Touching the Art in Arizona

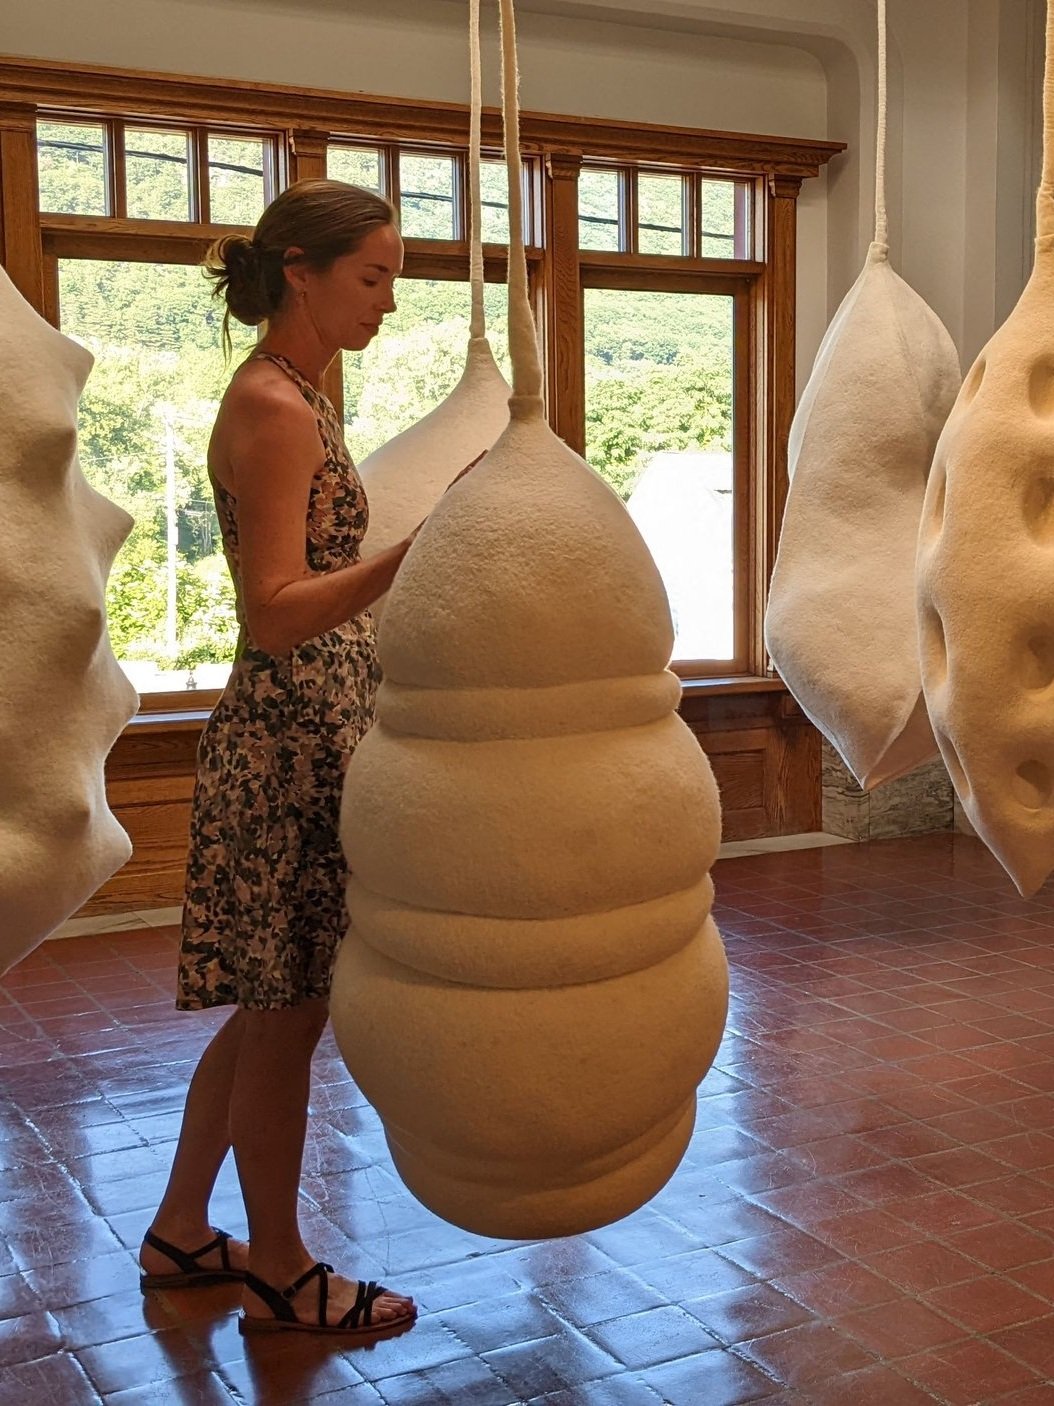
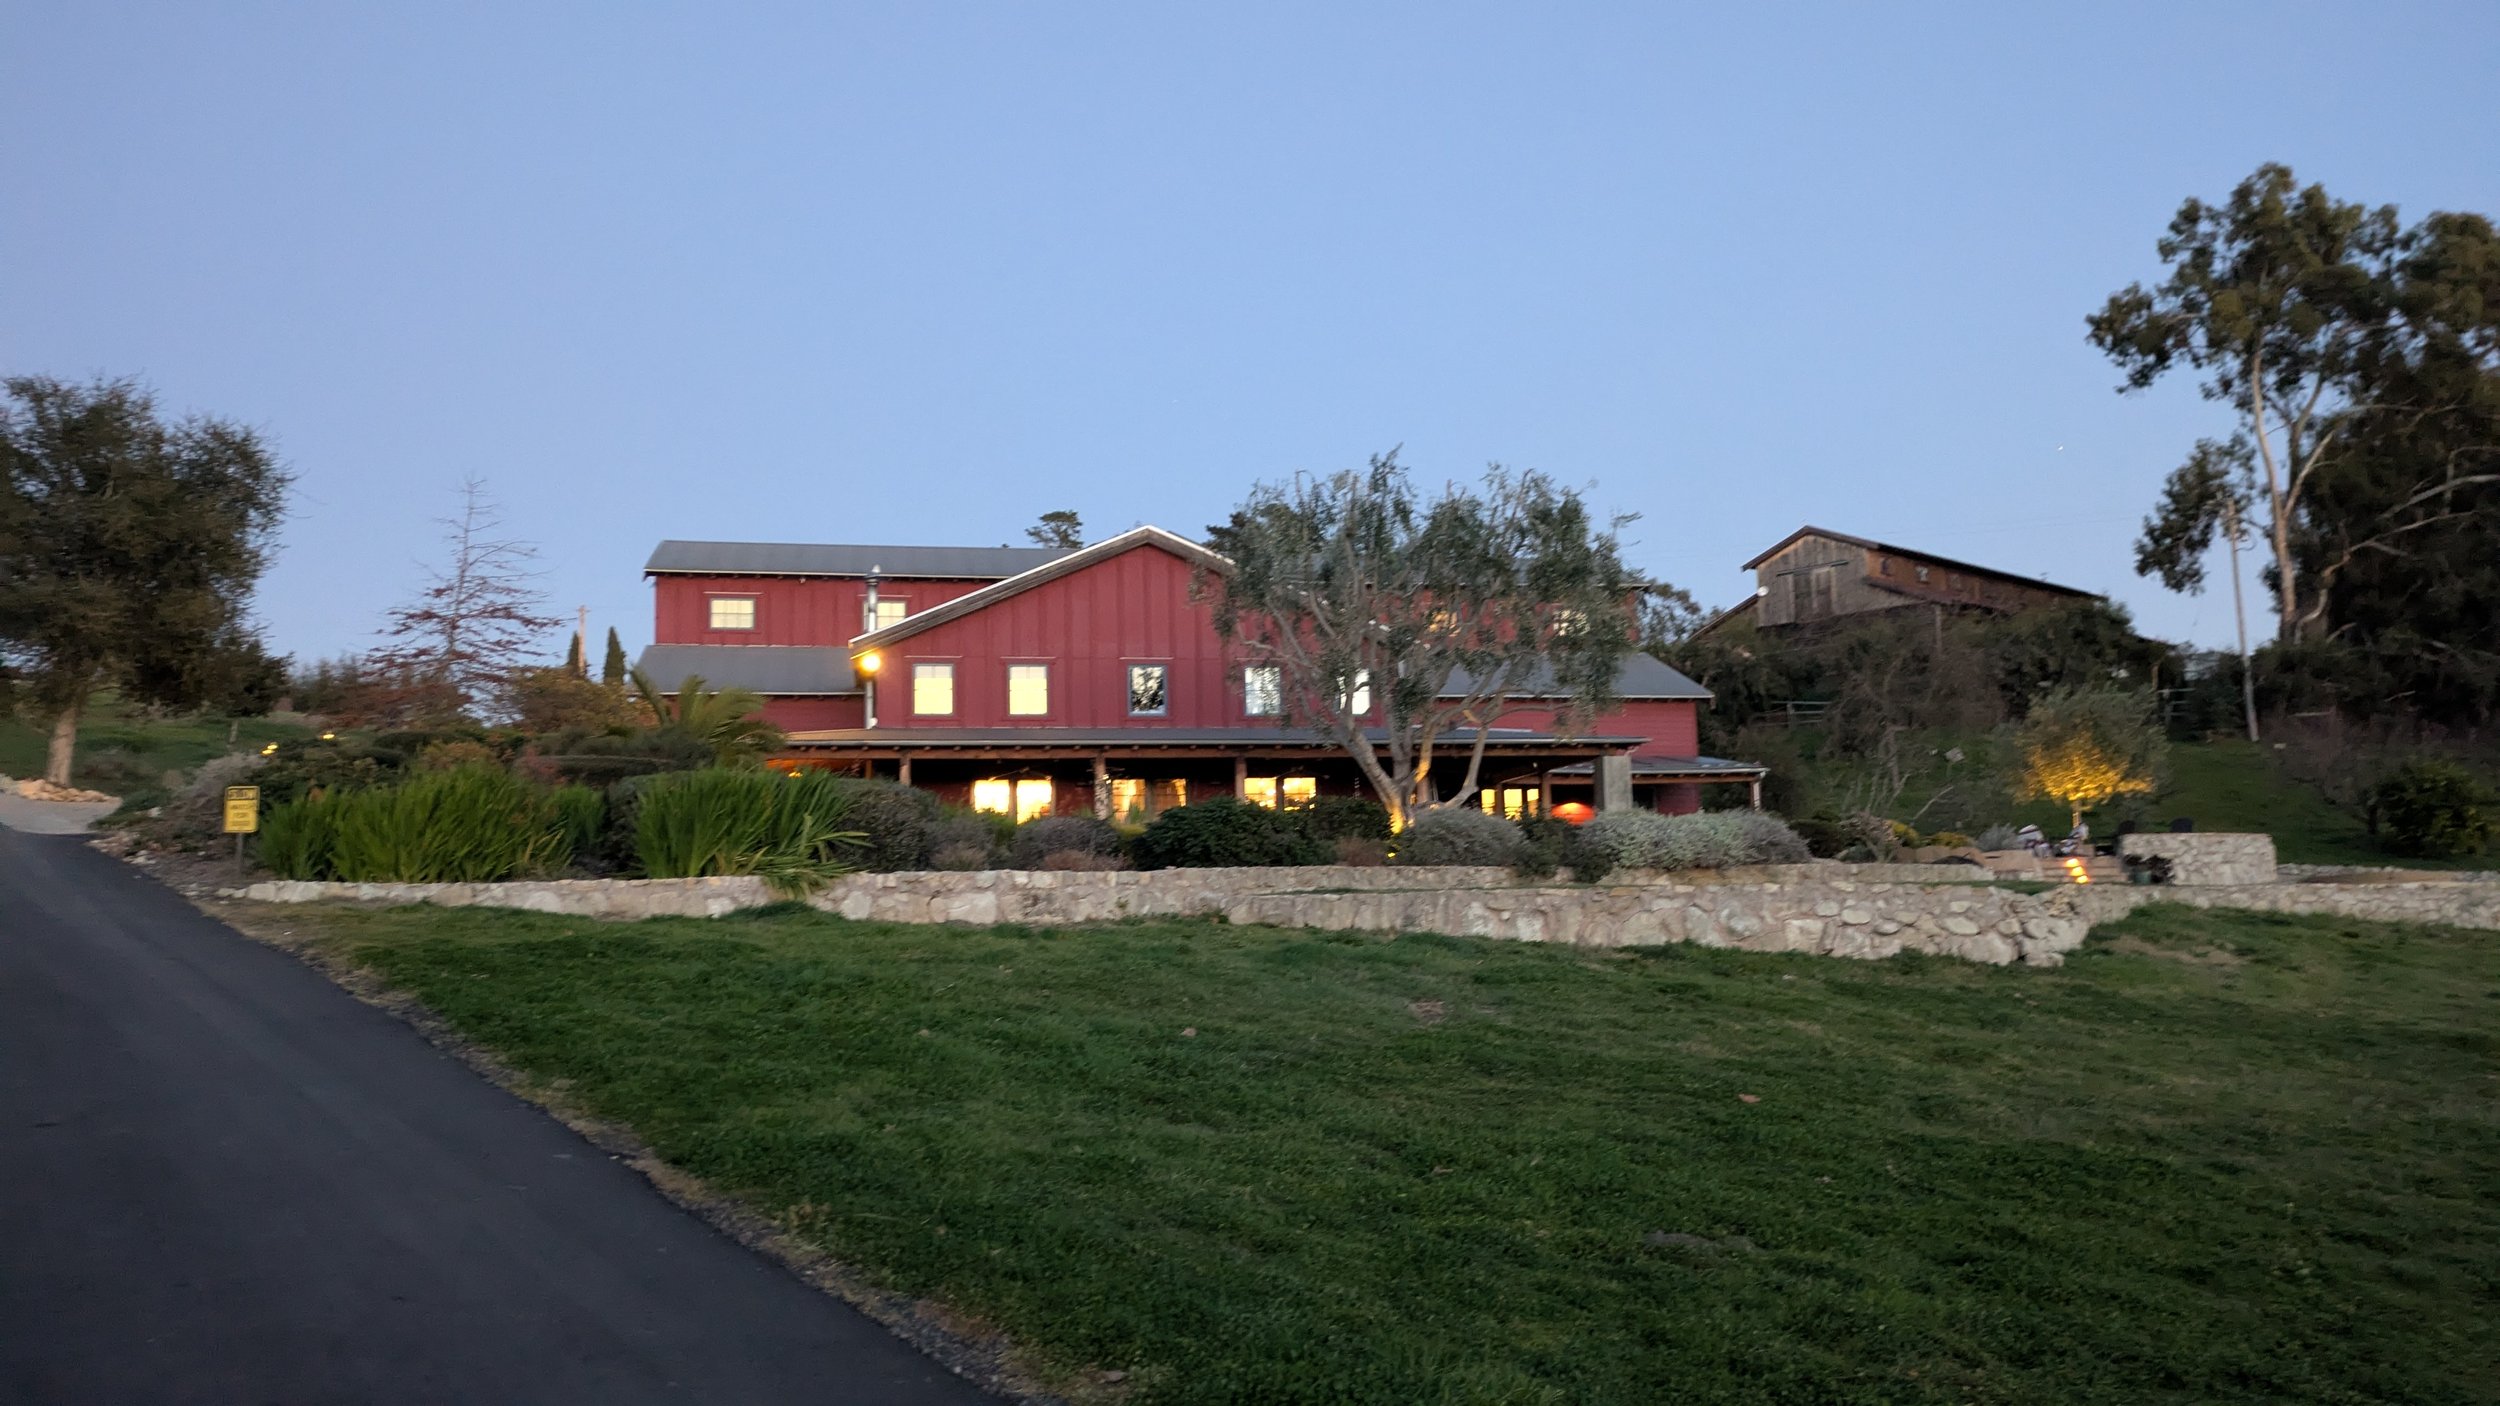
Nine of my Hanging Pod sculptures are currently on view at the Mesa Contemporary Art Center in Arizona (through January 2025). On view… and available to touch.

I was able to travel to the opening reception in early September and was blown away by the venue, the other exhibitions, and the crowds that came out in force. I did a lot of talking. With my hands. As usual.

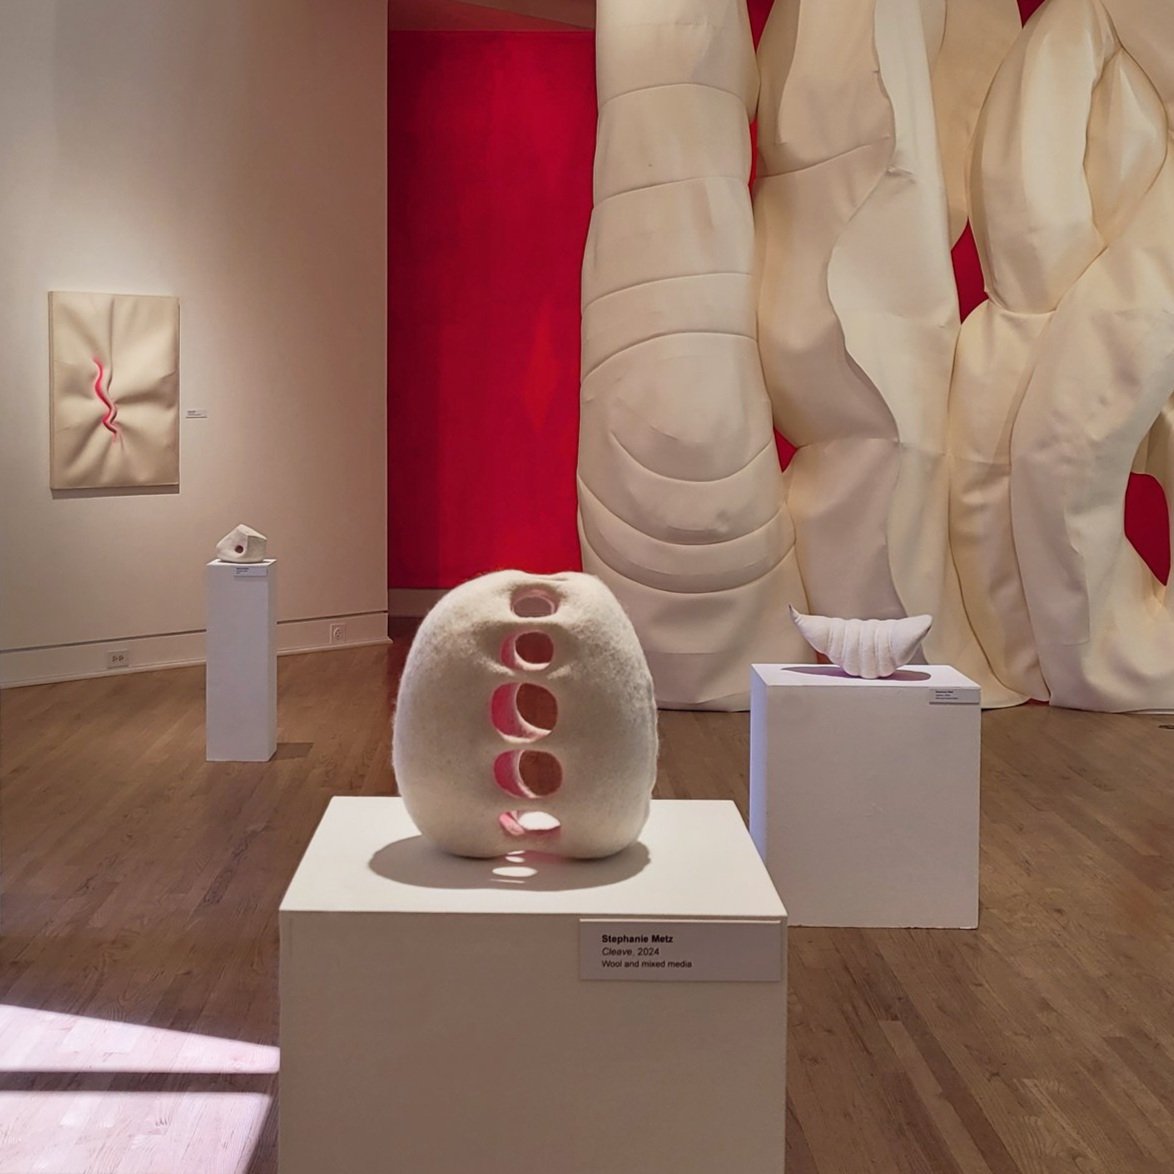
Every time my InTouch artwork is presented in a new place the experience is a little different. In this case the Hanging Pods are in a gallery between two other galleries that are each hosting fiber- and textile- based works: Antifunction by B. Jean Larson and Susan Allred on one side:

and Mending Stories: Fiber Art Invitational on the other, featuring works by Tamara Scott Anderson, Melissa Cody, Amber Doe, Shannon Downey, Sam Fresquez, Adia Jamille, Saskia Jorda, Brandi Kole, Kristen Miologos, Galina Mihaleva, Abbie Miller, Mark Newport, Rebecca Padilla-Pipkin, Philip Gabriel Steverson and Denise Yaghmourian.

I know, I know— it’s hard to see the art for all the humans. But it’s such a great feeling to be among so many people curious about and interested in art.

It’s heady company, and there were also three other exhibits opening there on the same evening: ‘Shimmering Mirage, White’ by Anila Quayyum Agha , ‘Safety Blankets: Discourse on Neurodivergence’ curated by Charissa Lucile, and ‘Use It Or Lose It’ by Ben Venom.

A highlight of the evening was a fashion show in the outdoor courtyard featuring the fantastical creations of Galina Mihaleva, a fashion technology designer who also teaches at ASU. The wearable art was even more outstanding thanks to the presentation by its models who helped take it to an otherworldly place through their interpretive movements.

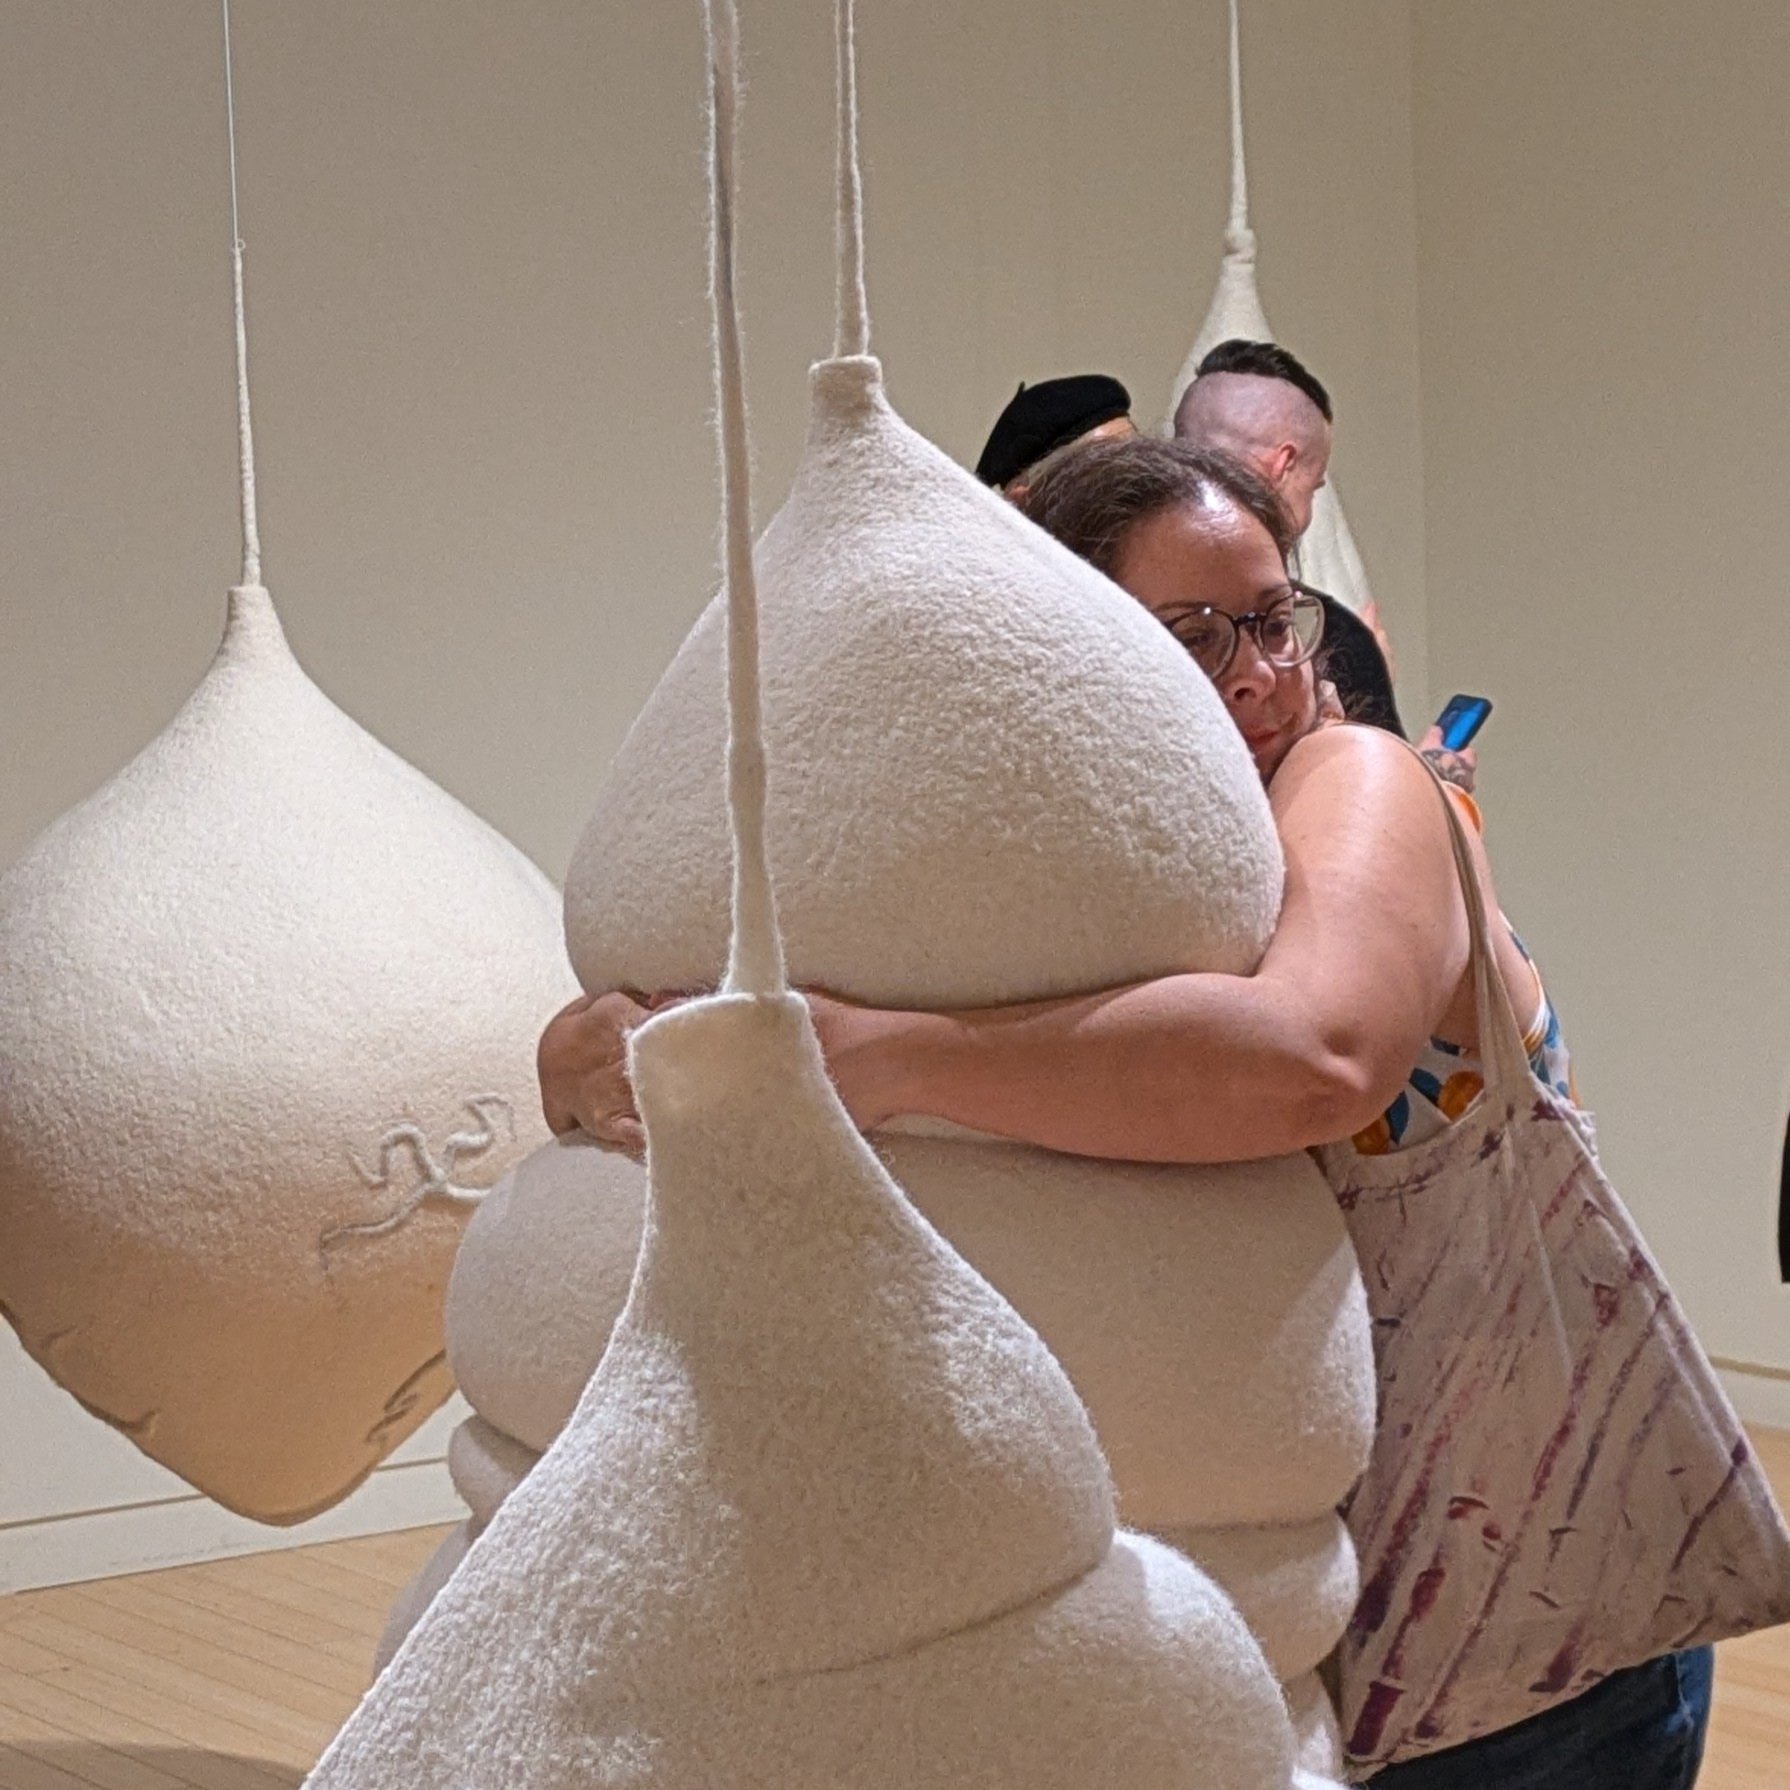
And back indoors there was plenty of hugging:

I have to say I was very impressed by the way the work and information about it was presented. The signage was thorough for those who wanted to read more:

The guidelines for interaction were presented on stands in the middle of each entrance to the gallery so you wouldn’t miss them, along with hand sanitizer:

They also had very hands-on docents, which is very much appreciated when one invites the public to interact. Even with the signage there can be… shenanigans. One challenge at this venue is that the ceilings are very high, so the pendulum swing could potentially be quite dramatic… were it not for the docents keeping polite control of that kind of action.

The highlight of my night (besides having parents, in-laws, and my handsome and helpful spouse on hand to take photos and be my ‘purse’)?

Well, the highlight was a couple who came up to thank me for making and presenting touchable artwork; he was blind, and she was nearly in tears. It was really moving, and another reminder of why I do all this.

I’m so grateful and honored to have been invited to be in the show; curator Mary-Beth Buesgen and exhibit designer Frank Gonzales were lovely to work with. The show is on view through January 26, 2025. I hope you get a chance to see and touch in person!

In the Glow: Trial by Fire... er, Thread

I’ve just finished installing my solo museum exhibition of all-new sculptural works— including a huge experimental immersive site-specific sculpture. And the whole experience has offered boatloads of my favorite aspect of being a visual artist: creative problem-solving.

And now I need some naps.

If you’ve been following along over the last year (especially via my instagram account or my Tiktok account), you will have seen lots of videos of the process.

I’ve made a separate page about the behind-the-scenes process of making the huge stitched sculpture so I won’t go over it again here. But suffice to say it’s been a true adventure and worth all the blood, sweat and tears. Not a lot of blood in volume, more in quantity of times stabbing myself with sewing needles (way more than I do with felting needles).

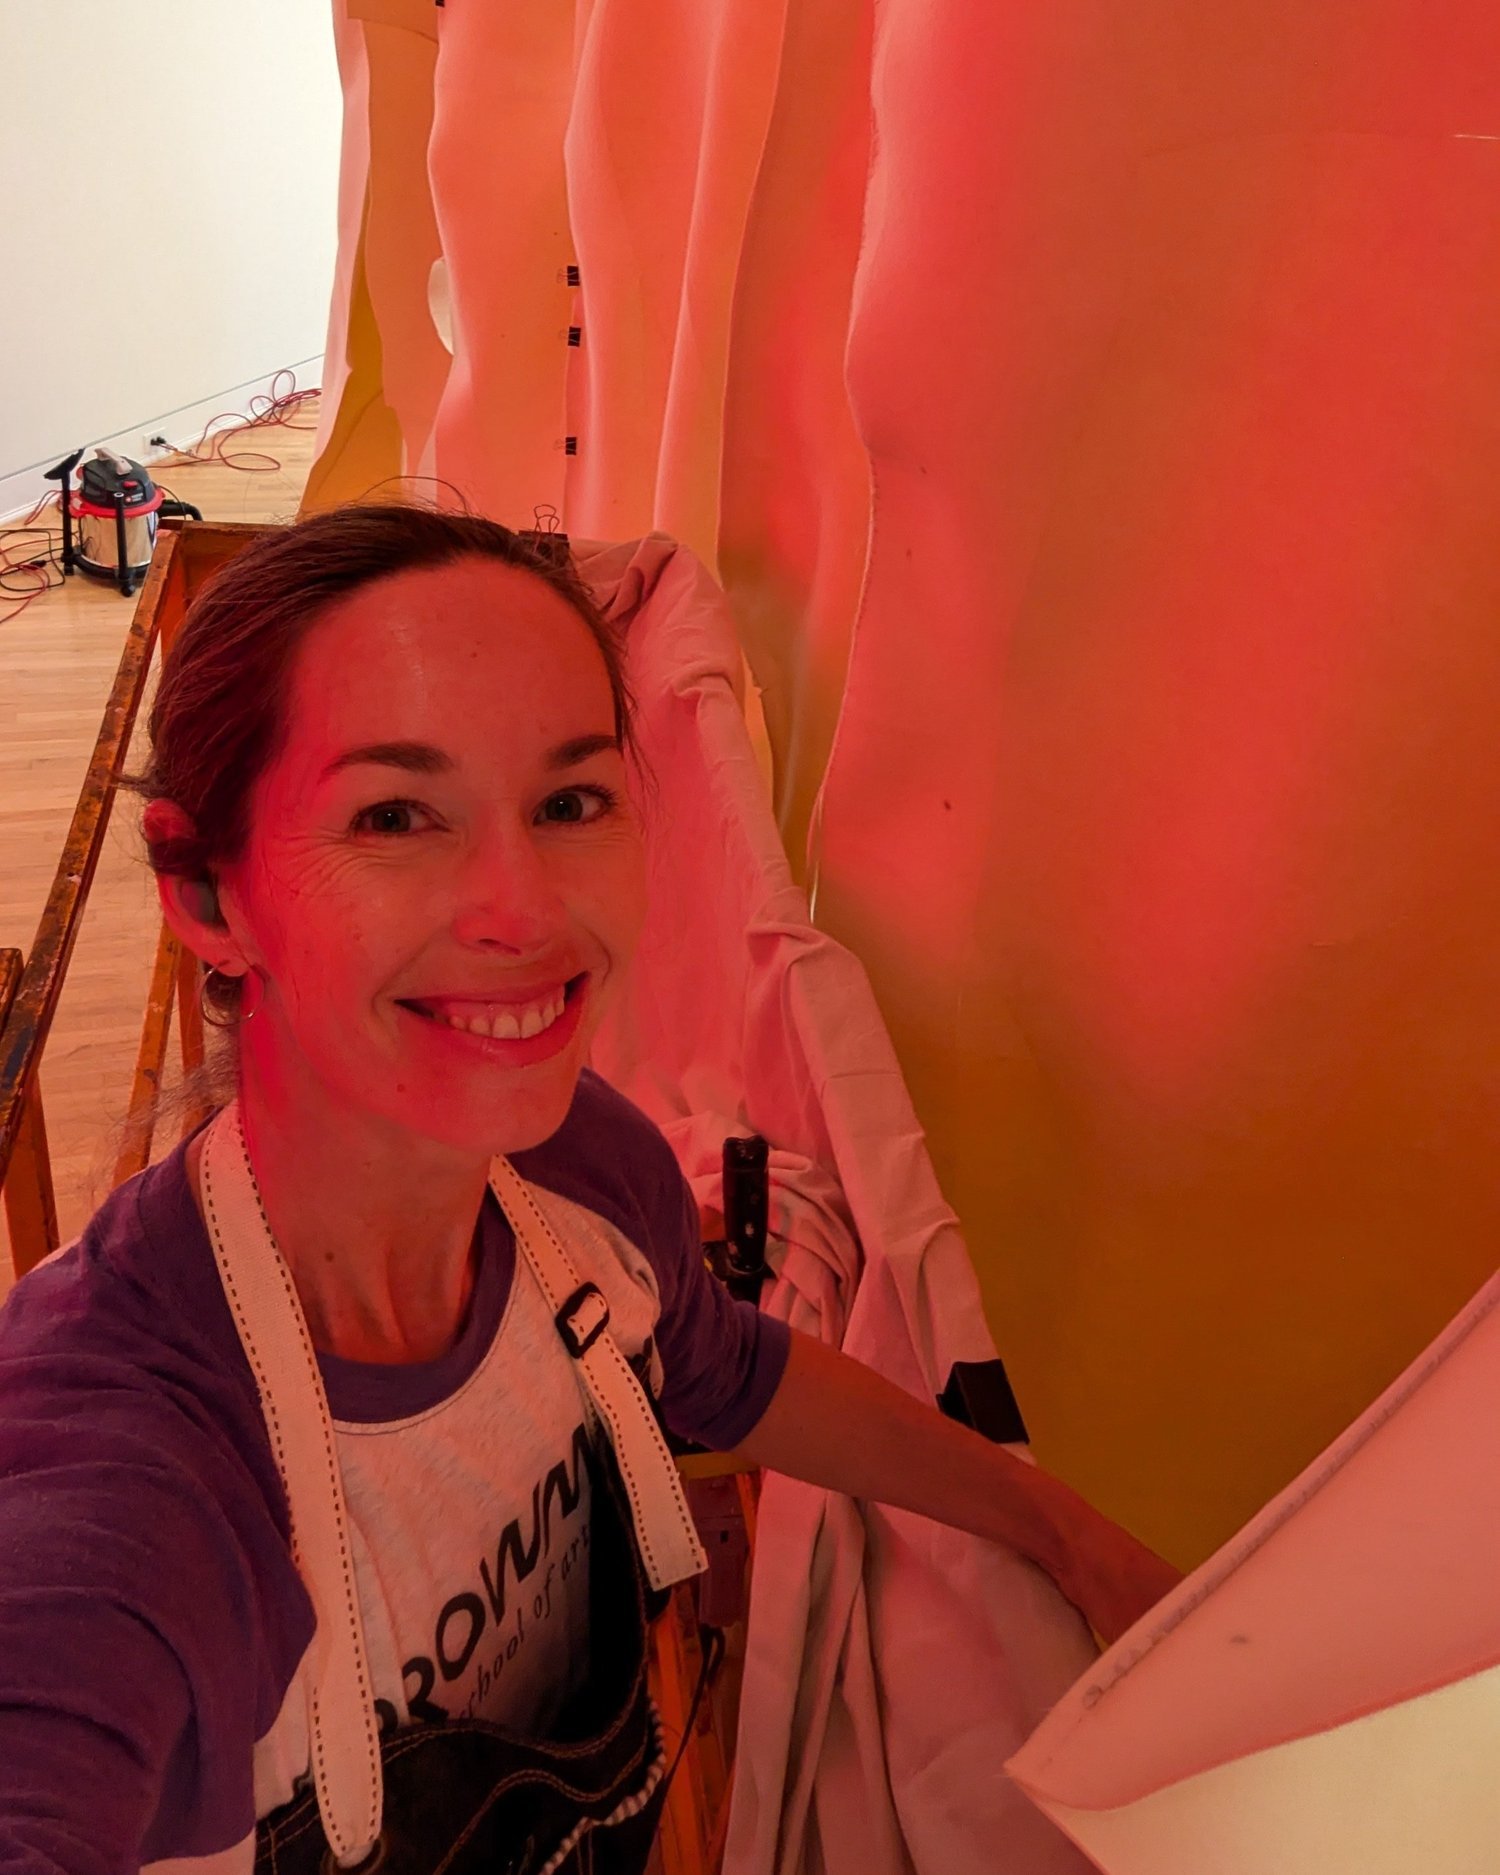
Spending time in the pink glow next to my trusty scissor lift. So glad I had access to the scissor lift.

I embarked on this adventure of making a monumental industrial felt sculpture as a means to see if I could go bigger with my concepts, to make the experience a full-body affair. All of my material knowledge and construction techniques and hands-on practice up to that point told me that I probably could, but I had one year to get a lot done without any guarantee of the results. It’s scary and exciting and it’s what keeps me coming back to sculpture. I like being on the knife-edge of using my unusual materials to create meaningful embodiments of ideas, sensations, and complicated emotions. It’s a lovely blend of the logical and emotional parts of my brain and body and hands, plus what comes out of it tends to be objects that sometimes resonate with other people.

Foreground: ‘Vessel’ at the Triton Museum of Art.

Besides the immense stitched sculpture I was also committed to a gallery full of freestanding and wall-based sculptures that would also push me in challenging directions with my use of pigment and reflected light. Deadlines are key in life, aren’t they? Having a set timeline and sharing it with others can be the push that gives you that extra bit of courage to, say, use an airbrush to apply (permanent) pigment to a sculpture you’ve spent fifteen hours shaping already… never mind that you’re new to using an airbrush, and it’s a temperamental one at that. But if nothing else, I maintain faith in myself to solve my creative problems, even though I’m creating those ‘problems’ myself.

‘Bowery,’ an experiment in translucency and airbrushing pigment.

Fresh in my mind is, of course, the act of installing the stitched columns of undulating felt forms. I’ve already taken the excellent advice of making notes for next time while I remember everything.

Here are my biggest takeaways from making a HUGE piece for the first time:

  • Expect for things to take longer than you expect. I worked hard to front-load my working schedule and boldly take each step without spending days or weeks second-guessing myself. I think it may be kind of like that ‘fail fast’ concept in tech: I tested parts quickly and moved along, realizing there were some things I just wouldn’t know yet, but I’d need time later to deal with the unknowns.

  • Be flexible in your plans as you gather more information. After some tests I had predicted that the felt would behave in particular ways thanks to its density and firmness and the way I stitched pieces to each other. In reality I ended up having to embed more structure onsite: metal wire ‘ribs’ stitched in key areas to open out the curtain-like forms. It was a bit disappointing yet enlightening to learn how much the weight of felt over sixteen feet of distance would affect the shapes, but now I have visceral knowledge for next time.

  • Mock up as close to reality as possible. I was able to hoist my full-size stitched columns up their full 16 feet in the hallway outside my studio, but could only do one at a time. That meant I wouldn’t know how they might work together until I was onsite. In future it would be ideal to be able to prepare more fully, but available space is, of course, never a given.

  • Accept that you can’t control everything, and compromise. The intensely bright fluorescent pink paint I sourced for the wall behind the hanging sculpture was ideal in terms of color. It was less then ideal to apply to the wall. The paint was incredibly thin, translucent, and watery so at first it showed clearly the path of the roller used to apply it, and the drips that accumulated. After seven(!) coats applied with rollers and no real improvement I came up with the approach of sponging a few layers of paint on to create an evenly uneven mottled effect. It’s likely that most visitors won’t even notice the paint on the wall, as it’s the reflected pink light that steals the show. But it felt good to find a way to make things better through accumulated artmaking techniques.

  • Know when to stop. I could have probably kept adding metal ribbing to the sculpture for several more weeks to get a smoother, stretched effect. But at some point you have to make peace with the nature of the beast, and I must admit that the folds and drooping in some areas— the effect of gravity— are a lovely metaphor for the same effect on the human body. May we all come to accept and even appreciate our imperfections.

  • Get help with big jobs. I was a bit overwhelmed at first to work on something so large that I would lose sight of it all by getting up close to work on it. I had to use a scissor lift and work on only one side at a time, then get down and take a look from across the room. Happily, I had a very skilled helper in my fellow artist Amy Brown aka who helped me over several days. Next time I would recruit help sooner and do more delegation- although in this instance I was learning on the job in the moment, so delegation was often impossible. The museum’s curator Vanessa and preparator Bryan were also incredibly helpful in facilitating the successful installation, so perhaps the caveat to ‘get help’ is to make sure it’s also good quality help!

Fellow San Jose artist Amy Brown is a whiz with a needle.

All told, I will absolutely keep making things up as I go, learning, and creating objects and experiences that have never existed before. A lot of life is in how you frame it: “what am I learning from this” vs. “why is this so hard!?” It’s worth it to keep accumulating useful and interesting skills and ideas. That’s what makes me feel most alive. What about you?

On Grief and Artmaking

Recently the fabric of my life has been altered, and I’m trying to find a new normal. My dog, Splash, died after a brief and brutal illness. She was a key part of my family since we first adopted her in the Covid summer. For the past nearly four years she had been a constant source of joy, laughter, comfort, and the forging of new friendships, canine and human alike. 

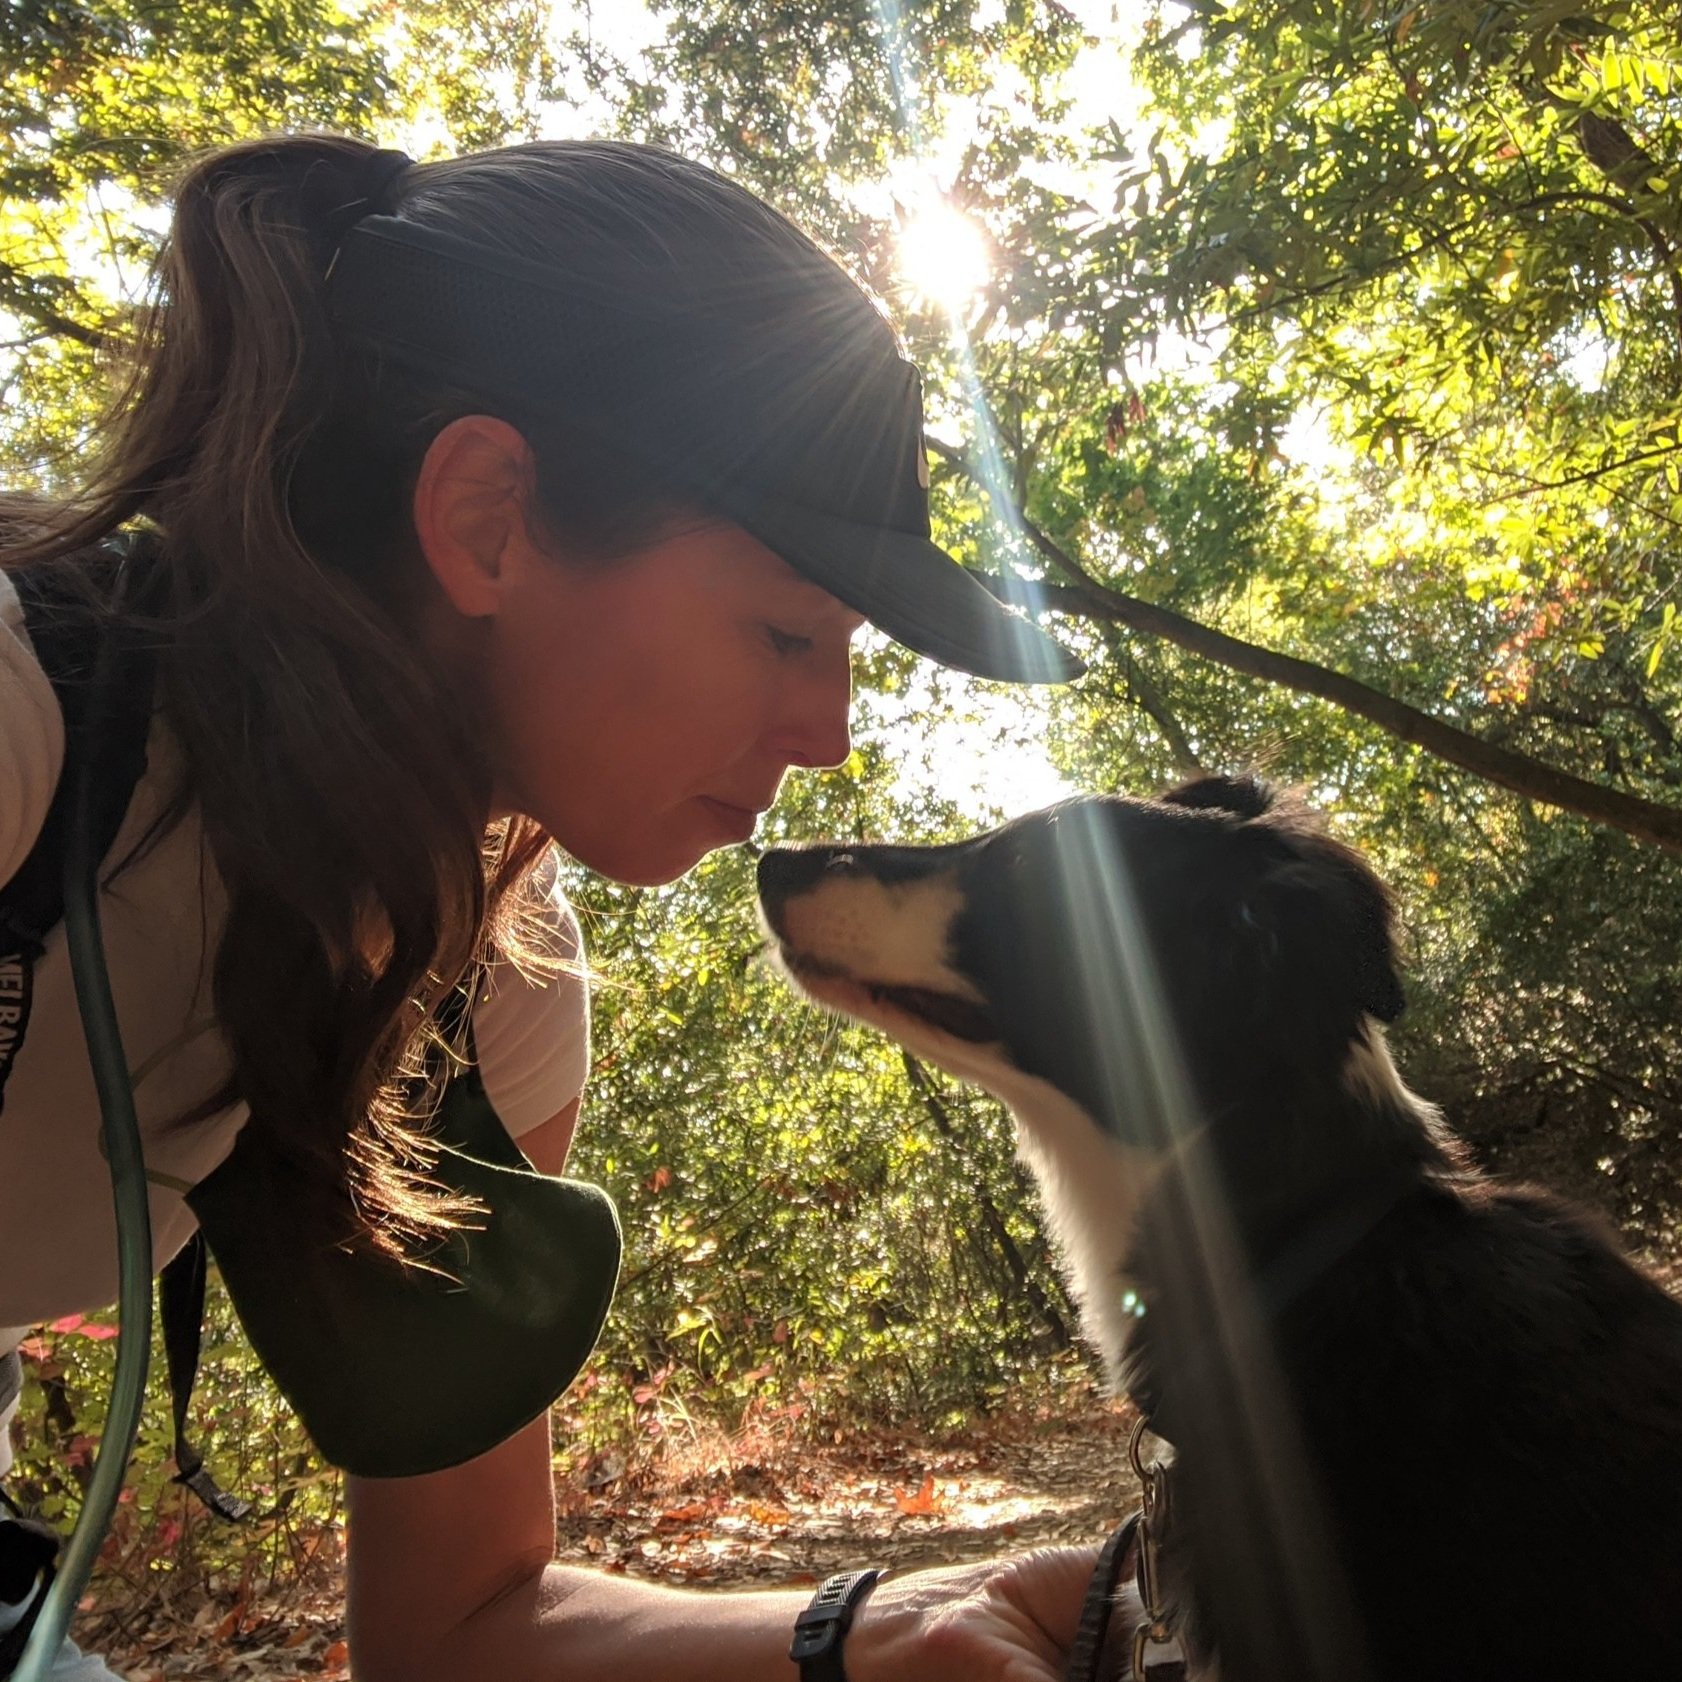
Me and Splash hiking in San Jose, 2021

I still can’t wrap my head and my heart around it. Four weeks ago she was perfectly healthy; we went on a sunset walk at a local county park where I took what turned out to be my last ‘normal’ photos of her. Over the past three weeks she suddenly developed an autoimmune disease called pemphigus vulgaris, in which the skin and mucous membranes break down, painfully. We sought every answer and solution possible; it took over two weeks to really get a diagnosis. We took her to specialist vets; we treated her there and nursed her at home. This is a very rare disease, and the treatments didn’t work. She held up and held on, but after another hospital stay and a lack of a miracle, we helped her let go. 

Splash holding wool roving while I photographed her for inclusion into a slide show for an elementary school about my artwork - a very willing model.

She was a remarkably clever dog, AND loved to eat anything and everything-- which helped her learn lots of tricks as well as the names of all of her family members, many of her dog/human friends from our extended neighborhood dog community (and she knew, of course, which dog went with which person), and she could identify by name and bring over many of her toys. It seemed like she understood compound sentences; at least she certainly learned ways to get what she wanted by paying attention to what paid off. She was affectionate; she was barky when excited, although she could also ‘whisper’ if there was food in it for her. When you would stop patting her she’d paw at your hand for more. 

I miss her terribly. 

The forms of rolling foothills echo through my artwork. Hiking at Ed Levin County Park.


My daily morning routine was to walk three miles with her through our neighborhood along any number of regular routes, or an adventure hike somewhere farther afield. It was a time for thinking, planning, observing, or escapist listening to audiobooks. I watched the seasons affect the landscape, saw wildlife, waved to other  ‘regulars,’ and even found fossils in the local streambed. It has always been an act of discovery, no matter how small. I can’t overstate how much daily rambles through familiar but subtly changing landscapes fuels my sculptural practice and shapes my day. 

A ramble in Pacific Grove, CA.

And yet there were times I resented the time taken away from my work. Every day: an hour in the morning and usually another full hour in the evening plus feeding our family and parenting and spending time with my husband and cleaning things and appointments and soccer games. It has always been frustrating trying to carve out enough time to make art, much less all of the other administrative time-sucking parts of being an exhibiting artist.

A puppy nap at my studio in the early days, 2020.

If you’ve been following along at all with my artmaking through this (occasional) blog or my much-more-frequent updates on Instagram, you’ll know I’m in the midst of creating a new body of work for a solo show that opens this September. I love a deadline and a venue and a plan: it’s what gives me the extra push to prioritize artmaking (and, thus, sanity). 

Now I have more time. 

But I’d happily trade it for more time with my sweet dog. 

Gratuitous puppy photo in the studio, 2020.

It has been terribly hard on our whole family, but we’ll get through it bit by bit. We’re focusing on good memories.  Her presence was felt through every part of our lives, so there are dog-shaped holes all over the place. Finding a plastic poop bag folded and ready in the pocket of my raincoat with eventually not prompt tears, I’m sure.   

Hanging out under Hanging Pods in my studio, 2022.

There’s a lot of grief out there, and plenty of reasons for it. I’ll admit there are times that I almost feel apologetic for feeling such overwhelming loss over my dog, given the state of the world and the wretched situations for so many humans. But it’s not something that needs to be compared. It’s not a competition. There are certainly no winners in grief. Except in as much as grief is evidence of love.

I think feeling strongly and deeply goes hand-in-hand with being an artist. Being wide open and sensitive to what goes on in your personal life and in the wider world can often feel like too much, but it also fuels tangible expression of those feelings and experiences so that other people can share them. The objects artists create can prompt a sense of familiarity, of understanding, of connection. 

As emotionally exhausted as I feel right now, it’s time to get back into the studio. I know that hands-on making settles my mind and tricky, experimental physical problem-solving demands focus. It’s time to figure out what my new normal will be.  Working on the ‘In the Glow’ artworks that first took shape in my mind along those many dog walks seems like a good place to start.

Remembering that that studio is first and foremost a place for joy and play, as well as focus on what really matters to you.

Words About Sculpture About Touch [Why I Keep Re-Writing My Artist Statement]
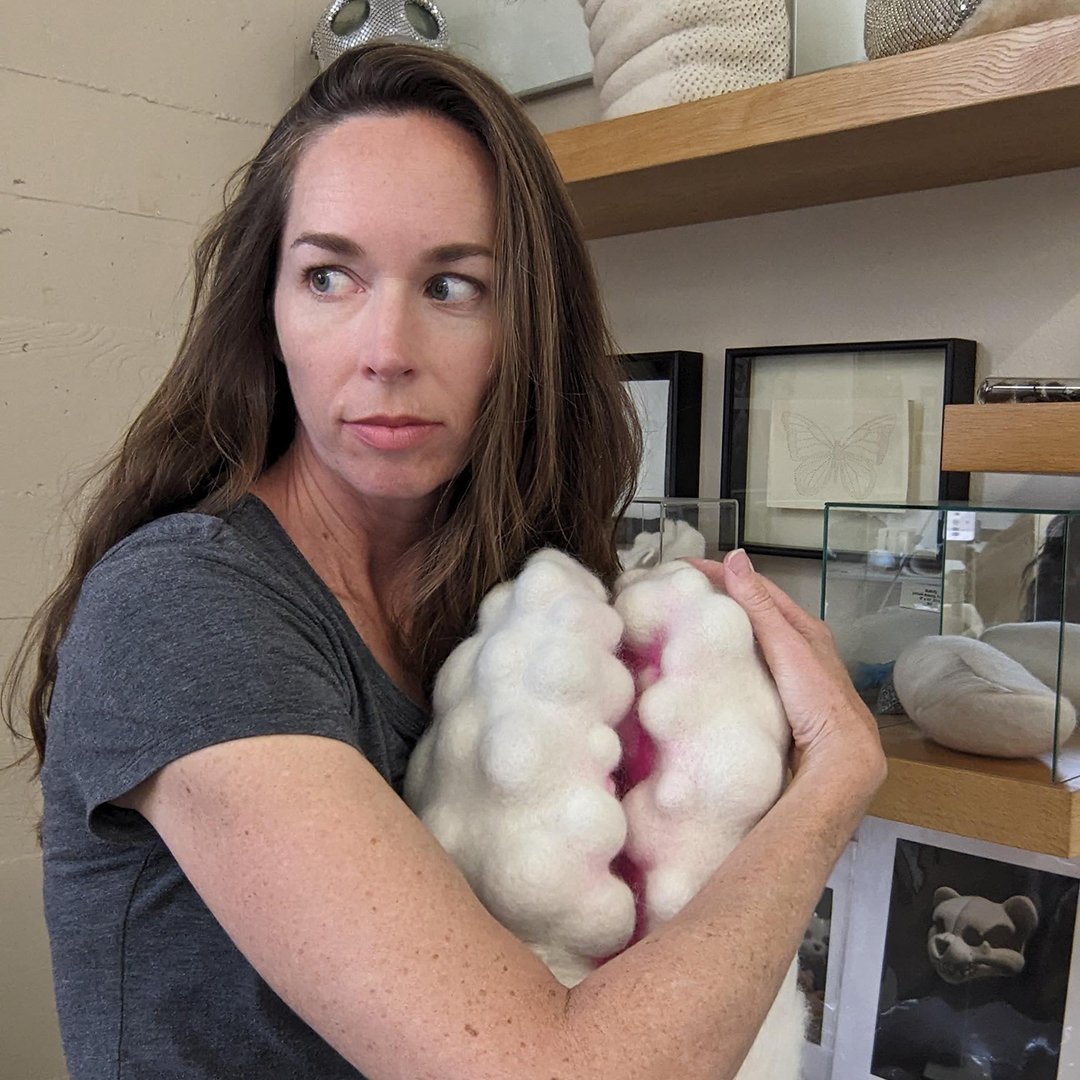
Three of my ‘Hanging Pod’ touchable sculptures are headed to Georgia next week to be part of the ‘Please Touch the Art’ exhibit at Reeves House Gallery in Woodstock, from January 18 - March 24. If you can get there in person, you can see and touch these three beauties:

InTouch Hanging Pods: Quad Concavities, Boxy, and Orb Cluster

Every time I send art to exhibitions I also send a written document that is meant to contextualize the work, known as an ‘Artist Statement’. You may be familiar with these from the reading end OR the writing end, and you may love them or you may hate them. They are written for the layperson or the artworld elite or anyone in between. They can be sources of information, aggravation, densely stultifying artspeak or elegant turns of phrase. And, even if I’ve shown the work before, I find myself re-writing or heavily editing my Artist Statement EVERY SINGLE TIME.

(This is where the aggravation comes in for me. I toil far too long over the writing part.)

Why? Has the art changed?

Well, generally, no. It’s not that the art has changed. It’s that the context has changed, the times have changed, the cultural landscape has changed, most importantly I have changed.

You see, an Artist Statement is more of a living document, not settled history. It’s an attempt to address the ideas encapsulated in a physical object… but the experience of that object is not fixed, nor static.

When I’m getting ready to send out the objects I have created into the world again, along with some writing intended to, you know, simply encapsulate who I am as an artist and why I created the work and what it means (briefly, of course), I find myself re-reading my previous statements and realizing that they don’t quite capture it. Or at least, not from my current vantage point.

The Artist Statement is a moving target. I am a visual artist— I create objects to experience with the eyes, the body, the hands. Trying to lock onto that with words sometimes feels like trying to shoot an arrow at a far-off bullseye amid intermittent winds. And I keep twanging my fingers on the bowstring. I aim for the elegant turn of phrase that also provides information, but it takes a lot of tweaking to get close to there.

And I am very aware that the objects and ideas I put out into the world may be interpreted quite differently by different people at different times. But it feels like an act of good faith to keep working to get closer and closer to my target every time. So I do my best to choose my words with care and truth.

For this upcoming exhibition the topic is specifically about art you can touch. This time around in my re-write I found myself focusing on the sense of vulnerability of the body when it comes to touch. My thoughts are heavy of late, dwelling on the damage, insult, and danger to these vessels we inhabit. But I think hope always comes through as well. Below is the latest iteration of my official Artist Statement, illustrated with images of my touchable sculpture. I invite you to read it and let me know what you think:

————————————————————

Artist Statement: Please Touch The Art

Inviting visitors to touch the art is a radical act, so often forbidden due to its danger to the artwork or the visitor. But it also opens the possibility for casual moments of shared humanity: the experiences of wonder, curiosity, connection, or vulnerability. My touchable white felted wool ‘Hanging Pod’ sculptures are roughly human-sized, suggestive of recognizable organic shapes, yet also mysterious. Their tactile qualities of softness, firmness, pliability, and solidity can be explored by running one’s hands over their surfaces, squeezing, and hugging the sculptures.

View of the artist’s hand pressing against the pliable surface of InTouch Hanging Pod ‘Veiny Bulb.’ Photo by Stephanie Metz

To create these sculptures I needle-felted wool over pliable armatures: using specialized sharp, notched needles I tangled and embedded wool fibers to cover three-dimensional patterned shapes I made from stitched industrial felt with a core of fiberfill, or else over polystyrene blocks. My practice borrows from the realms of craft, design, and industry, yet its appearance is not crafty, functional, or industrial. My relationship to wool as a sculptural medium is not invested in traditional concerns about history or process-- I respond to it as a highly plastic and intrinsically responsive and visceral material with limitless potential for manipulation.

Close-up view of Hanging Pod ‘Quad Concavities’ revealing its surface texture of felted wool. Photo by Stephanie Metz.


By design the Hanging Pods are both specific and open-ended, familiar but unknown in their material and their forms. Both aspects seem to prompt a desire to touch-- and indulging that impulse can be highly satisfying. I use the word “wonder” because it refers to both a question and its response: curiosity as well as the feeling that comes from encountering the unexpected.

A visitor hugging hanging pod ‘Orb Cluster’ at the de Saisset Museum, Santa Clara, California. Photo by Maryana Petrenko.


Using one’s own fingertips to glean information about the world is a core part of the human experience. A personal ‘knowing’ through one of our most primal senses is a moving and complicated occurrence, and yet we lack a descriptive language about the varied qualities of touching.

Touch is most often related to the human body, and the Hanging Pods reference that loaded subject indirectly. In these encounters the Hanging Pods are passive recipients of touch, the vulnerable parties in the interaction. Touching an impersonal stand-in is both discomfiting and satisfying. Handling such objects may trigger a visitor to think about their own body, and the handling and objectification of others’. To be vulnerable is to be both brave and at risk-- and to recognize vulnerability in others. The performative and voyeuristic aspect of a shared public experience of touch forges a sense of communal trust, a connection to the others sharing that activity.

Visitor among Hanging Pods at the de Saisset Museum in Santa Clara. Photo by Mercer Hanau.

The alluring and tactile nature of my artform, the unusual offering of radically hands-on experiences, and the intellectual and physical gulf between the familiar and the alien opens up the possibility for engagement. Engagement, like making art and viewing artworks, requires attention and presence in the moment-- conditions for creating connections and experiencing wonder.

Touching hanging pod 'Planar’. Phot by Mercer Hanau.

————————————————————

So, dear reader, you’re as up-to-date as I am on my current thinking about this touchable sculpture. I would be pleased to know your response, your questions, your feedback. Because the other aggravating thing about Artist Statements (besides the mind-boggling labor of forcing words out) is that they’re so very one-sided. Writing them feels like shouting into the void because they’re so often placed in a binder at a gallery but not part of a conversation. Putting so much thought, effort, and time into writing about my own work IS, no doubt, good for my processing of what I’m doing and my growth as a person and an artist. But I’d also love to hear from you.

Feeling The Glow of a New Project

I’m preparing new work for a solo exhibition slated for September- December 2024 at the Triton Museum in Santa Clara. Here’s your sneak peek at my plans.


The Triton Museum of Art is a city-run facility that exhibits contemporary and historical works with an emphasis on artists of the Greater Bay Area. The curator who approached me has been extremely supportive of my desire to create a new body of of work for the gorgeous gallery, including a site-specific installation piece.


This is, in fact, one of my career goals: to have carte blanche and a ready space to explore my ideas three-dimensionally. I could have suggested a retrospective, but can you blame me for jumping at this opportunity? Plus, a deadline (and a venue) help me make the most of my creative time on this earth.


So what am I planning to include in this exhibition? It will be a mix of four or five freestanding sculptures (sized to be presented on pedestals), a similar number of wall-mounted stitched sculptures, and a large stitched sculptural piece that will hang from a ceiling feature. And one of the aspects that will unite this body of work (besides my abstracted organic forms)? The color pink. Crazy intense pink softened when reflected against white wool or felt, bounced off of undersides or insides or, in the case of the 16-foot-tall installation, the huge wall behind it.


These are initial sketches of some of the freestanding sculptures; note the plans for bright pink insides.

This one is still in progress, here is the sketch followed the almost-finished piece:

This one is already completed; note the glowing pink effect as light passes through the pink-lined tunnel.

These are sketches for stitched wall-mounted pieces, larger and more complex versions of the pink panel studies I’ve made. Before I used fluorescent pink spray paint; this time I may use dyed fiber. Yes, you can achieve that color with dye.

And the installation piece: the plan is that it will be suspended ten feet from the back wall (the gallery space is a long octagon) and the wall behind it will be painted with a particular intense shade of pink, which will reflect off the back of the white felt. You can go around and behind it to feel like you’re really getting INSIDE the sculpture.

“Why?” you might ask. “What is the deal with this pink?!”

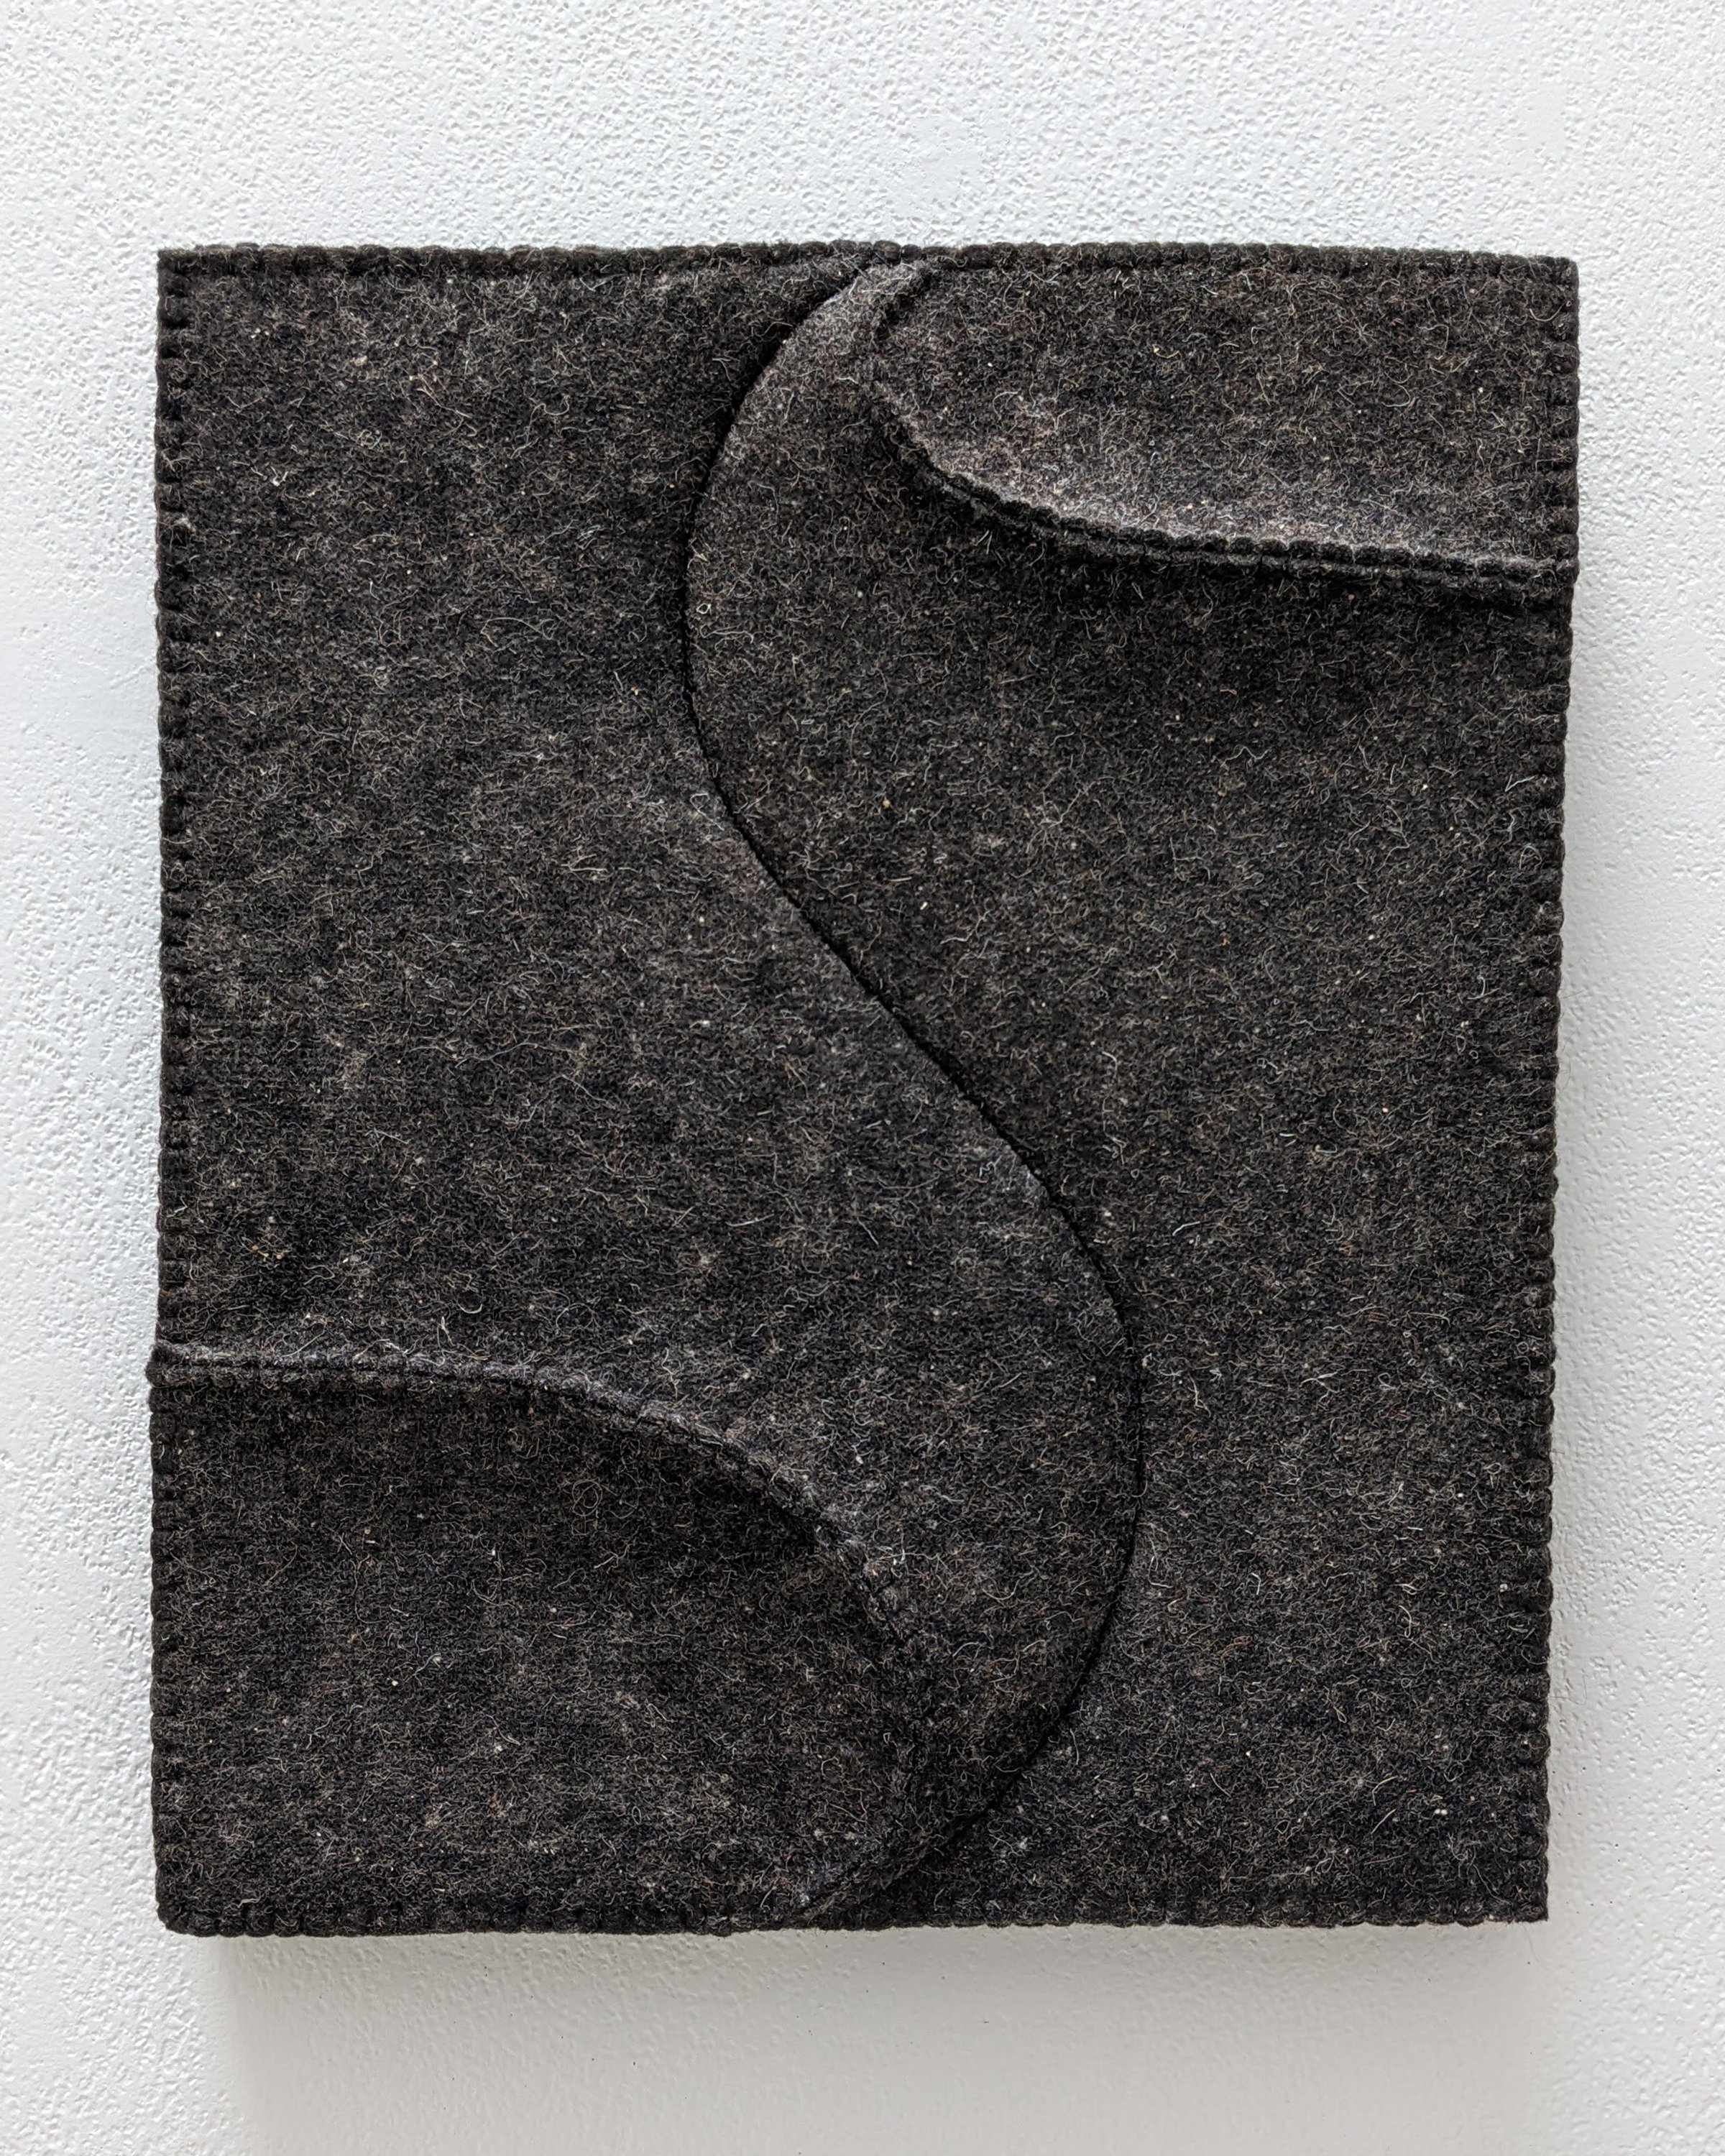
If you’ve been following along with what’s piqued my interest over the last few years, you’ll know that I have been exploring form and (gasp!) color in new ways. Besides needle-felting wool into sculptural forms, I’ve been turned on to using flat (but thick) sheets of industrial felt to see how I can manipulate them into elegant topography. Here’s one example, called ‘Crest + Fossa’:

I’ve also gone from using mainly the natural colors of sheeps’ wool— white/cream, grey, and brown— to playing with what may well be the opposite end of the spectrum: that aforementioned fluorescent pink.

You can also find THAT color in nature if you’re looking in the ocean or simply walking through my neighborhood. My use of it— or rather, the reflected color haze that can bounce off it onto white felt— has five components:

1) Over a lifetime of looking closely at things, I continue to be fascinated by the way we see at all, thanks in most part to the quality, intensity, and directionality of light. When it comes to color there’s even more to pay attention to. I’m thinking about looking and perception. I’m interested in noticing what I am noticing. And related to that…

2) Bouncing color so you’re seeing the reflected color is a way to subtly guide attention to the fact that, in art, we’re seeing something contrived and created by a fellow human being. I like inserting that back into the conversation between viewer and art. To paraphrase Lawrence Weschler in his writing about the artist Robert Irwin,

“Aesthetic perception itself is the pure subject of art. Art exists not in objects but in a way of seeing.”

3) Color is tricky and loaded and personal. I have a close relative who doesn’t see color like the majority of the population, which makes me extra cognizant of the subjective nature of color itself, even before reading meaning into it.

4) The color pink is so very universal among animals: it’s inside all of us, in our literal guts, regardless of our outward appearance. As a color it seems vital, vulnerable, raw, and comforting all at once.

5) And finally, my use of the color pink is also a reexamination of how much I have in the past rejected and discarded the color purely because of its historical link to girlhood and femininity. Growing up I never identified as a ‘girly’ girl- I preferred dirt, making, and adventure- so I felt quite uncomfortable with the social strictures on how girls and young ladies and women ‘should’ be. I gave it a lot of power, but in a negative way. It’s time for another look.

My sculptural forms- freestanding, wall pieces, and the big hanging stitched piece- will in some way bear the muscular, organic, mysterious features that continue to engage me. Folds of flesh, sinuous curves, and weighty, solid masses blended with delicate and precise details are a way for me to explore the contradictions and variations that ground us in our physical bodies. In a time that feels ever more dismissive of respect for corporeal beings, especially when they are somehow framed as “the other,” I find myself increasingly insistent on the tactile, tangible, physical stand-in for others.

And that brings me back again to the color pink: the life force, the glow. In fact the working title of this show and body of work is ‘In The Glow’. The glowing pink insistent color that, I hope, will at the very least cause viewers to pause.

And now I hope you’ll forgive the limitations of the written word when it comes to experiencing sculpture. Here I’m trying to use words to communicate to you what I hope to work out with my sculptural forms, but I hope you’ll ‘read’ them directly, in person or through images, to find out what, if anything, they might evoke in you.

Stay tuned for more on the making of these .

Simply Complex: Why the Simplest Marks Can Take The Longest Time
Some of my artmaking takes a LOT of time and labor for an individual piece; any of my human-sized Hanging Pods come to mind. Each of those creations seems nearly heroic in effort, and its resulting size and presence tend to impress. Yet some forms of my artmaking take relatively little time to execute -- although they also require hidden years of practice and experience to be able to bring them into existence.

Working on a Hanging Pod sculpture; later, that same sculpture and others on display in a touchable exhibition at the de Saisset Museum at Santa Clara University in 2020.

Here I’m thinking of my simple, elegant little wool drawings. I tend to make these small (5x7 or 8x10) compositions during in-between-times in my studio and personal life. They’re often line drawings with a little shading to create the impression of an individual living creature. I use the word ‘simple’ only in that they eloquently capture an animal through an efficiently restrained application of fiber through paper.

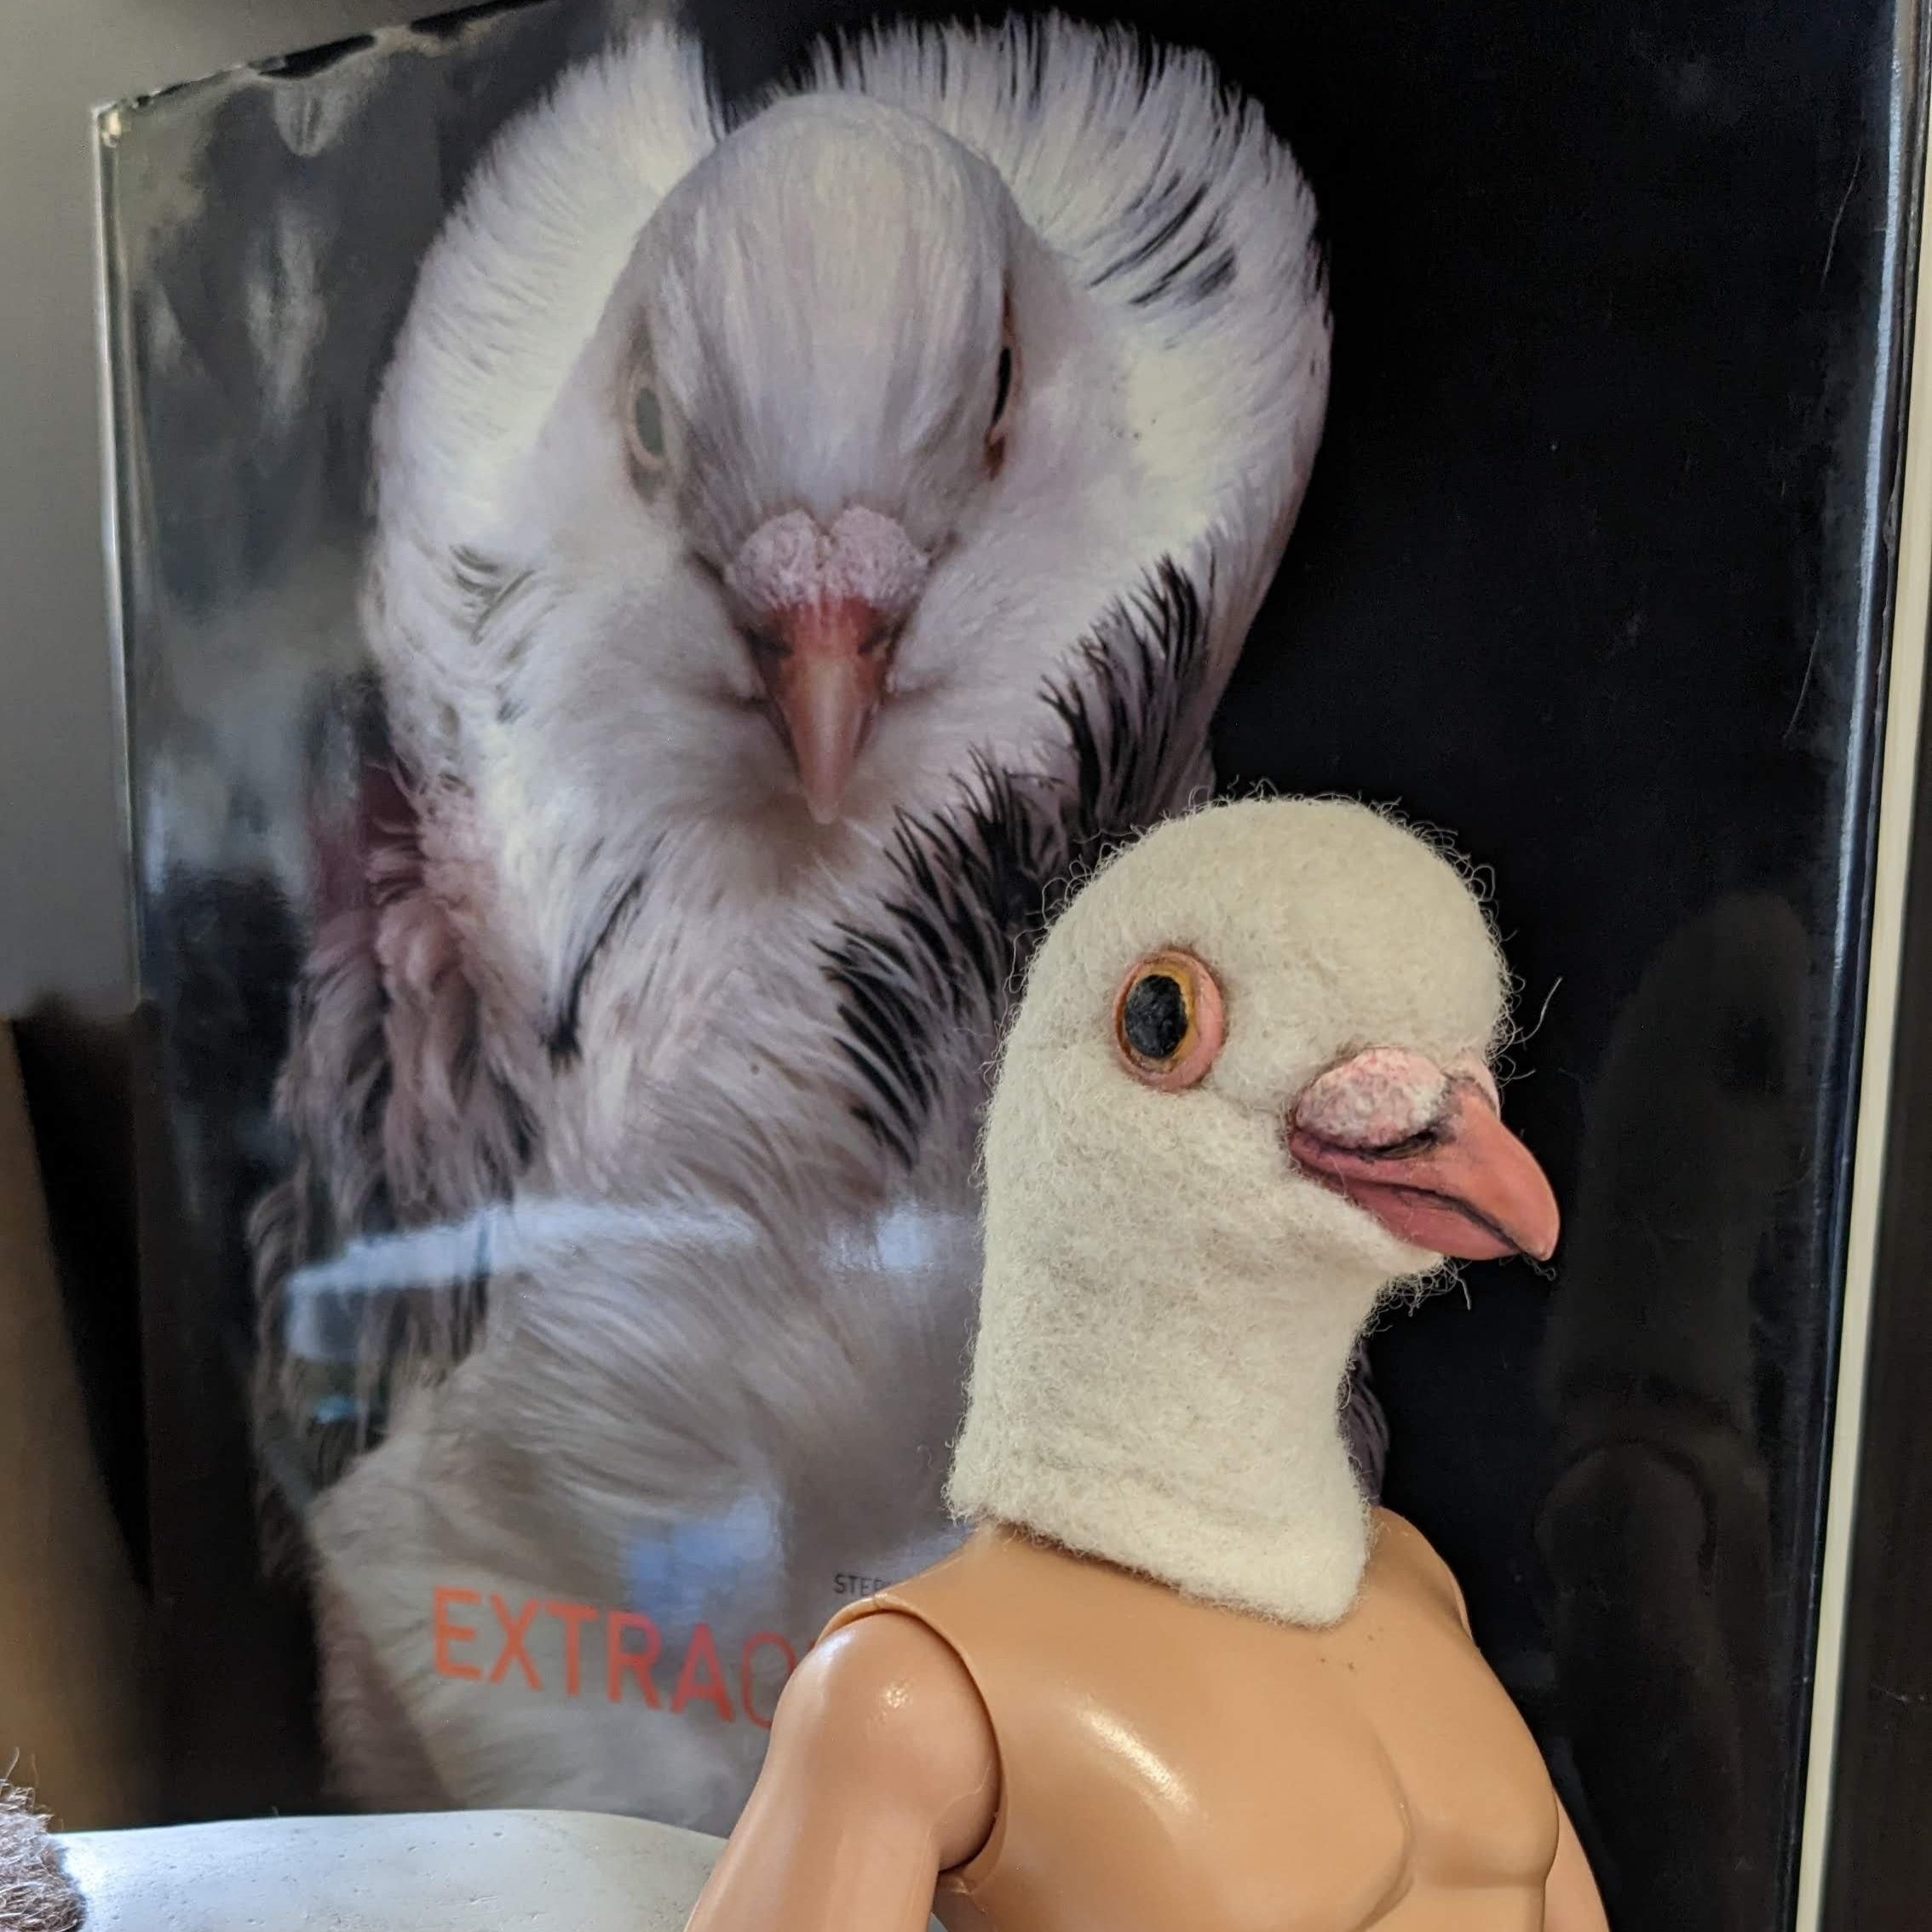
‘Aloof Dove’, wool through paper, 7 x 5 inches, 2023.

But manipulating fibers just the right amount through tiny holes in unforgivingly smooth paper is a fussy process. That apparent simplicity comes about through a sustained investment in curiosity and labor.

I’m reminded of a video of a young gymnast in which her incredible skills were labeled as ‘effortless’, when in fact they are the result of extreme and rigorous effort. You don’t see the sweaty hours of practice, the injuries, the sacrifices, and the compromises that go into that singular, focused, smooth, perfect performance captured forever in video.

Here’s a quote I had on my bulletin board in college from the choreographer and dancer Martha Graham:

“Behind one perfect leap are hundreds of leaps taken over a period of years. Is it not more strange that freedom should be acquired by discipline than that spontaneity, that most natural-seeming of all moods, is not chance or happy accident, but a selected circumstance achieved by intention and design?”

Her quote echoed the spirit of my figurative studies professor Paul Buckner who would talk us through carefully observed anatomy lessons, pointing out details and explaining how surfaces changed as the model moved and the muscles, fat, bones, and tendons interacted. We’d spend hours and days on long poses making pencil drawings or sculptures in clay. Every so often he’d have us make charcoal gesture drawings-- quick, physical scrawling marks on paper as the model took dynamic thirty-second poses before changing to the next position. Over the course of the semester my gesture drawings became more sure, more recognizable. My stick of charcoal seemed to know where to linger, where to be broad or fine, dark or faint. I didn’t have to think about the motions even as I became increasingly able to capture our model in brief flashes thanks to all the time getting to know bodies in depth.

Gesture drawing, Stephanie (Goetsch) Metz, 1996

My little wool drawings are like that. They don’t take as much direct time to make as my more involved works-- maybe two, three, five hours-- but their foundation is deep and wide. I’ve been ‘drawing’ with wool fibers through paper for sixteen years now, and drawing animals from life and from photographs for over forty years (!).

Cat Waling Wool Drawing, 5x7 inches, 2023

I first came up with the idea of using wool to draw in 2006; I wanted to see if I could assemble dark-colored fibers on a flat surface and manipulate them to stay in place, but first I thought I’d adhere them to paper somehow. That ‘failed’ experiment simply pointed me in a different direction, and I thought I’d try stabbing the wool THROUGH the paper with a felting needle, the same tool I use for sculpting. Iterations of types of paper, types of wool, backing material (since you can’t poke right into a wooden table without breaking a needle) and how much fiber to push through the paper or leave on the surface were part of the journey. And practice. Lots of practice.

One of my first ever wool drawings, inspired by textured damask wallpaper, and how I’d see hidden images within their designs. Damask Crow wool drawing, 30 x 22 inches.

Here’s another quote I have on my studio wall; it’s from Ellen Winner, author of ‘How Art Works: A Psychological Exploration,’ and it’s a doozy:

“When people are told that a work of art took a very long time to create, their evaluations of that work go up. But if you prime people to think about talent, then works that are made very quickly are valued more.”

So, two completely opposite responses. It’s interesting- do you find you value things more because they’re costly in terms of labor hours, or because their source is an expert at the top of their game who can ‘effortlessly’ nail it?

Does it matter what realm we’re talking about? Practicing law, emergency medicine, cooking, composing music… It all takes time and practice that might vary widely between the long arc of a life and the short task.

I get asked a lot about how much time goes into any given piece. I don't think the questioners are necessarily assessing my hourly rate; I think they’re simply curious, and want to find a yardstick to compare what they do in a given amount of time. But as you can see, that answer is complicated. Sometimes the things that take the least time conceal the most expertise.

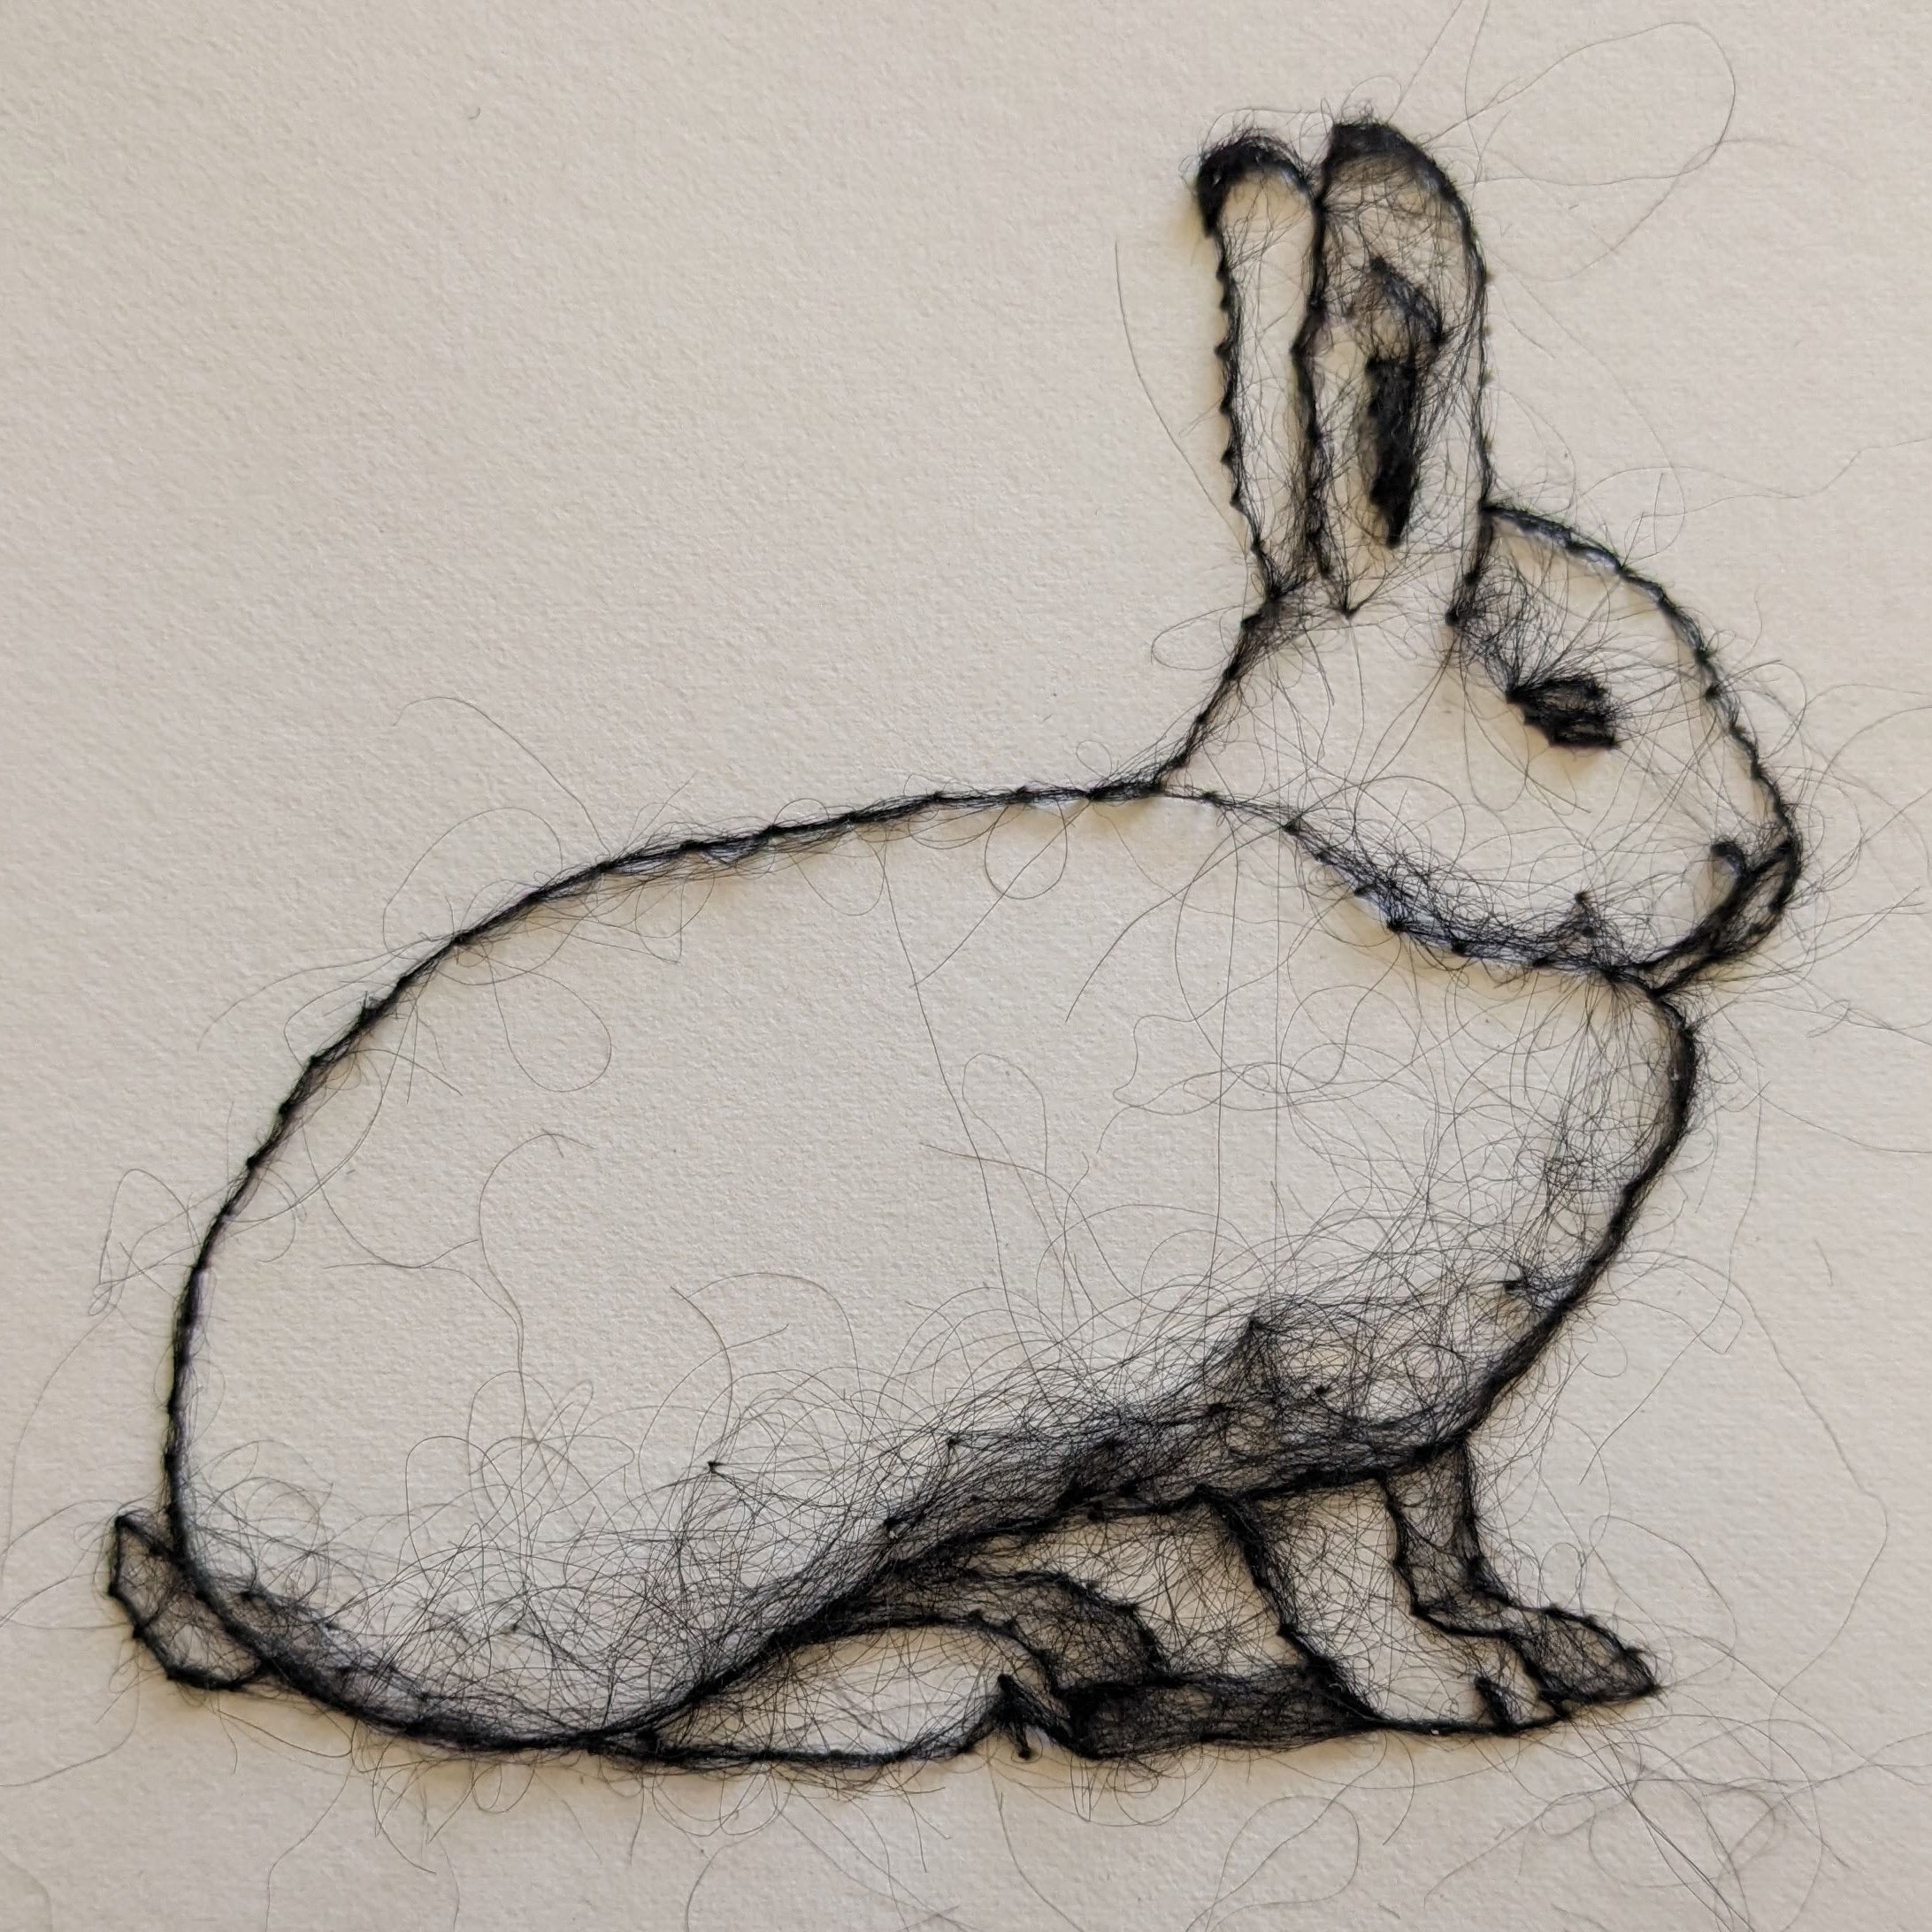
‘Snowshoe Hare’ wool drawing, 7 x 5 inches, 2023.

Why Visit An Artist's Studio? For The Little Things That Are Also The Big Things...
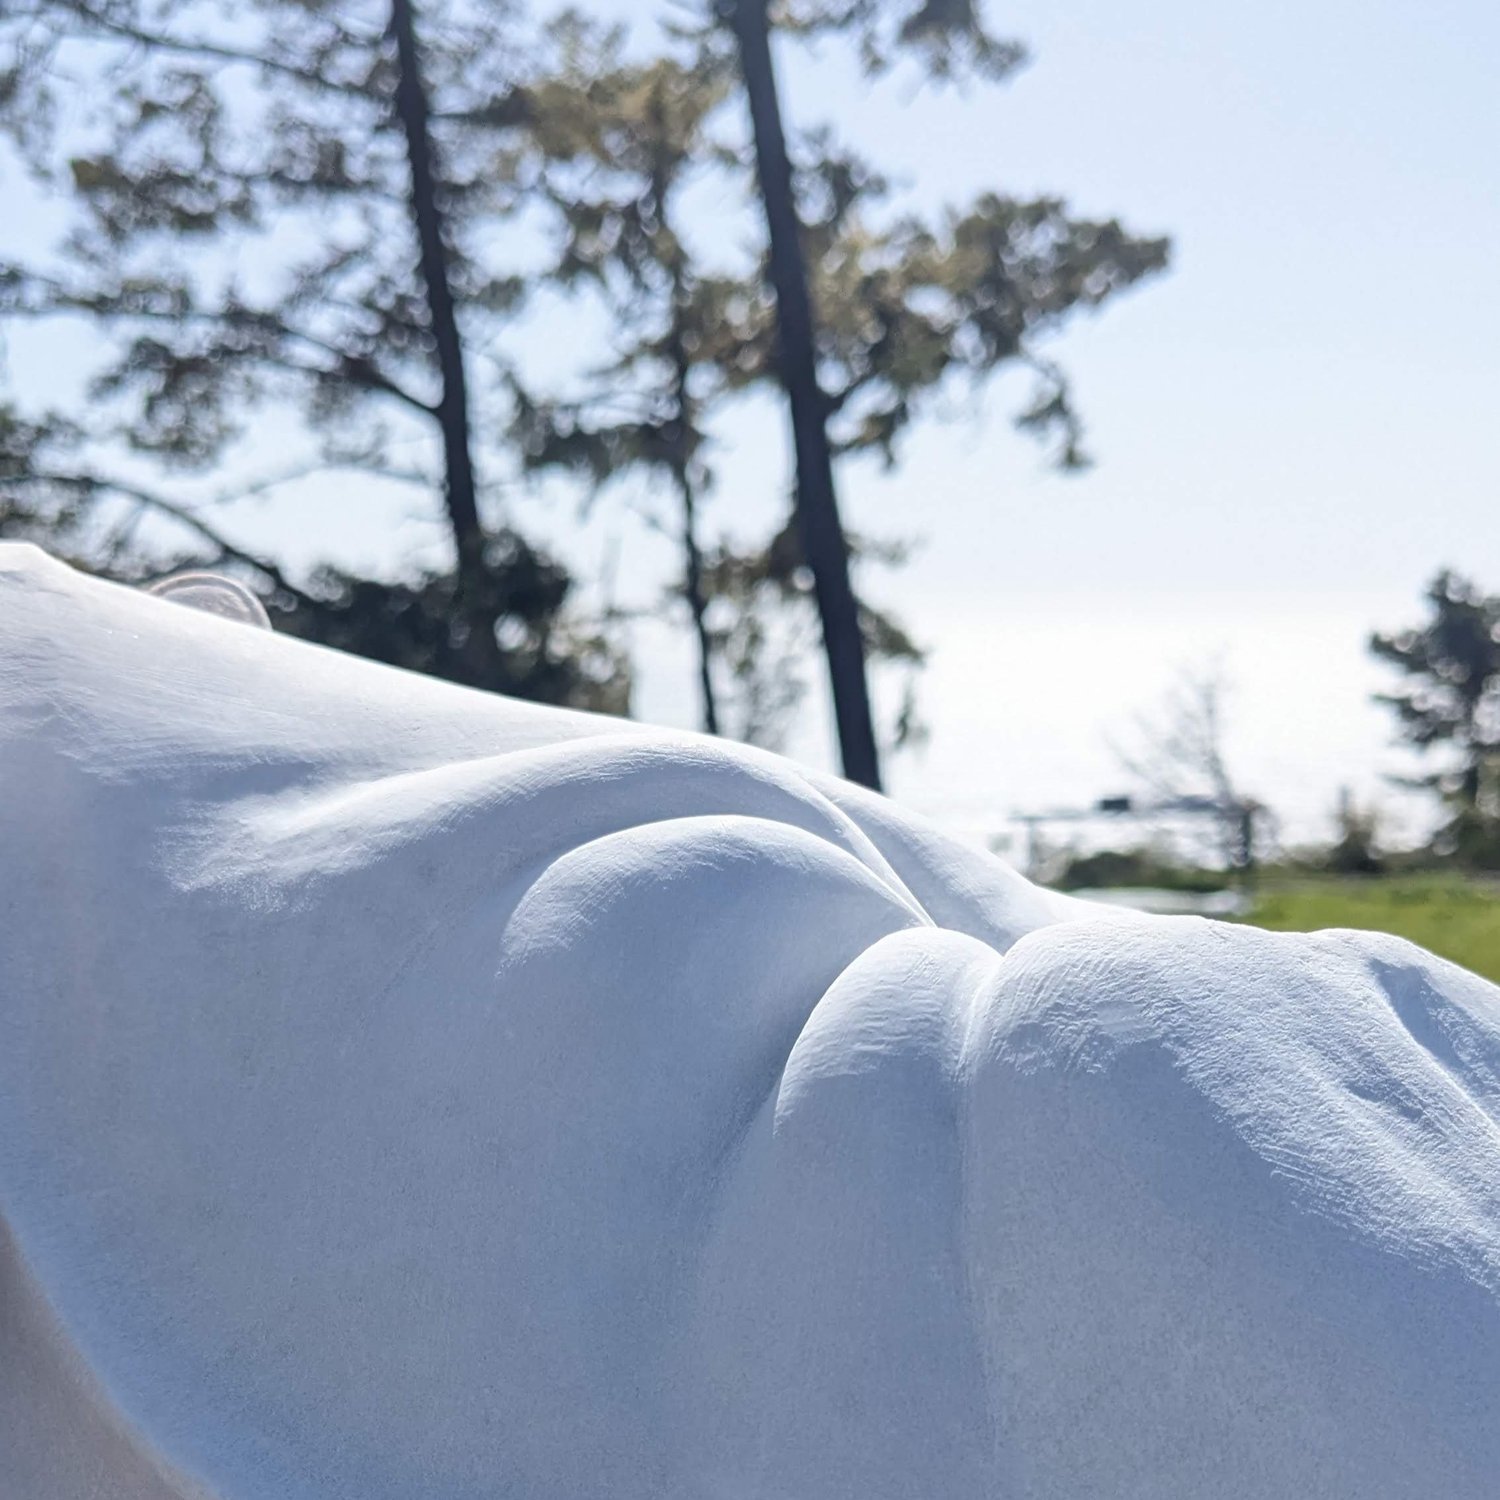
At least twice a year I participate in formal ‘Open Studio’ events: when artists invite the public into our workspaces (often multiple artists at the same complex, sometimes organized by an outside entity). Visitors get to see what we’re working on as well as the quirky detritus that accumulates in a studio over time. This post is illustrated with such details from my own workspace, like this one:

Looking up at a high shelf with a small clay model for a figurative painting (circa 2002); jars full of my own hair rolled into tiny balls after shedding for a long-term color change analysis; some seedpods preserved in alcohol, and a ‘Fur Bra’ sculpture emphasizing the directionality of cilia (body hairs) which cover most of human skin, including breasts. See, interesting tidbits!

I know from my side of things there is a lot I get out of the Open Studio experience: 

  • it’s a way to introduce people to my artwork and my workshops, 

  • I often sell some small pieces, and it’s sometimes the very first original art purchase a person has ever made, which feels pretty special,

  • It forces me to tidy up my studio,

  • I get a lot of social positive reinforcement (which, if you mostly work alone, is pretty delightful), and

  • it feels like a public service on behalf of artists everywhere to emphasize that actual people put time, effort, and specialized skill into making things that serve the purpose of forging human connections. 

An embroidered reminder by Margaret Timbrell, some dried flowers given to me as fresh flowers at a previous Open Studio, and a framed quote about doing what we are meant to do.

That last ‘public service/forging human connections’ part may sound like too much, huh? But here’s the thing: we artists do that. Forget that survey that lists artists as the most non-essential workers.

In our everyday lives each and every one of us human beings is surrounded by images and objects that were created by artists. A lot of those things make our lives better and make us feel connected, although we take that for granted more often than not. Seeing an artist working in their element and deftly using the tools of the trade- whether it’s a sculptor or a graphic designer or a cake decorator- is a reminder of the human touch behind the finished product. 

‘Beauty Mask’, a ceramic sculpture from my college years with stitched-together lips alongside a felt rainbow Mood Brightener by Tricia Stackle and a comfortingly squishy stitched strawberry by Amy Brown.

Why does that even matter? Because we humans thrive on connection, and suffer from its lack.

Experiencing the things other people do and make and feel strongly about and spend time on is a form of connection. The stories that come along with that are another whole layer: the why behind the creation itself (using the ceramic wheel to shape a pot as a form of meditation on imperfection), or the material used (the satisfying buttercream feel of acrylic paint), or the process (reassembling pieces of a beloved’s broken mug into a mosaic). The memories or metaphors or feelings prompted by a landscape painting or a handmade book or a voluptuously abstracted fiber sculpture are real and valuable means of connecting with ourselves and other people. 

Cast of my teeth after braces were removed, encircled by faux laurel wreath from my Artist Laureate award. Still not sure how these teeth may come into play…

And visiting an artist’s studio? That’s where you get the really interesting tidbits. Granted, we all do some tidying and think about what is being presented to outside eyes (that’s not just me, right?). But even so, in a visual artist’s studio you get to see the kernels of ideas, the weird little inspirations, the trials, the experiments. You get to see the thing they kept around for no particular understandable reason except later it turned out to be THE KEY TO EVERYTHING. You get to see the raw materials (physical and otherwise) and sometimes you even get to see the acts of creation taking place. 


At least as much as one can do so while simultaneously entertaining visitors. 

A few of the teeth and bones I’ve collected or been gifted. These DO play into the forms I create. And I can’t stop acquiring them, so that must be something, right?

I get it, maybe that’s not something everyone is curious about. Maybe I’m assuming that my own particular wiring is more universal than it actually is. Heck, I just read about how difficult it is for people to effectively communicate seemingly simple concepts through words. THAT was an interesting read about how we tend to talk past each other and can’t even agree on whether a penguin, that overdressed aquatic bird, is more like a chickadee or a dolphin. As an aside, it makes me feel a lot better about how my own artwork is interpreted by others in ways FAR different than how I conceived it. 

Peeking into artist’s studios has a lot to offer the curious. And you don’t even have to talk to the artist. I can tell some people come in ready to dodge the hard sell as if it’s a used car lot, averting their gazes and ‘just looking’. They don’t want to engage, or maybe they feel like they won’t have the right knowledge or are afraid to ask questions that might sound stupid. And maybe they’ve come to that stance for good reason- because they’ve had other experiences along those lines. 

But just looking? That’s fantastic. Looking is enough. 

My dove-headed altered doll lounging against some plaster-coated felt experiments and one of my favorite books, ‘Extraordinary Pigeons’.


You’re allowed to respond however you respond. Taking a quick stroll in and then out again is also a valid response. I try to make people feel welcome in my studio because I really do feel like part of my mission is to make art and artmaking more accessible and part of everyone’s life. But not everyone is going to like what I make. I can live with that. Mind you, I don’t need anyone to treat real life interactions like social media and tell me to my face in all caps that what I’m making is NOT ART. (That’s never happened in real life, at least, happily).  But it’s perfectly fine with me if you’re not my audience. And you may in fact be exactly my audience but not buy anything today or tomorrow or ever. That’s okay too. 

I’m going to keep making things that make me feel alive and connected, and inviting others to join me in those feelings. So come on in and take a look. We can talk or not talk. When you look at the things I have made and collected and tried you can guess at what I must have been thinking or feeling or trying to express, or you can chew on what you yourself think or feel, or you can ask me (and my answers may change, and yours might too). 

A monotype print of a toothy teddy bear, circa 2001 (?), an indirect precursor to subsequent teddy bear anatomical specimens that also feature teeth. Are you wondering where this all came from? Let’s chat and find out!

I’ll be exhausted by the end of the day, but pleasantly so. Drained but also filled up. And in a few days (I DO need to rest afterwards) I’ll be back in there, working and playing. Until the next time. 

Carving Stone at Sculpture Camp: Paradise Among My People

Highway 46 weaves sinuously among the rolling green foothills; the drive between Cambria and Paso Robles ⅔ of the way down California’s coast is one of the most beautiful, soothing, and satisfying stretches of road I’ve driven thanks to those undulating forms. And yet all I could think about was how to refine their slopes.

Rolling hills along highway 46 by photographer Alexander S. Kunz; used with permission. See more of his work at www.alex-kunz.com


I was on my way back from sculpture camp where I’d been carving, filing, and sanding stone sculpture for nearly eight hours each day, so you’ll have to forgive me for still being in the mindset of coaxing my will onto forms so similar to those I’d been focused on for a week. 

The landscape-like marble sculpture I worked on this week, still at the ‘lots of refining needed’ stage.

It took a while for me to even realize that I was imagining using steel hand tools to re-shape the landscape around me, and when I did I had to smile, albeit sadly. The transition back into ‘normal life’ had begun after my brief escape into a sculptor's paradise. The California Sculptors Symposium takes place mid-April each year at Camp Ocean Pines in Cambria. Days are filled with hours and hours spent working on sculpture, broken up only by instruction in different media and delicious meals made for you and spent in companionship with other artists. Evenings feature talks, slideshows, sunsets, games, and music. 


It’s hard to communicate how valuable the experience is to me. I love my ‘normal’ life, don’t get me wrong, and it would clearly be too physically and mentally demanding for me to live each week working as intensely as I did this past one. But oh, the pleasure of having a whole day devoted only to shaping materials to suit my own vision. It feels deliciously self-indulgent, but amidst a life peppered with helping and serving others it’s essential to at least devote some time to serving only yourself. 


This year was the first time I fully indulged; in the past I’ve taught at the event, which nonetheless leaves lots of time for one’s own work. But this time I gifted myself the whole time free of responsibilities. That is to say, free other than the usual tether of checking in on my family, which was notably a little different this time since one of my sons just got his nose broken in a soccer game the day before I left. Grandma and Grandpa helped even more than usual at home in my absence with doctor visits and follow-up. But other than phoning in to his ear/nose/throat consultation and extra attention to my device alerting me to anything (cursing each time I had to take off the layers of protection on my face and hands only to find a spam message or special offer) I had no other demands on my time and attention. 

Protecting eyes, ears, lungs, hair, and hands makes for a lot of layers to remove when checking the phone…

You may have noticed that I primarily work in fiber, by the way. And sculptural needle felting is indeed the topic I have taught at camp. But I also love other materials and methods of making, and there are things I’m just not really set up to do at my own studio. CSS began primarily focused on stone stuclpture, but it also offers other media that changes by the year, and the Board of Directors bring in different instructors who excel in their fields and teach particularly well. 

This year attendees had the option of working with Jason Arkles of ‘The Sculptor’s Funeral’ Podcast fame, who teaches the nearly-lost Renaissance technique of sculpting from life using the ‘Sight-Size’ method. Some opted to spend half of their days practicing figure sculpture from a live model. Jason is an excellent instructor who’s also living the dream with a huge studio in Florence, which he only leaves to come teach some lucky students a few times each year. 

Jason (bearded, in the apron, center left) in action at the 2022 workshop. Somehow I didn’t get a photo this year.

Alex Yoshikawa of Splady Art Studios in Oakland taught students all about sculpting in wax, which acts as a proxy for bronze: in lost-wax casting, an original object is made in wax (or multiple copies of an object can be made by pouring wax into a mold) and then a hard ceramic-like shell is used to coat the form, with special attachments used to form channels into and out of the sculpture. That wax is then melted out, and the hollow left behind is filled with molten bronze. Here’s a video I made long ago about the process. It’s pretty incredible, and Alex is highly skilled and experienced. He and Chuck Splady are masters of working with metal- and besides making their own sculpture they also help other artists realize their visions. They are the ones who fabricated the frame-like structures that suspend my ‘Hanging Pods’. They also teach classes in hot and cold ways to shape metal, so reach out if you’re interested.

Alex (on the left), Chuck Splady (center) and my own kid a few years ago at Splady Studios. You know, showing a nine-year-old how to do some plasma cutting!

Oakland-based Ibiza-born artist Marcel Regueiro led the group of stone sculptors in tool use, finishing techniques, and modeling an understated dry wit in one’s approach to banging on a rock until you get the shape you want. His journey as a sculptor- literally a journey that took him from Ibiza to London to Vermont to Oakland- is an entertaining lesson in deciding what you want and working to accomplish it, assisted by a strong sense of self and sense of humor. 


Finally, I can’t help but mention the unofficial instructor in all things sculpture-related, Stephanie Robison. She’s a gifted, innovative, incredibly hard-working sculptor (you’ve got to check out her latest work that combines stone and felt) but on top of that she’s one of the best teachers of anything I’ve ever known. She welcomes in a student at whatever level of skill and knowledge they currently have, and she makes sure they know the safe, smart, effective way to use tools and materials-- the how and the why. And she’s patient and generous with her knowledge without fail. She’s the one who recruited me for the camp in the first place, and is responsible for bringing in over half of the warm bodies attending this year. She teaches at CCSF, and if you’ve ever wanted to learn sculpture she’s the one you want to learn from. 

Marcel Regueiro with Stephanie Robison, on the field, of course.

Let me paint you a picture of my experience last week. I decided to spend my time and energy carving stone, since 1) it’s different from what I usually do 2) it’s uniquely pleasurable, 3) I don’t normally have access to all of the specialized tools and 4) it’s not something I’m really set up to do at home because it’s loud and messy.

The large field overlooking the ocean is transformed to workspaces by laying down tarps (to catch the bits of stone that go flying so we don’t leave them for kids to stumble on), erecting pop-up tents (because even on the coast the sun will burn you), and arranging work tables (portable and pretty good, but they still move a bit when you’re hitting at heavy rocks perched atop them). I was in the ‘beginner tent’ area where I could share tools and benefit from the roving instructor’s nearness, while the returning carvers set up their own stations around the field, some with power tools. 

The stone sculpting field, from my 2022 visit. The ocean is that vast expanse to the right over the trees.

Dangers of stone carving come in the form of flying rock chips, dust, loud sounds, and missing with the hammer or rasp- so goggles, masks, ear protection, and gloves are the outfits of choice. And hair covering, since stone dust makes one’s hair turn into straw until the next shower. 

Stones can be acquired through a silent auction on the first morning: alabaster, marble, soapstone, and a few other varieties that come from donations from personal stashes. There’s also a representative from Art City in Ventura who often has larger stones. Note: a week is not a very long time to work on a large stone, but you can take it home to finish. But small also has its drawbacks-- a lot more clamping and using sandbags to hold it in place. Last year I carved a fairly small piece of marble into a form similar to one I’d made in wood, and although I finished it while there, I do recall the fussiness of having to keep it in place as I worked.

My smallish stone in progress from last year (next to the carved wood piece I modeled it on), wedged in place with a wooden clamp since it was so small and lightweight.

I came to the camp with a stone I bought at last year’s auction-- a piece of marble that had a hole drilled through it. I was intrigued by that piercing, and determined to make use of it. The piece reminded me somewhat of a bone (I collect them and love the sculptural form and function of anatomy) and I wanted to incorporate both hard and soft, much as I’ve done in felt with my Flesh & Bone series

My chunk of marble in the ‘Before’ phase laying on a sandbag, with my hammer, chisels, and paintbrush for dusting away bits.

I also put some bids on stones in the silent auction, and secured a rounded, flat piece of alabaster that looked like it will be a bit translucent when finished- intriguing and beautiful. Alabaster is much softer than marble, as I would come to find out. But first I tackled the marble piece. 

I have some experience with stone carving; in college I took a week-long workshop with Kazutaka Uchida while still at the University of Oregon, and the hammer and chisels I bought back then still, of course, work. There are plenty of other tools for specialized and generalized use, however, and CSS is the perfect opportunity to try them. Learning about new tools to use- or old tools to use in different ways, like a hacksaw blade as a means to scrape smooth, even curves (below)-- is satisfying and challenging. 

Using an old hacksaw blade held in a bowed shape can give you a nice scraper for curved areas. Who knew?

But I’m getting ahead of myself. I started by using a hammer and chisel, although depending on one’s stone and design there is also cause to use power tools to drill or cut off parts of the stone. There’s no cheating in stone carving, just different tools for different goals. Chisels can be pointed, rounded, flat, and shaped like rakes, all of which have their uses. Understanding the angle needed for the best use of force is key to effective hand use, as is correcting one’s body and hand positioning to avoid injury. 

The marble had some cut marks in it already, which helped inform my design— even though one of my goals was to obliterate them. I started with a clawed chisel.


As I mentioned, I’ve carved before AND I had a sense of the form I wanted, so I drew on some outlines in colored pencil and just went to it. My stone was large and heavy enough that I could position it on a sandbag and it didn’t need to be clamped in place, which meant that I could turn it over and around as needed without having to pause and re-clamp. Yet it wasn’t so large and heavy that it took a lot of strength to move it around-- I really hit the sweet spot and avoided a lot of the ‘friction’ of dealing with the stone itself, which let me move from area to area as needed. The first day I roughed out my form pretty well, and slept well that night after such a workout. I’m used to repetitive arm motions, but the added weight of the hammer is certainly different than needle felting! 

You can faintly see the red pencil marks I used as a guide, and the way I’ve worked my way across the surfaces with a small flat chisel at this stage.

A note on where you sleep at camp: there are cabins with bunkbeds that can hold 10 people- but we grownups occupy them at a rate of only three or four to a cabin, and each cabin has its own shower room and toilet/sink room. It’s rustic but works well, and the water’s hot. Some people choose to stay offsite in hotels or vacation rentals, but I like the full camp experience, I must admit. Not that I have a photo for you.

Over the next several days I used rasps, abrasive grinding bits, diamond riffler files, and these amazing scraper tools modeled on ones found in stone carving sites from the Renaissance, if the stories are true.

Using a triangle file to work on shaping those curves.

It’s kind of crazy to note that simple pieces of steel can shape hard stones- at least when applied with a lot of care and patience. Other participants are incredibly generous in sharing and lending their tools, which requires that one be equally generous in not stealing them even though said tools are not made anymore. Sigh.

Using a simple but incredibly effective scraping tool, which I can’t find anywhere to purchase! Tell me if you have a source! Please!

I took a break from my marble piece when I’d gotten it pretty far to address the lovely alabaster. Here's where I left off. If you look closely you’ll see a faint red circle around a bruise I’ll need to tackle.

Still in need of sanding, but almost there!

Carving alabaster is quite different from carving marble. From Marcel I learned that very little hammer and chisel work should be used in favor of rasps, since alabaster is softer and far more bruisable and breakable than marble. Bruising a stone, by the way, is what happens when you crush the crystal structure, leaving a white dot that requires a lot of scraping or sanding to remove. So my second stone was an exercise in wearing away at the surface rather than breaking it off. 

A diamond rasp was a good (if laborious) way to take down some of the surface without danger of leaving bruises that would show later.

At some points what I was doing with a scraper in one hand and a paintbrush in the other felt akin to archeology: digging gently and carefully, and brushing away dust to see what was revealed. 

Using the scraper to start to define the outlines of where smaller foreground forms meet the background shape.

It was, in a way, meditative- but I was also eager and a little impatient to get to my form. I conceived of a grouping of egg-like pods that would (hopefully) be even more intriguing in their finished translucent appearance. A lesson on finishing a stone began with addressing the importance of not rushing to the sanding stage. Sanding over scratches or white bruise marks doesn’t remove them; instead one has to scrape or abrade down to remove them and only then is sanding appropriate. So I had to slow down again and remind myself that sanding, at least, I can do at home. 

Roughed out but still a ways to go. Luckily the finishing is fairly satisfying.

By the end of the week I was extremely pleased with my progress on two different pieces, although I had a hard time tearing myself away from working on them. Part of that was the sheer satisfaction in smoothing and refining those elegant slopes and clean edges; part of it was my acknowledgment that it truly is difficult for me to find time to work on ‘extra’ things once back in my regular life. I guess it’s about ‘carving’ out time and space to do what you find agreeable and worthwhile- pun clearly intended. 

‘Agreeable and worthwhile.’ I wonder how many people in the general population would describe stone carving (or other means of sculpting) in that way. Besides the actual act of making art, the real value in sculpture camp for me is being among other people who share that outlook. As a working artist it often feels like I have to explain the value of what I do in terms of money, time, and energy resources. I have to try to put into words why art is necessary to humankind; heck, I have to start with asserting that it even IS necessary. Art has to be framed as a commodity that others will buy; my worth as an artist has to be determined by whether and how much other people pay me for what I do. I know that’s not true, but it’s a pervasive ongoing demon lurking around the edges. 

Among my fellow sculptors there’s simply the accepted fact that shaping materials feels good on so many levels. That doesn’t mean it’s easy or simple, just that it’s important when you’re wired like us. It feels like a deep, slow sigh to breathe out all the reasons and inhale the sweet shared air of doing and being and making for its own sake. 

And to share that life-giving oxygen with generous, funny, thoughtful, open-minded people was the real treasure of sculpture camp. The personal connections you forge while deeply engaged in creative pursuits among kindred spirits is something I need- we all need- in our lives. It’s another thing I get to bring home from camp with me.

Until next year, CSS tribe!

The Color Pink: Breaking My Own Rules of Making

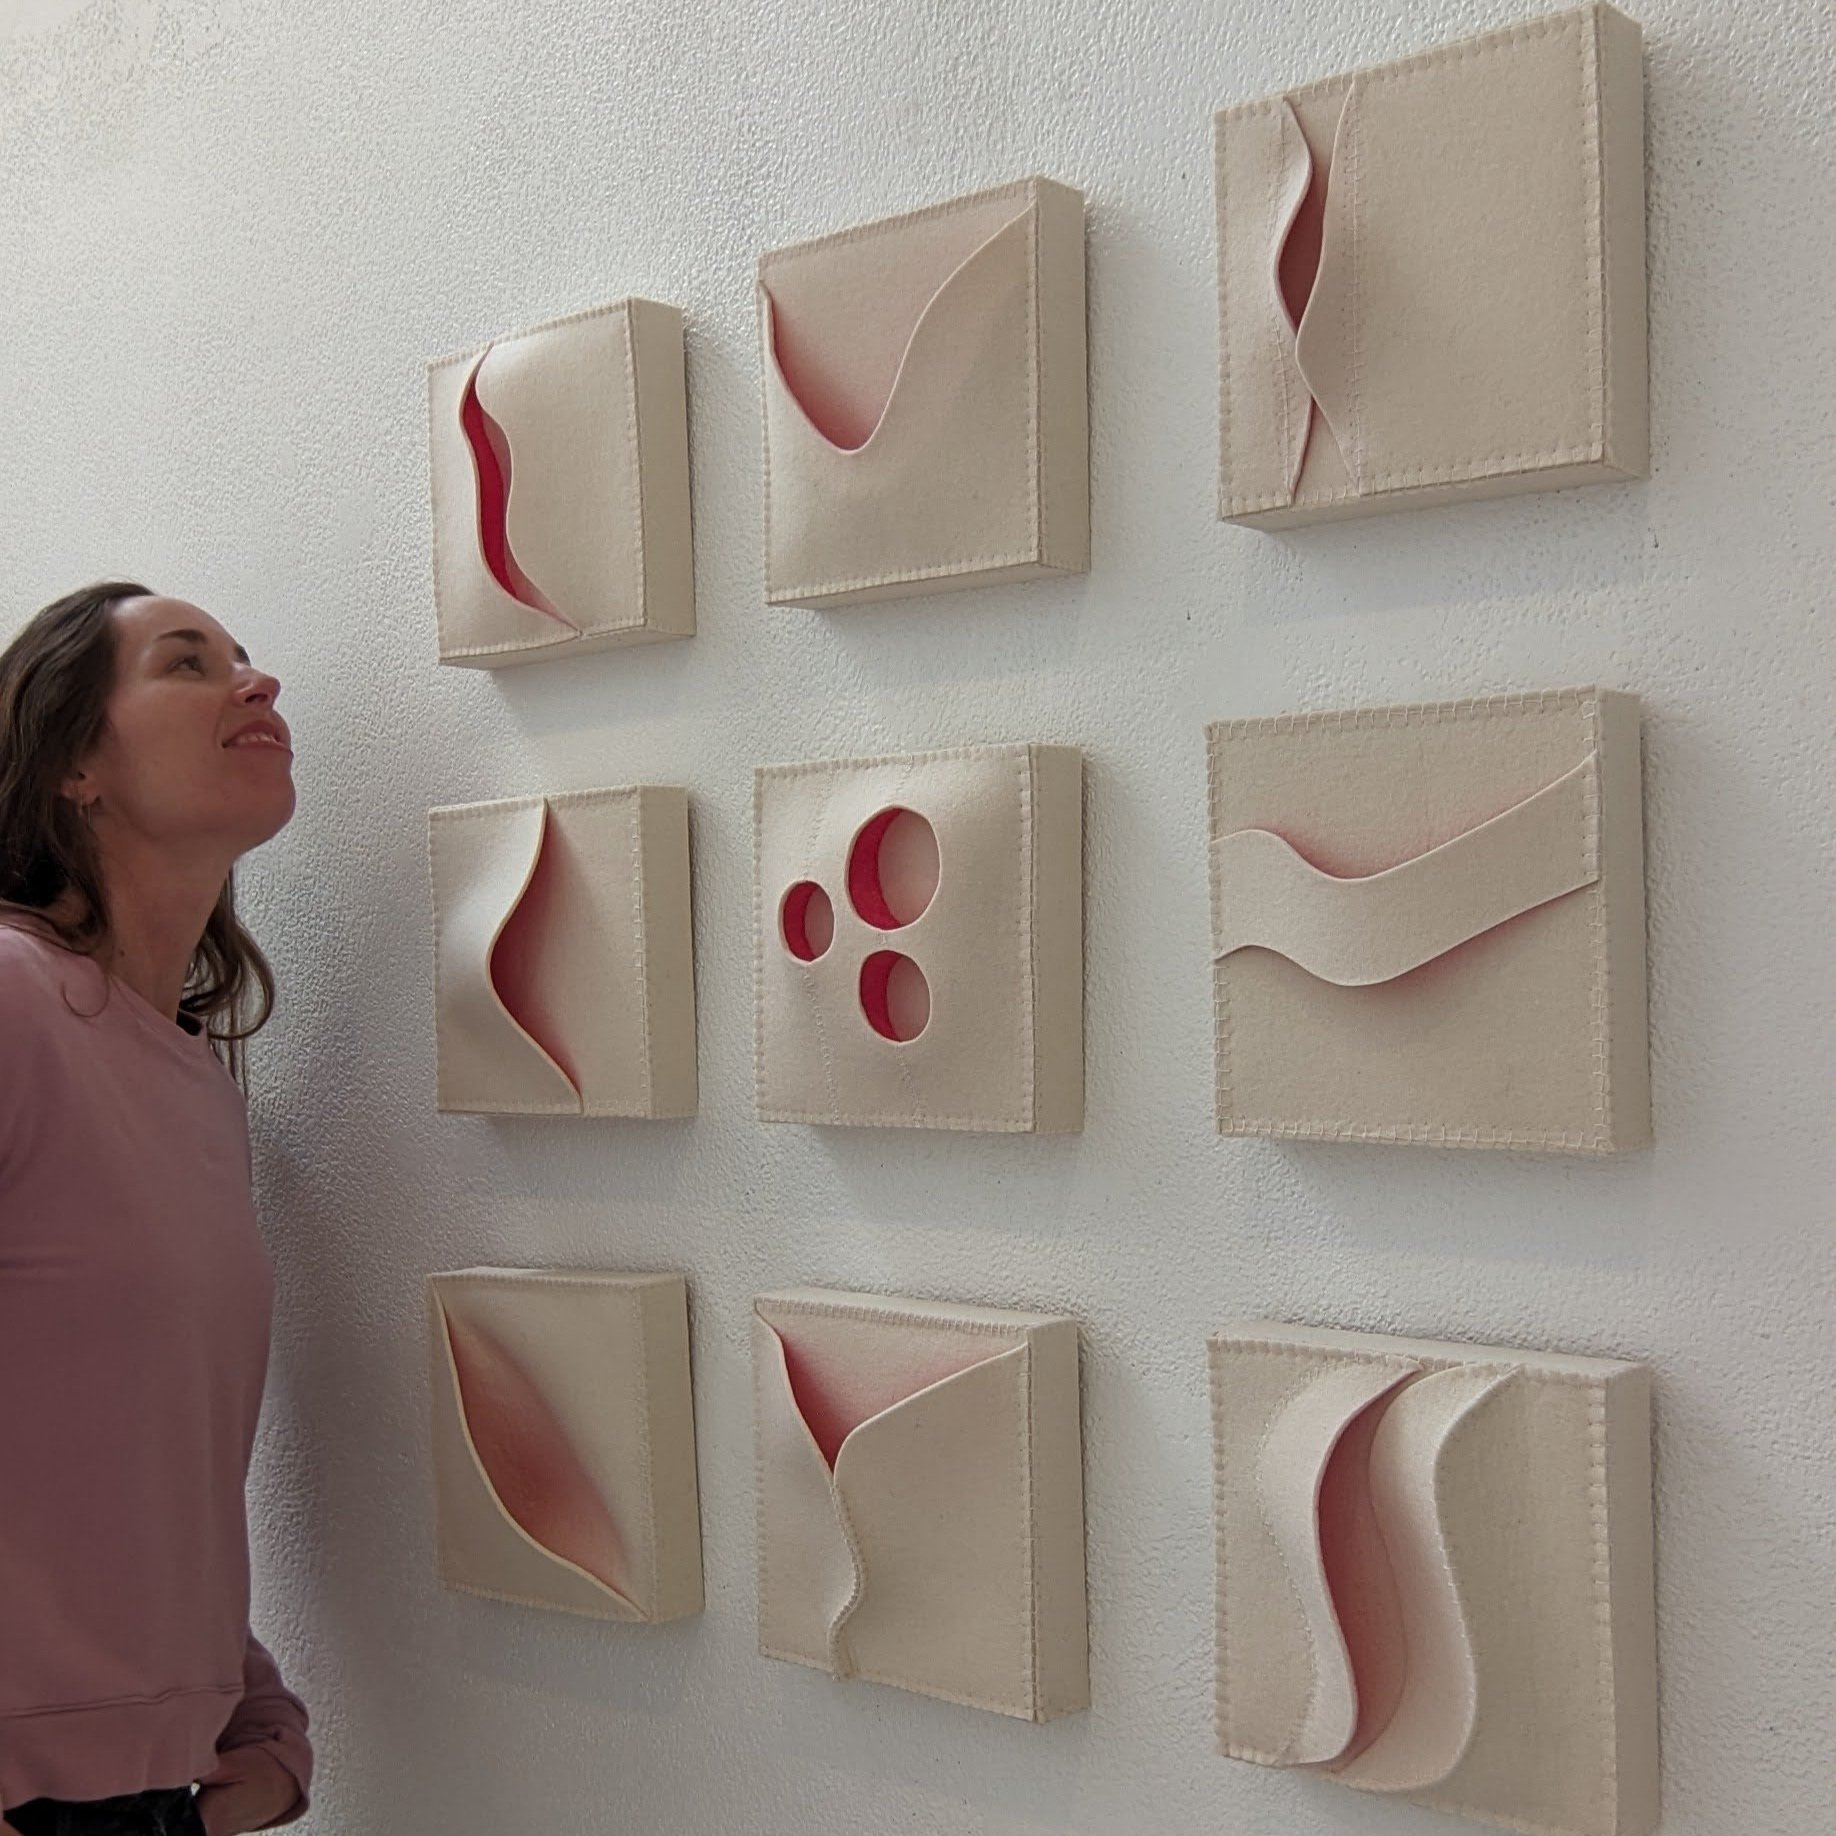
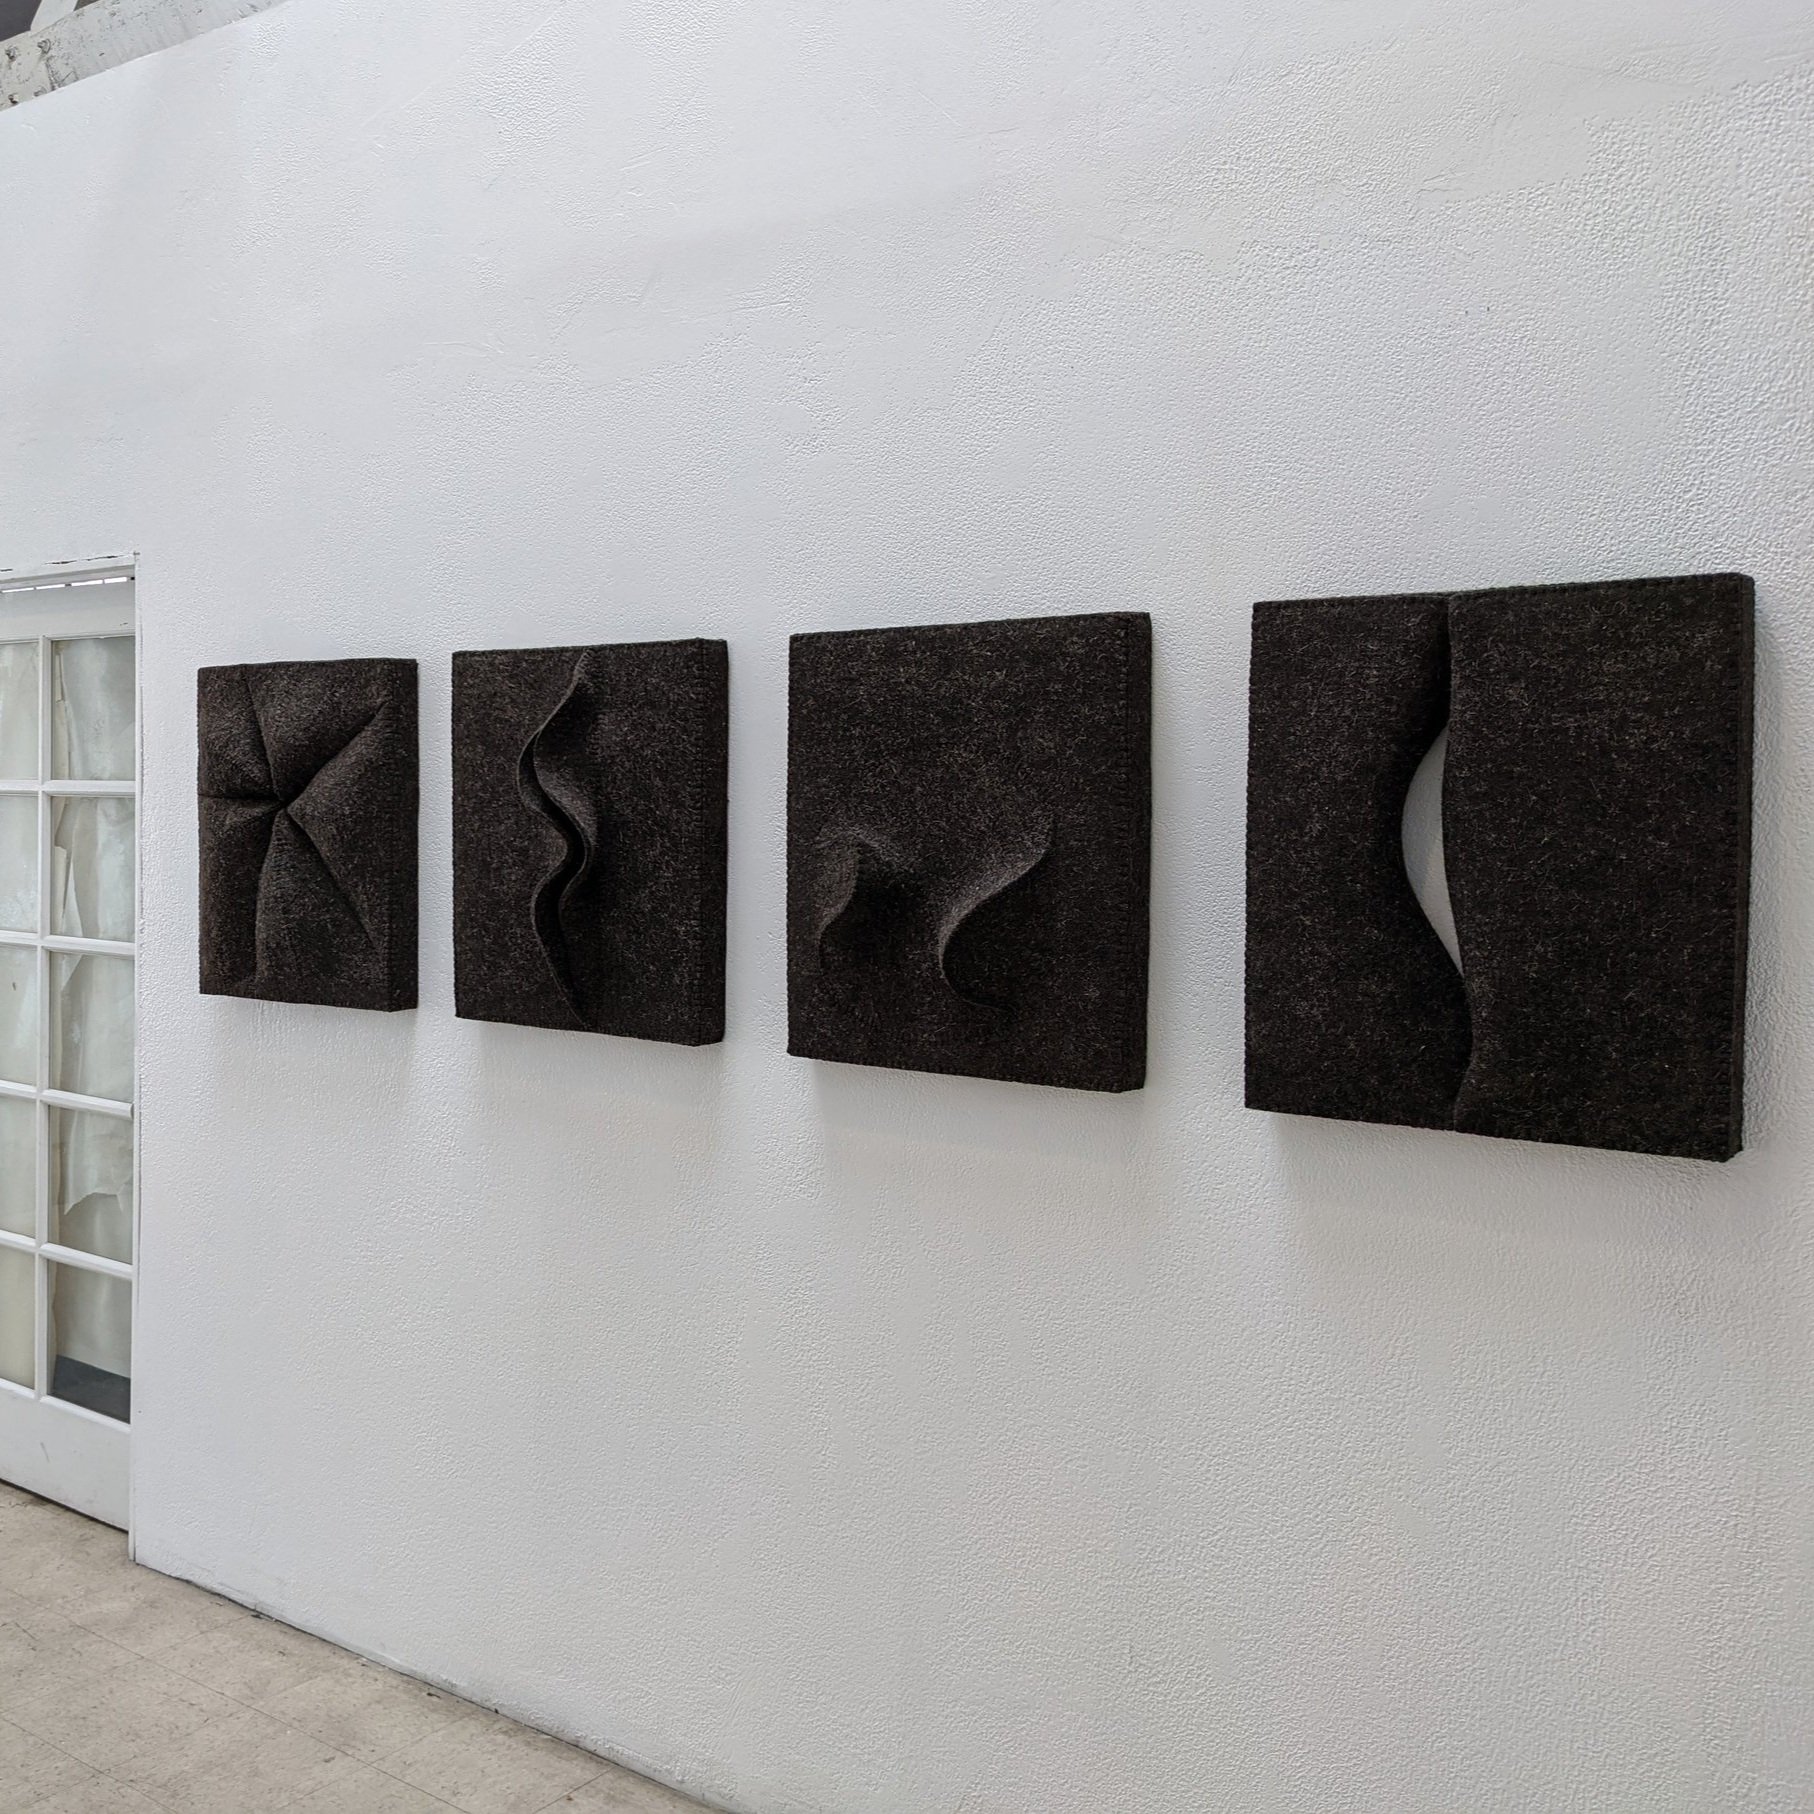
Posing (in pink, of course) next to nine experiments with reflected pink color on stitched white felt, each measuring 8x8 inches and up to 3 inches deep.

In the spirit of ‘living in the now’ and giving myself more studio work time this year I’ve been indulging in ideas accumulating in my sketchbook, even when the sequence from one body of work to the next isn’t currently obvious. It’s all related by, well, me.


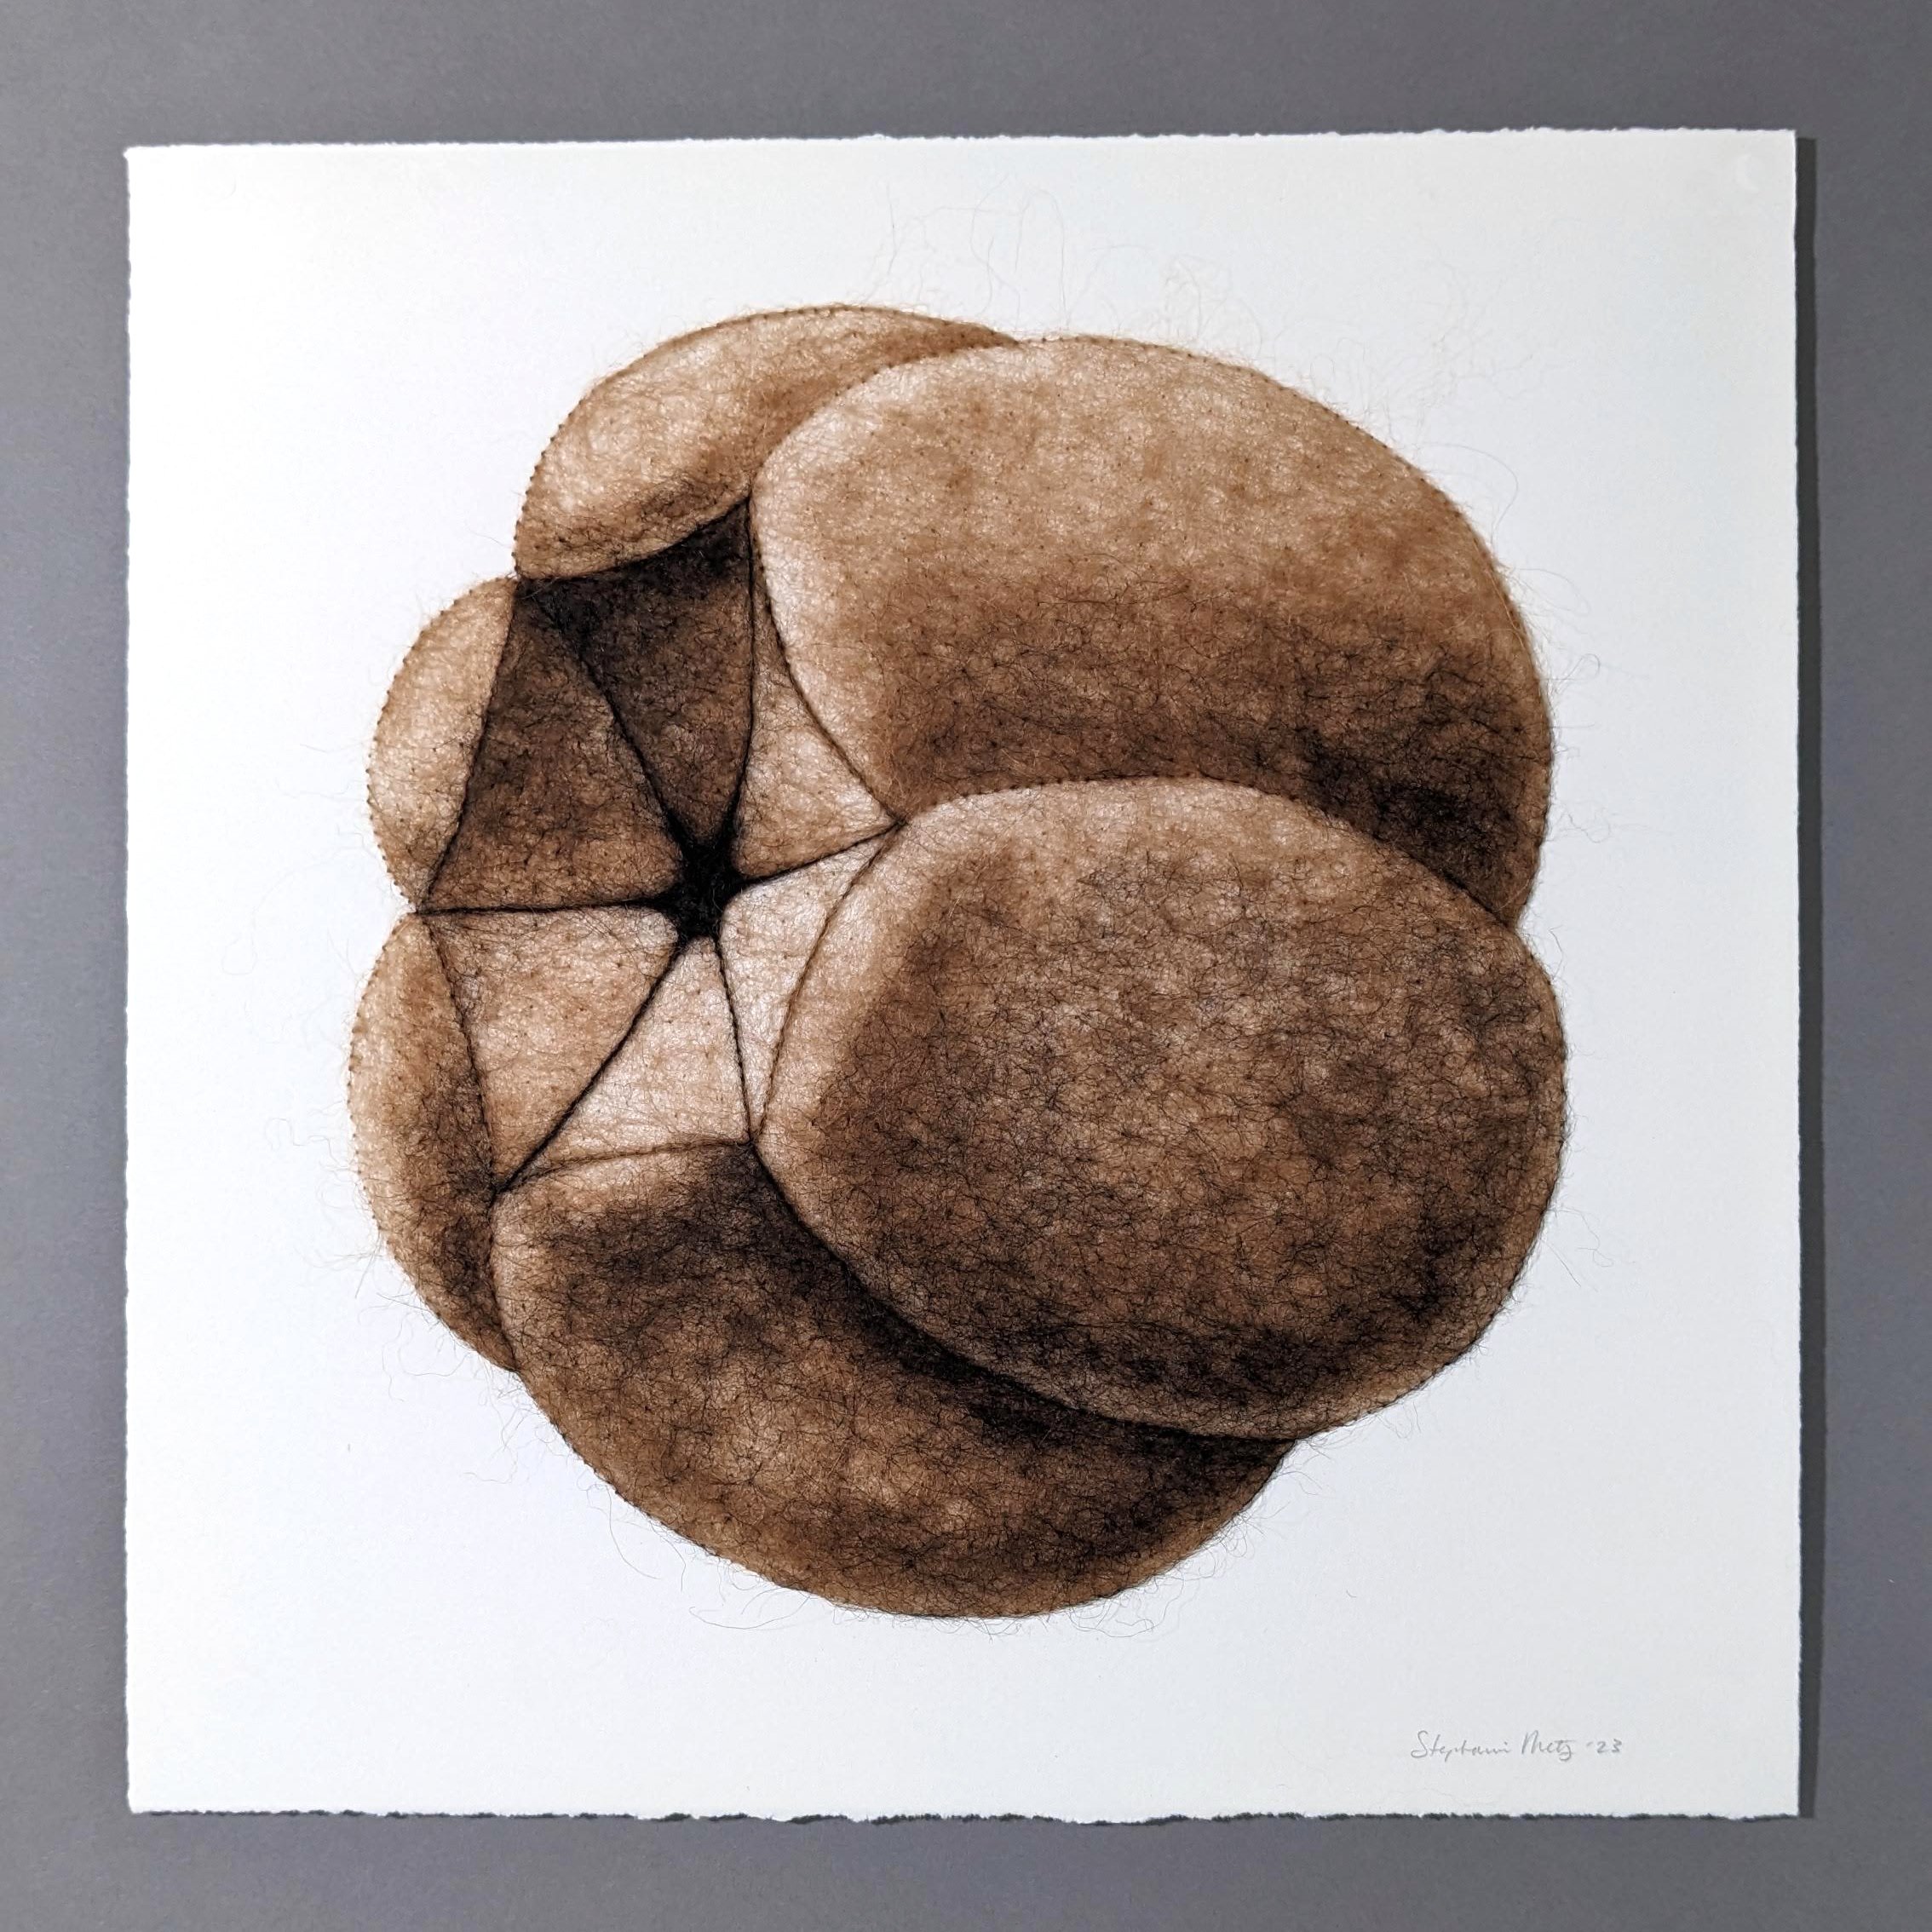
Following my ‘Objects of Intrigue’ brown and black wool drawings, I’ve jumped next to the concept of using smooth white wool felt sheets to reflect color. And not just any color: I’m using an insane fluorescent pink to color the backsides and edges of clean, minimalist stitched designs with the result of a subtle pink glow that changes with lighting conditions. I think of these pieces as quietly, delicately powerful; symbols of elegance and simple complexities that reveal themselves through attention and light. They’re available now in my online shop.


These may seem a bit like a departure from my needle felted forms, but they’re certainly from the same brain and hands. They come from a spirit of curiosity and experimentation, which I would consider the touchstone in my practice.

I learn from and respond to all sorts of sources when it comes to my artmaking, however when it comes to my particular materials and techniques of needle felting and stitched felt I find I’m somewhat of a pioneer. At the very least, I don’t have any clear predecessors or guides. That’s not a bad thing; it means I have to/get to do the work of trying things to see what happens. And like any true experiment, there aren’t necessarily successes or failures; instead each is a learning opportunity that may or may not have turned our how I expected (or hoped!). This one, for example, required a major re-do; I’ll show what I mean in a subsequent post.

‘Pinkness Study #5 (Circle Holes) went through a big re-do over the course of its creation. I’ll write more about that next time and link it here.

So I’m pretty comfortable trying new things. And yet over the years that I’ve been exploring this seemingly unexplored approach to materials and techniques I’ve nonetheless discovered that I hold some foregone ‘rules’ in my head about what is allowed or not allowed. Silly, I know, but something a lot of makers come up against with all sorts of different traditions of making. Some of those rules are quite useful and come from the best practices developed by others for safety, efficacy, and efficiency. Some of the origins of the rules are lost to time and may be vestiges of mere quirks of their originator. And even when one is working within a tradition it’s good to push against and question the rules to develop one’s own voice. But I had thought that since there were no official rules I could find, particularly with needle felting, I was free to do whatever I wanted.

But I occasionally acknowledge the ways I DO have rules, some related to other art realms I’ve worked in (stone carving, metalsmithing, working in clay to name a few) and some that I developed in response to felt. The first was an early one— I realized I put a lot of stock in my felt sculptures being NOTHING but felt, through and through, without any support or armature. The novelty of being able to say that a freestanding form was made solely of compressed fibers certainly had a ‘wow’ factor. But what did that get me? Only a limitation on developing forms that needed a little extra help or working a LOT larger. So I tossed that rule aside. This ‘Overbreeding’ sculpture wouldn’t have been possible otherwise:

A sculpture of a grey four-legged headless beast with a rounded body made of grey wool felt.

This sculpture was one of the first to have a simple wire armature; I had to insert wires into the legs despite my attempts to make them so dense that they could hold up the rounded body on their own. They couldn’t. But it led me to innovate and find that I could insert wires AFTER nearly completing the piece, instead of at the beginning.


How do my rules figure into these pink studies? Well, for starters with my using color at all. I truly love the creamy white or warm, mixed browns of natural wool; love that it references its source as an organic material that’s only been minimally processed (cleaned, for God’s sake, cleaned/degreased, brushed!!!).

Clean vs dirty wool from an article on whether or not to wash it. I say yes.

White forms are very much about form, light, and shadow. The decision to introduce color is not something I undertake lightly; there has to be a good reason for it.


Pink is a color pushed on girls from birth, at least in the U.S. It’s very gendered, and the associations that ride along with it are messages of softness, delicacy, fragility, innocence. I never fit into that picture of girlhood, and rejected it from a young age. In toy stores I recall being strongly turned off by the ‘pink’ aisle where Barbie dolls and all their accouterments are packaged in a particular bright fuchsia. Just do an internet image search for ‘Barbie Aisle’ and you’ll see for yourself.

A screenshot of a google image search for "Pink Aisle" showing toystore aisles dominated by pink colors with products targeted at girls

A Google search for ‘Barbie Aisle’ shows toy store sections with products targeted at girls.

Then there are the Victoria’s Secret clothes and intimates emblazoned with the word 'pink,’ which I long thought of simply as their way of trying to co-opt the color for their brand. Then a male friend revealed to me that ‘pink’ is also slang for lady parts in a lot of cultures, and now I can’t get that out of my head when I see a pre-teen with ‘PINK’ across her rear. The color is sexualized AND gendered.

‘Pink’ can also refer to the body in terms of more, ahem, internal parts— organs and tissues. Depending on context and shape, it can suggest a feeling of squeamishness or rawness. Yet pink is also officially a color of love and romance. Lots of intriguingly opposing and loaded meanings to mine with this one.

I know, maybe that’s making too much of it, and a color is just a color. It IS, of course, just a color. But meaning is something everyone reads into, one way or another, based on one’s own lived experiences. Heck, ever heard of ‘rose-colored glasses?’

Yes, this is a hole cut and stitched into a wool panel, with slight pink color coming from reflections of the bright pink color applied to the back side.

So. I’m fully embracing that my use of the color pink will be interpreted in myriad ways, especially given that I tend to take forms from organic sources of bodies, undersea creatures and plant life to name a few. Heck, what I thought of as a simple first foray into seeing how reflected pink through an opening in a sculptural surface might change the color of the wall behind the art yielded a lot of comments about how sexual my work is. Here’s a video, if you want to see me show the backside (and read some comments; I do in fact delete the overly foul and crass ones when I catch them from what is MY posting, after all).


Internet trolls aside, I am finally in a place (thank you, 40’s) to not care so much what people read into the things I create ESPECIALLY when it comes to suggestions of a sexual nature, which is a triumph considering that I grew up in an atmosphere of Catholic guilt and discomfort around all things sex-related. What you see is partly on me, partly on you, for good or bad or however you interpret it. Neither of us lives in a vacuum. If my color choice layered with my chosen forms makes you think of sex, so be it.


But I digressed a bit. Here’s the other thing about me and rules: I broke another one I didn’t now I had, and it’s related to the color. I USED SPRAY PAINT. There. I admit that I used chemically, fakey, totally un-organic fluorescent pink spray paint to achieve the overly bright pink color I deemed necessary to get the reflected color I wanted. It went against my instincts as far as materials go; I love that most of the things I work with are tactile and, well, wholesome and satisfying in a way that spray paint… really isn’t. But as an artist I’m also a problem-solver, and using a layer of super-intense color over flat pieces of felt seemed like the best way to achieve the effect I wanted in this vein.

The back side of component parts of various ‘Pinkness Study’ sculptures as they receive their coating of fluorescent spray paint.

And I have to say I’m glad I did. Despite the off-putting crunchy coated texture (which really doesn’t affect the experience of the work as a whole, just the experience of its creation), the sprayed pink worked out as I hoped. Figuring out the optics of capturing light through the sculpted shape to better reflect the color has been another whole issue. I’ll share some stories from that in the future.

So, there you have it. Breaking the rules (even if you’re the one who made them) can be a really good way to stretch creatively. I’m curious to see what this experiment will lead to in my practice. I may have purchased some neon pink dyed wool to play with…shhhh.

Finally, the visual effect of these sculptures varies greatly depending on the lighting situation. Below are four slightly different situations, but you can also view some videos that show how the works change depending on their surroundings: here’s one with the drama of direct sunshine, and here’s one cycling through lighting conditions as I photographed them in my hallway with only skylights, hallway lights, and an LED light in different combinations.

If you’ve got to have one, available Pinkness Studies are available in my online shop.

Different combinations of light yield different effects, both in how saturated the pink color is, and the sculptural look of the pieces.

I think of experimenting as playing with an extra dose of attention. Now, back to the studio…

Why Wool Drawings Part 1: What's In It For The Artist?

Applying wool fibers to paper by anchoring them through the surface is an unusual means to make marks, to be sure. Instead of pigment I’m using different colored fibers arranged in dense or loosely concentrated areas to create a value scale and linear patterns. What’s in it for me, as the artist? Why make drawings out of wool? What’s the big deal about this process?

To begin from the making side, these kinds of drawings are incredibly satisfying to create in and of themselves, and not just due to my delight in coming up with the technique.  Back in 2007 I was needle felting cream-colored wool into three dimensional shapes and had wool on the brain all the time-- so when I saw my own long dark hairs swirled into a pattern on tiles in the shower one day (don’t worry, I always clean them up!), it occurred to me that perhaps I could work with dark-colored wool in two dimensions like a drawing. 

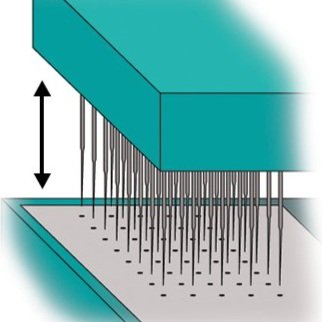
First I thought about adhering wool fibers to paper by spraying fixative, or arranging them in some liquid medium that would harden, but since I was constantly using felting needles I decided to try poking wool through paper. A felting needle has tiny notches cut along its shaft that catches fibers and pushes them to rub against and tangle with their neighbors-- that’s how wool can be matted mechanically into felt.

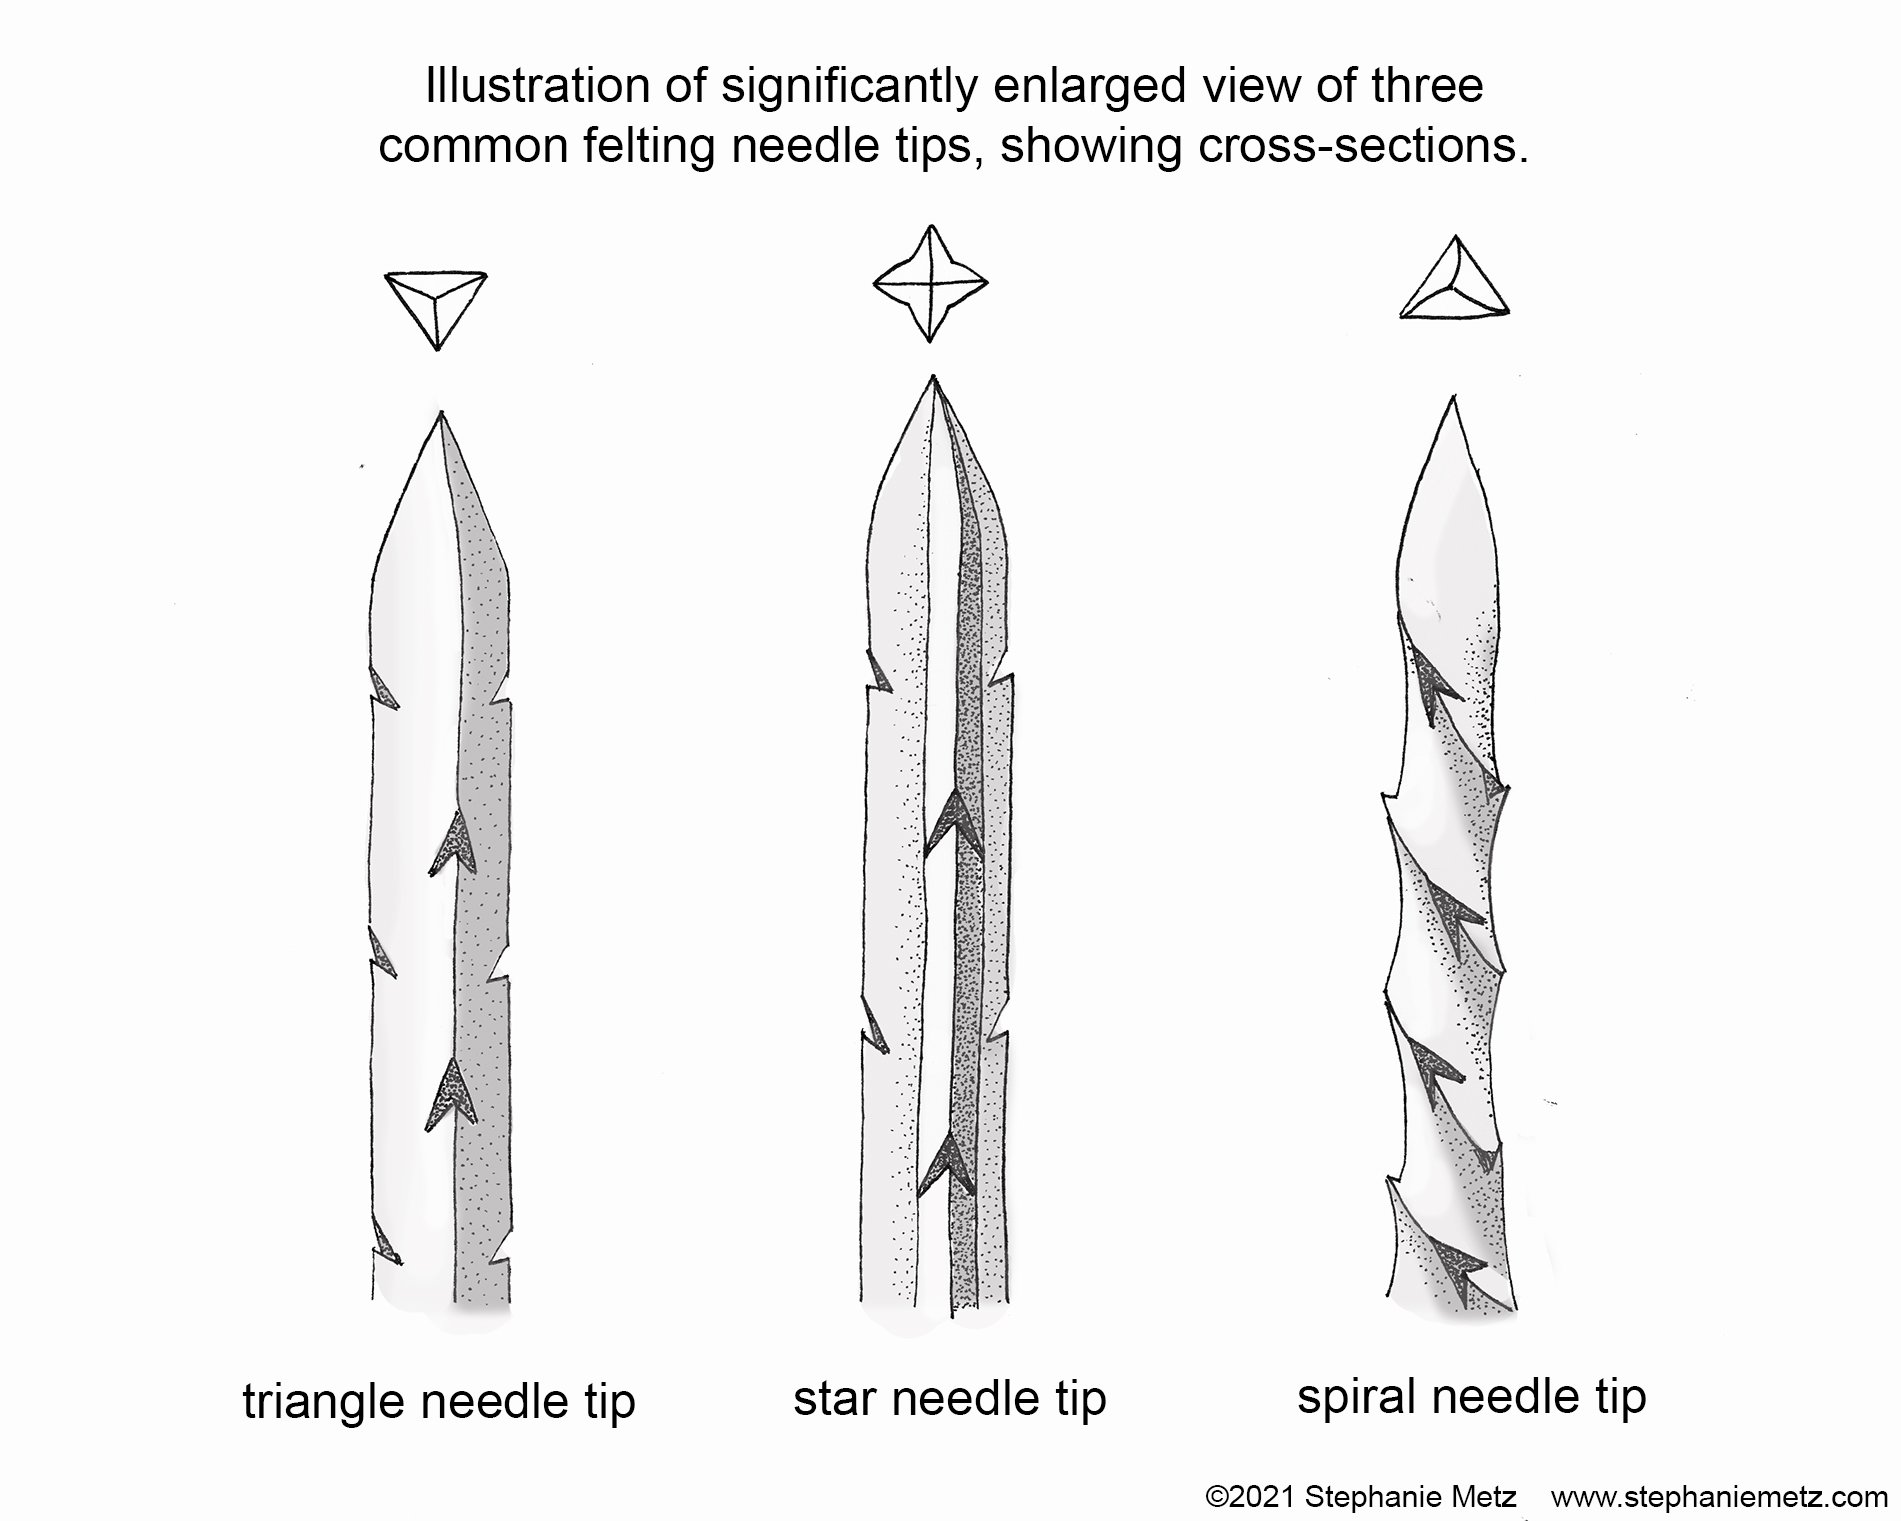
Close-up view of a felting needle, showing the notches cut along its shaft. This is why one can push fibers into and through surfaces— the fibers catch on those notches when the needle moves forwards, then they stay as the needle is pulled backwards.

I would usually have a piece of foam rubber under my felt sculpture as I worked since sometimes the needle pokes through wool and I don't like to stab myself or break a needle on a hard table. I figured I could try the same approach. I laid a piece of thick cotton-heavy printmaking paper over a foam piece and tried using a single felting needle to create an outline and then poke wool through to anchor in the foam.

Laying a piece of thick printmaking paper (I use BFK Rives) over my work surface, a foam sheet meant for packaging.

I found I could push about half of the length of fibers through the paper so some was arranged on the front of the paper, almost like stitches. I could lay out an area of fibers and poke at them to anchor some of the tangle, or make an outline of holes first, then gently drag fibers sideways towards the holes and poke them through with the needle.

A line drawing of a cat made by pushing wool fibers through paper to create its outline.

I pre-poke my outlining holes, then carefully pull the fiber across the paper until I am ready to push it down through a hole.

When I tried to pick the paper up when done I had to carefully peel it away from the foam pad, pulling the back half of the fibers free so they projected out the rear of the paper.

Drawing of a cat rendered in black wool fibers pushed through paper by artist Stephanie Metz

The finished cat drawing, from the front- showing the linear and shaded effects.

The back side of the paper shows the fibers that were anchored temporarily into the pink foam.

It took a lot of trial, error, and practice to get a feel for how to effectively needle felt through paper. I had to learn how much fiber to ‘feed out’ onto the paper and how much of it to push through-- too much and the wispy fibers would disappear entirely from the front! I learned that I could add on more fiber in multiple layers for dark areas, and that I could pull it back out as well if there was too much density. I figured out how to apply thin, spread-out tangles of fiber, anchored in only a few areas, for lighter effects where more of the white paper showed through.

Closeup showing lines and shaded areas— made up of different concentrations of fiber across the surface. One poke too many might push too much fiber through, leaving too much white showing. It takes a careful hand and a lot of practice.

I couldn’t ‘un-poke’ a hole, of course, so I had to use care not to make too many where they’d be very visible in thinly covered areas. I learned that too many holes too close together would break apart the paper and destroy the piece. 


At first I worried about the fact that the fiber could be tugged back out again, the drawing effectively removed. I tried spraying fixative on the back, on the front, on both sides… but it gave a strange sticky sheen to the fiber and stained the paper. In truth the untreated fibers didn’t just fall out on their own or with a casual touch, they had to be deliberately pulled out. So I decided not to use any gluey treatment, instead to consider it like a pencil drawing: you COULD erase it, if you really wanted to. But it wouldn’t erase itself. 

The process of poking fibers through paper is gratifying. The physical sensation and sound of a light, crisp ‘crunch’ as the needle pokes through the paper into the foam, the satisfaction in aligning fibers where I want them, and way I can deftly create shadows by layering darker fiber to achieve subtle effects all make me eager to be in the studio.

Working on a wool drawing while listening to an audiobook— a great way to spend hours of my life. Truly!

Making wool drawings requires practice, finesse, and a lot of patience-- worth it since both the process and results are rewarding to me. But what’s in it for the viewer? How could my particular process have an effect on an audience? Read on for Part 2: What’s in it for the Viewer?

Why Wool Drawings Part 2: What's In It For The Viewer?

Why might drawings made out of wool fibers matter for the viewer? The short answer is that wool drawings practically compel further interest from viewers once they take a moment to look. I’m referring to more than my subject matter- which could be a mysterious organic form borrowing parts from the natural world, or a fairly straightforward depiction of an animal. I hope to present a compelling subject, of course, but also the medium itself is novel and intriguing.  

What appears to be an image made with charcoal, ink or paint from far away reveals its true nature to those who get close enough to see the fine fibers standing out from the paper.  And then the whole thing is considered anew.

A wool drawing calls fresh attention to itself, the subject depicted, and even the ‘hand of the artist,’ in making the work. ‘Multiple levels of engagement’ is a dry way to refer to the experience of wonder. And that’s not something to take lightly. 

It reminds me of reading the caption under an early Picasso painting in a book I recall from my teenage years. The unfinished portrait had areas of sketched lines on raw canvas suggesting the yet-to-be-painted body as well as the nearly completed realistic face. I can’t recall which specific painting, but it was like this one:

Pablo Picasso, ‘Arlequin’, 1923. Note how the body is drawn and shaded, but the face and head are more finished.

The actual artwork doesn’t matter, the important part was that the caption expressed wonder at the fact that such a painting could be both a surface and a window at the same time-- the viewer could acknowledge both the marks made by a human (on a surface) AND the illusion of the thing our brain and eyes recognize (like looking at the subject through a window).

This was noteworthy because it was emphatically not news to me. I remember it to this day because even as a teenager I had always approached art as a maker, not just a viewer, and took for granted the surface/window duality. My mom recalls me drawing horses running off the picture plane at five years old. I had never considered that it might be novel to consider both the marks made as well as the object depicted, or that it might be unusual to move freely back and forth between the two.  

It’s not something I take for granted now. In fact, I think the surface/window duality is a huge part of why looking at art makes me feel connected to other humans across time and space. Paying attention to the artwork as an object in itself and something created by human hands grounds me in the reality that we are all just people here, living out our different lives and sometimes recording those things that really move us or intrigue us or obsess us.

Paleolithic cave painting that truly shows the hand of the artists…

When I was in college I took a marble carving workshop and learned how difficult it is to use the right amount of force to break off the area you want without leaving a white spot that goes deep into the stone. And then I got to see Michelangelo’s unfinished ‘Slave’ sculptures in Florence and saw those same kind of marks left by an incredibly gifted yet still imperfect human. It was an experience that truly rocked my foundations as an artist.

Michelangelo, ‘Awakening Slave’ at the Accademia Gallery. In person you can more easily see the circular white marks left by the ‘point’ carving tool. Which makes it even more magnificent.

It makes me feel like part of a huge tapestry of humankind in a very direct way. That’s not something reserved for artists only, it’s something everyone can tap into. Even those familiar dismissals of ‘Oh, I could do that’ or ‘You call that art?’ are still threads leading into that great woven story because they acknowledge that a human being took the time and effort to make a thing. I do acknowledge that I personally favor the kind of artwork that reveals its own process to some extent-- the more hand-made, imperfect kind of creations. Here are some of my favorites:

 But there’s also a making story and human action behind art where you can’t clearly intuit how it was made, whether it’s highly polished chrome, ultra-smooth canvases, and even 3D-printed objects. Here are some noteworthy ones in that category:

For me, using wool fibers as a drawing medium is a way to call attention to the surface/window effect. Using an unusual and surprising method of making art is perhaps a shortcut, even a cheat. But who exactly is making the rules? My goal as an artist is to engage, to try to create that sensation of wonder and connection with the other humans who may someday see the things I created. Using wool as a means to record and share my own amazement at the world is a joyful, satisfying process that has the added benefit of being novel and interesting.

And what does the viewer get out of a wool drawing? A direct line into the surface/window effect, and a direct line into a connection with the human being on the other end. It may be brief; it may be inconsequential; it may be appreciative; it may be dismissive. It also may be a lifeline; it may be a reminder that we’re all in this together. 

Or, in the words of poet Mary Oliver: 

‘Instructions for living a life: 

Pay attention.

Be astonished.

Tell about it.’

Answering Questions About Creativity: Being a Sentient Sponge
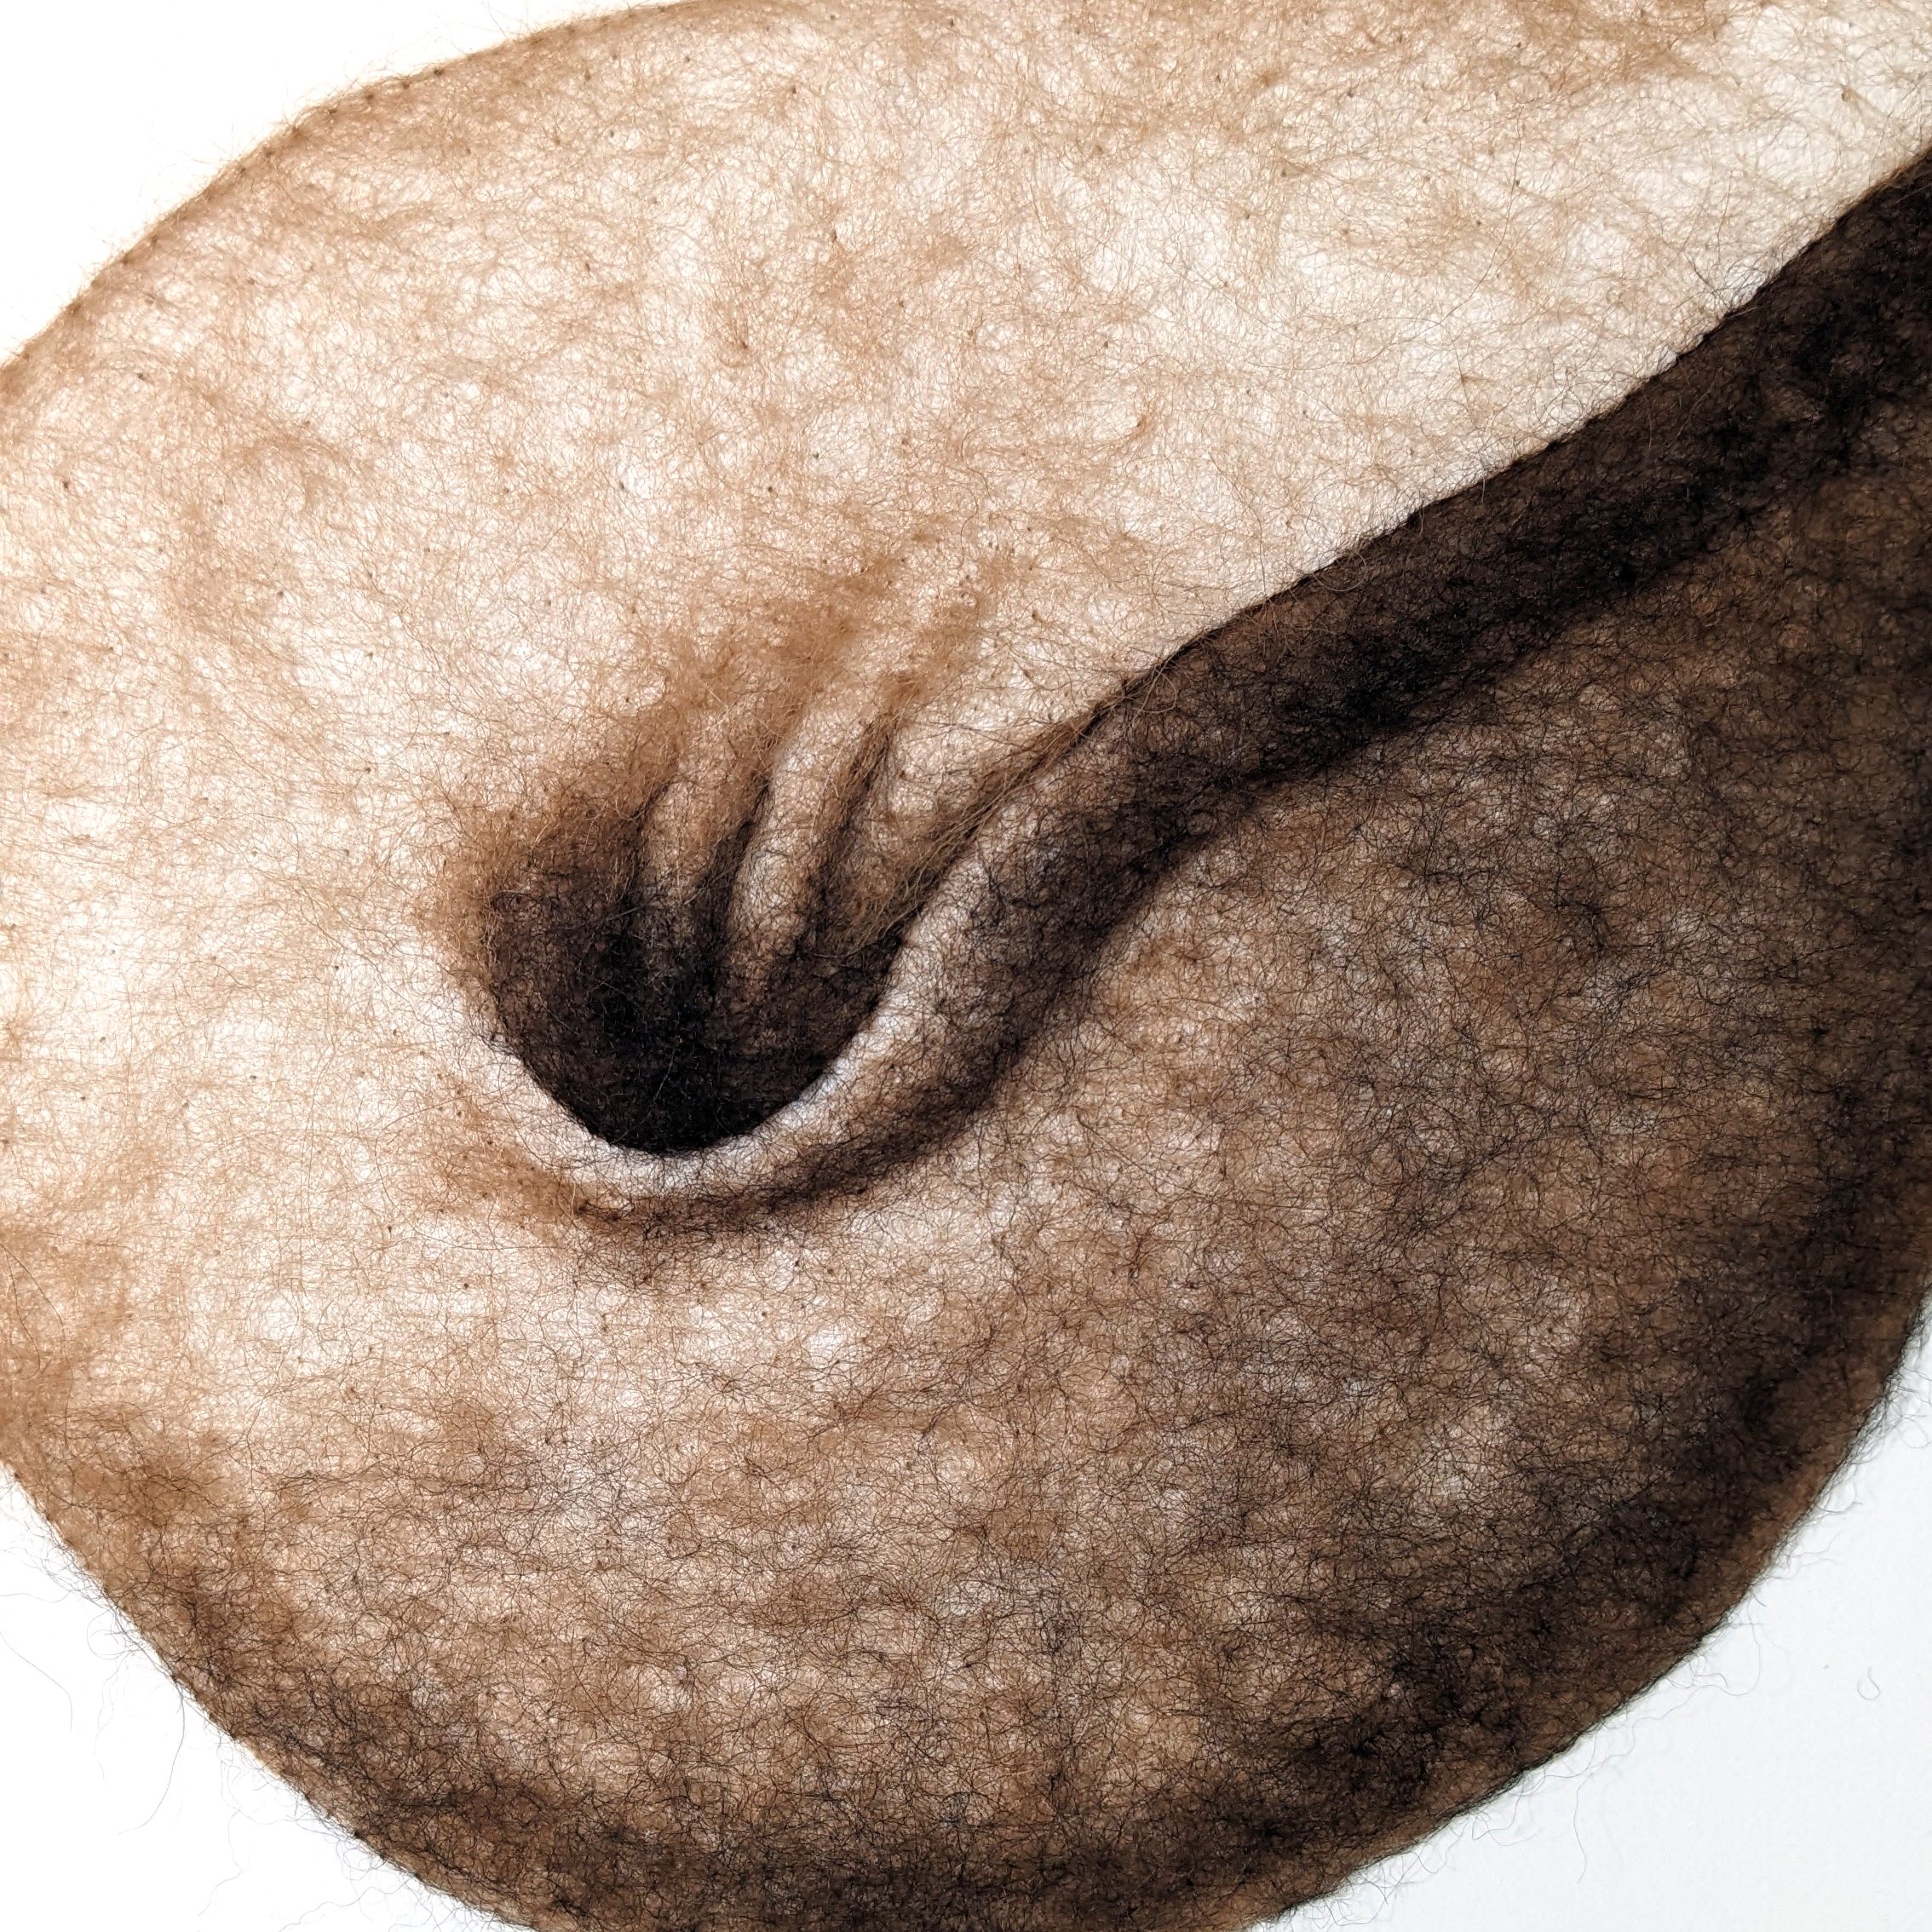
“So…you make weird and mysterious things. How do you decide what to make? How do you come up with original ideas? Who and what inspires you?”

I believe one of the characteristics of creative people is the tendency to notice what they notice-- to take note of the things that stand out and draw their attention. That’s the first step- being curious and engaged. Responding by remembering or writing or sketching or recording or photographing interesting things--whether they’re mundane or exceptional--is the next step. What’s mundane to others may be exceptional to YOU, after all.

images of geometry in plants: citrus fruits, rose hips, a squash, succulents.

A small selection of plant life observed on dog walks, in my garden, or out in the world. Daily life provides forms to imitate, sometimes quite directly.

But creativity truly grows from the act of making connections between all those hoarded snippets of noticing and seeing how they might play out. Creativity is exploring what it would look like or sound like or feel like to recombine or substitute or capture or emphasize things, or simply to recreate something in a particular process or instrument or movement or material, depending on your discipline. For me, materials are a real entry point. Thick industrial felt, for example, is quite mundane and theoretically boring, yet it can be cut into patterns and stitched together to embody a sense of fullness, solidity, and weight— despite being lightweight.

A sketchbook page showing ideas for organic/geometric forms, paired with completed ‘Holdable’ sculptures made of stitched industrial felt, measuring approximately 3 feet wide each.

It’s like being a sentient sponge as you go through life-- soaking up interesting things without prejudging precisely what you’ll do with them.

So how do I decide what to make to squeeze out the results of the sponging?

I trust my excitement.

By now I have a huge library of ‘interesting things’ in my sketchbooks, in my phone’s camera roll, and in my head. If there’s something that sparks excitement, I trust that it’s something I should address through my materials. 

I recently found this strange citrus fruit while walking my dog, and couldn’t stop looking at its wormy surface pattern. Trying to figure it out (and how light and shadow might communicate and define those structures) inspired one of my still-in-process Objects of Intrigue wool drawings.

Trust in oneself is key to coming up with original ideas. An original idea is by definition something different and new, and it can be intimidating to make something that veers from what already exists, much less show it to the judgment-filled wider world. 

Creativity requires trust because otherwise every new idea would be dismissed before it could come to any fruition. Trust that one’s own curiosity or reaction is worthwhile, even if (or especially if) it’s weird, offbeat, different or unusual. Trust that one’s unique lens of life experiences and accumulated (or newly acquired) skills are enough to start with. Trust that the road is more important than the destination, that uncertain outcomes are the only real certainty. Trust that ‘failures’ are in fact learning experiences. Trust that one’s own satisfaction in exploration is what matters, regardless of outside reactions.

In my own studio practice I’ve spent a lot of years indulging in playful experimentation and learning to trust myself. Twenty-some years in, following my interests and trusting myself have become habits. I know that I respond again and again to certain types of forms found on human and animal bodies and echoed in plant life and even geological features: full, swelling roundness, folds of flesh, sharp, clean edges that morph into smooth planes. There’s some sense of a life force, a potential for movement, or maybe simply a satisfying way my eye travels over such forms that feels valuable and important to me.

The folds of flesh on a snake I photographed at the California Academy of Sciences informed the physical logic of this snaky form I created out of needle felted wool. For me there’s a satisfaction in making something that makes sense to the human observer (at least in its believable physical qualities) regardless of meaning assigned or suggested by the artwork.

But not every experiment results in something wonderful, of course. Artmaking is like a journey where some directions are rewarding and branch into new highways, roads, and paths; but unless they visit my studio, the audience doesn’t necessarily see the dead ends, the cul-de-sacs, and the parking lots (to take another metaphor way too far). Happily there is still plenty to learn from a ‘failed’ experiment. 

I also stand on the shoulders of giants. Like so many other disciplines there are incredible people to learn from, both directly and by observation. There are approaches to mimic or reject, techniques to master or adapt, forms to admire and wish you’d made. Some of the artists who inspire me include Martin Puryear, Eva Hess, Georgia O’Keeffe, Louise Bourgeois, Ernesto Neto, and Lee Bontecou. I feel an affiliation with these artists because of the way they’ve manipulated inert materials to make them sing of different stages of life: fresh budding, maturation, and even decay.

Left to right, top row: Martin Puryear “Old Mole”; Louise Bourgeois “Cell XXVI (detail)”; Lee Bontecou, “Untitled 1962”. Left to right, bottom row: Ernesto Neto “The Malmö Experience”; Eva Hesse “Ringaround Arosie”; Georgia O’Keeffe “Shell”

So my weird and mysterious things-- sculpture and drawings-- are a combination and a distillation of the unique experiences and observations of my particular life. These are the squeezings of my sponge. Not everyone will appreciate what I make and some question if it’s even art, and that’s okay. I’m going to keep on soaking it all in anyway.

Objects of Intrigue: Starting A New Group of Wool Drawings

They say that the best way to achieve a goal is to make it measurable, tie it to a firm date, and share it with others to hold you accountable. I don’t do New Year’s Resolutions per se, but I do start out each year wanting to get into the studio more and make things. So you, dear reader, get to help me achieve my goal of creating a new body of work over the next six weeks simply by running your eyes over this write-up.

When I look back at my past year as a professional artist I’m also trying to plan what to focus on in the coming year. This is no different than most people in their business and personal lives, of course, but when I specify the ‘professional artist’ part it’s to make the point that I approach it as a business rather than a hobby, and that the sales of my work, teaching income, and presenter fees are the things that fund my artmaking. So when I’m evaluating past and future decisions it’s with two distinct but intertwined goals in mind: to grow and challenge myself creatively and to succeed financially by covering my expenses and paying myself.

Those two goals all begin with making art in the studio, but throughout the year there are myriad other activities to carry them forward that fall under the umbrella term ‘administration’- documentation, marketing, writing, shipping, presenting, fundraising, and communication. The end of the year wrap-up is focused heavily on the business side of my practice, and while it’s satisfying to tidy things up within a calendar year’s measurement, it always leaves me eager to get back into the studio, resolved to defend more hours there against the unending demands of administrative tasks. 

Going into this new year I am excited to have a few different bodies of work in development-- it feels like they lay coiled inside me, ready to spring out-- but I have to pace myself since I can’t do them all at once. If you’ve been following my work for any amount of time you’ll note that I dance around between a few different formats, yet they all have fiber in common: needle felting three-dimensional objects, stitching slabs of industrial felt, or ‘drawing’ with wool through paper. All of my processes take a good deal of specialized labor and a lot of time, as they are all one-of-a-kind and hand-made. I tend to work in series, creating a group of related artworks in a particular format before dancing back to another form of making. My approach keeps my excitement and curiosity stoked, and that’s something that I think comes through in my artmaking.

I love the problem-solving aspect of creating: figuring out how to make something in the real world that matches an idea, reaction, sensation in my brain, or answers a question about how things might look or work. My new favorite quote is “Happiness comes from solving problems”.*

So here’s a sneak peek at the first body of work I’m letting myself loose on: wool drawings of mysterious forms that I’m calling ‘Objects of Intrigue’. My sources for these images are drawings from my sketchbooks and reference photos that keep tugging at my imagination. In these works I borrow bits and pieces from existing biology and distill them into pleasing simplified forms: organic shapes that look interesting to touch and seem ready to move, change, grow, or expand and contract with breath. 

Unfamiliar with my invented technique of ‘wool drawing’? I’ve made a very brief video showing the process as a 60-second YouTube Short.

The drawings will all be 15 x 15 inches in size, and will be created using only light-brown Shetland sheep’s wool and black Alpaca wool poked through thick white printmaking paper. Layering light and dark fiber to create a deep three-dimensional effect is intensely satisfying for me, both in the process and the results. I hope that for the viewer the intrigue of nearly-familiar, almost-recognizable objects rendered in wool will also spark curiosity and satisfaction.

I’ll share images and videos of the process and finished works as I go, but the drawings themselves won’t be available for purchase until Friday, March 3rd. I have made three so far, and my goal is to have twelve drawings completed by that time. Stay tuned for more updates, and thanks for being complicit in ensuring ample studio time through my publicly stated goal-setting!

* “Happiness comes from problem solving” is quoted from Mark Manson’s book “The Subtle Art of Not Giving A #%^!”

The Person Behind the Art: Summer Travel & Inspiration
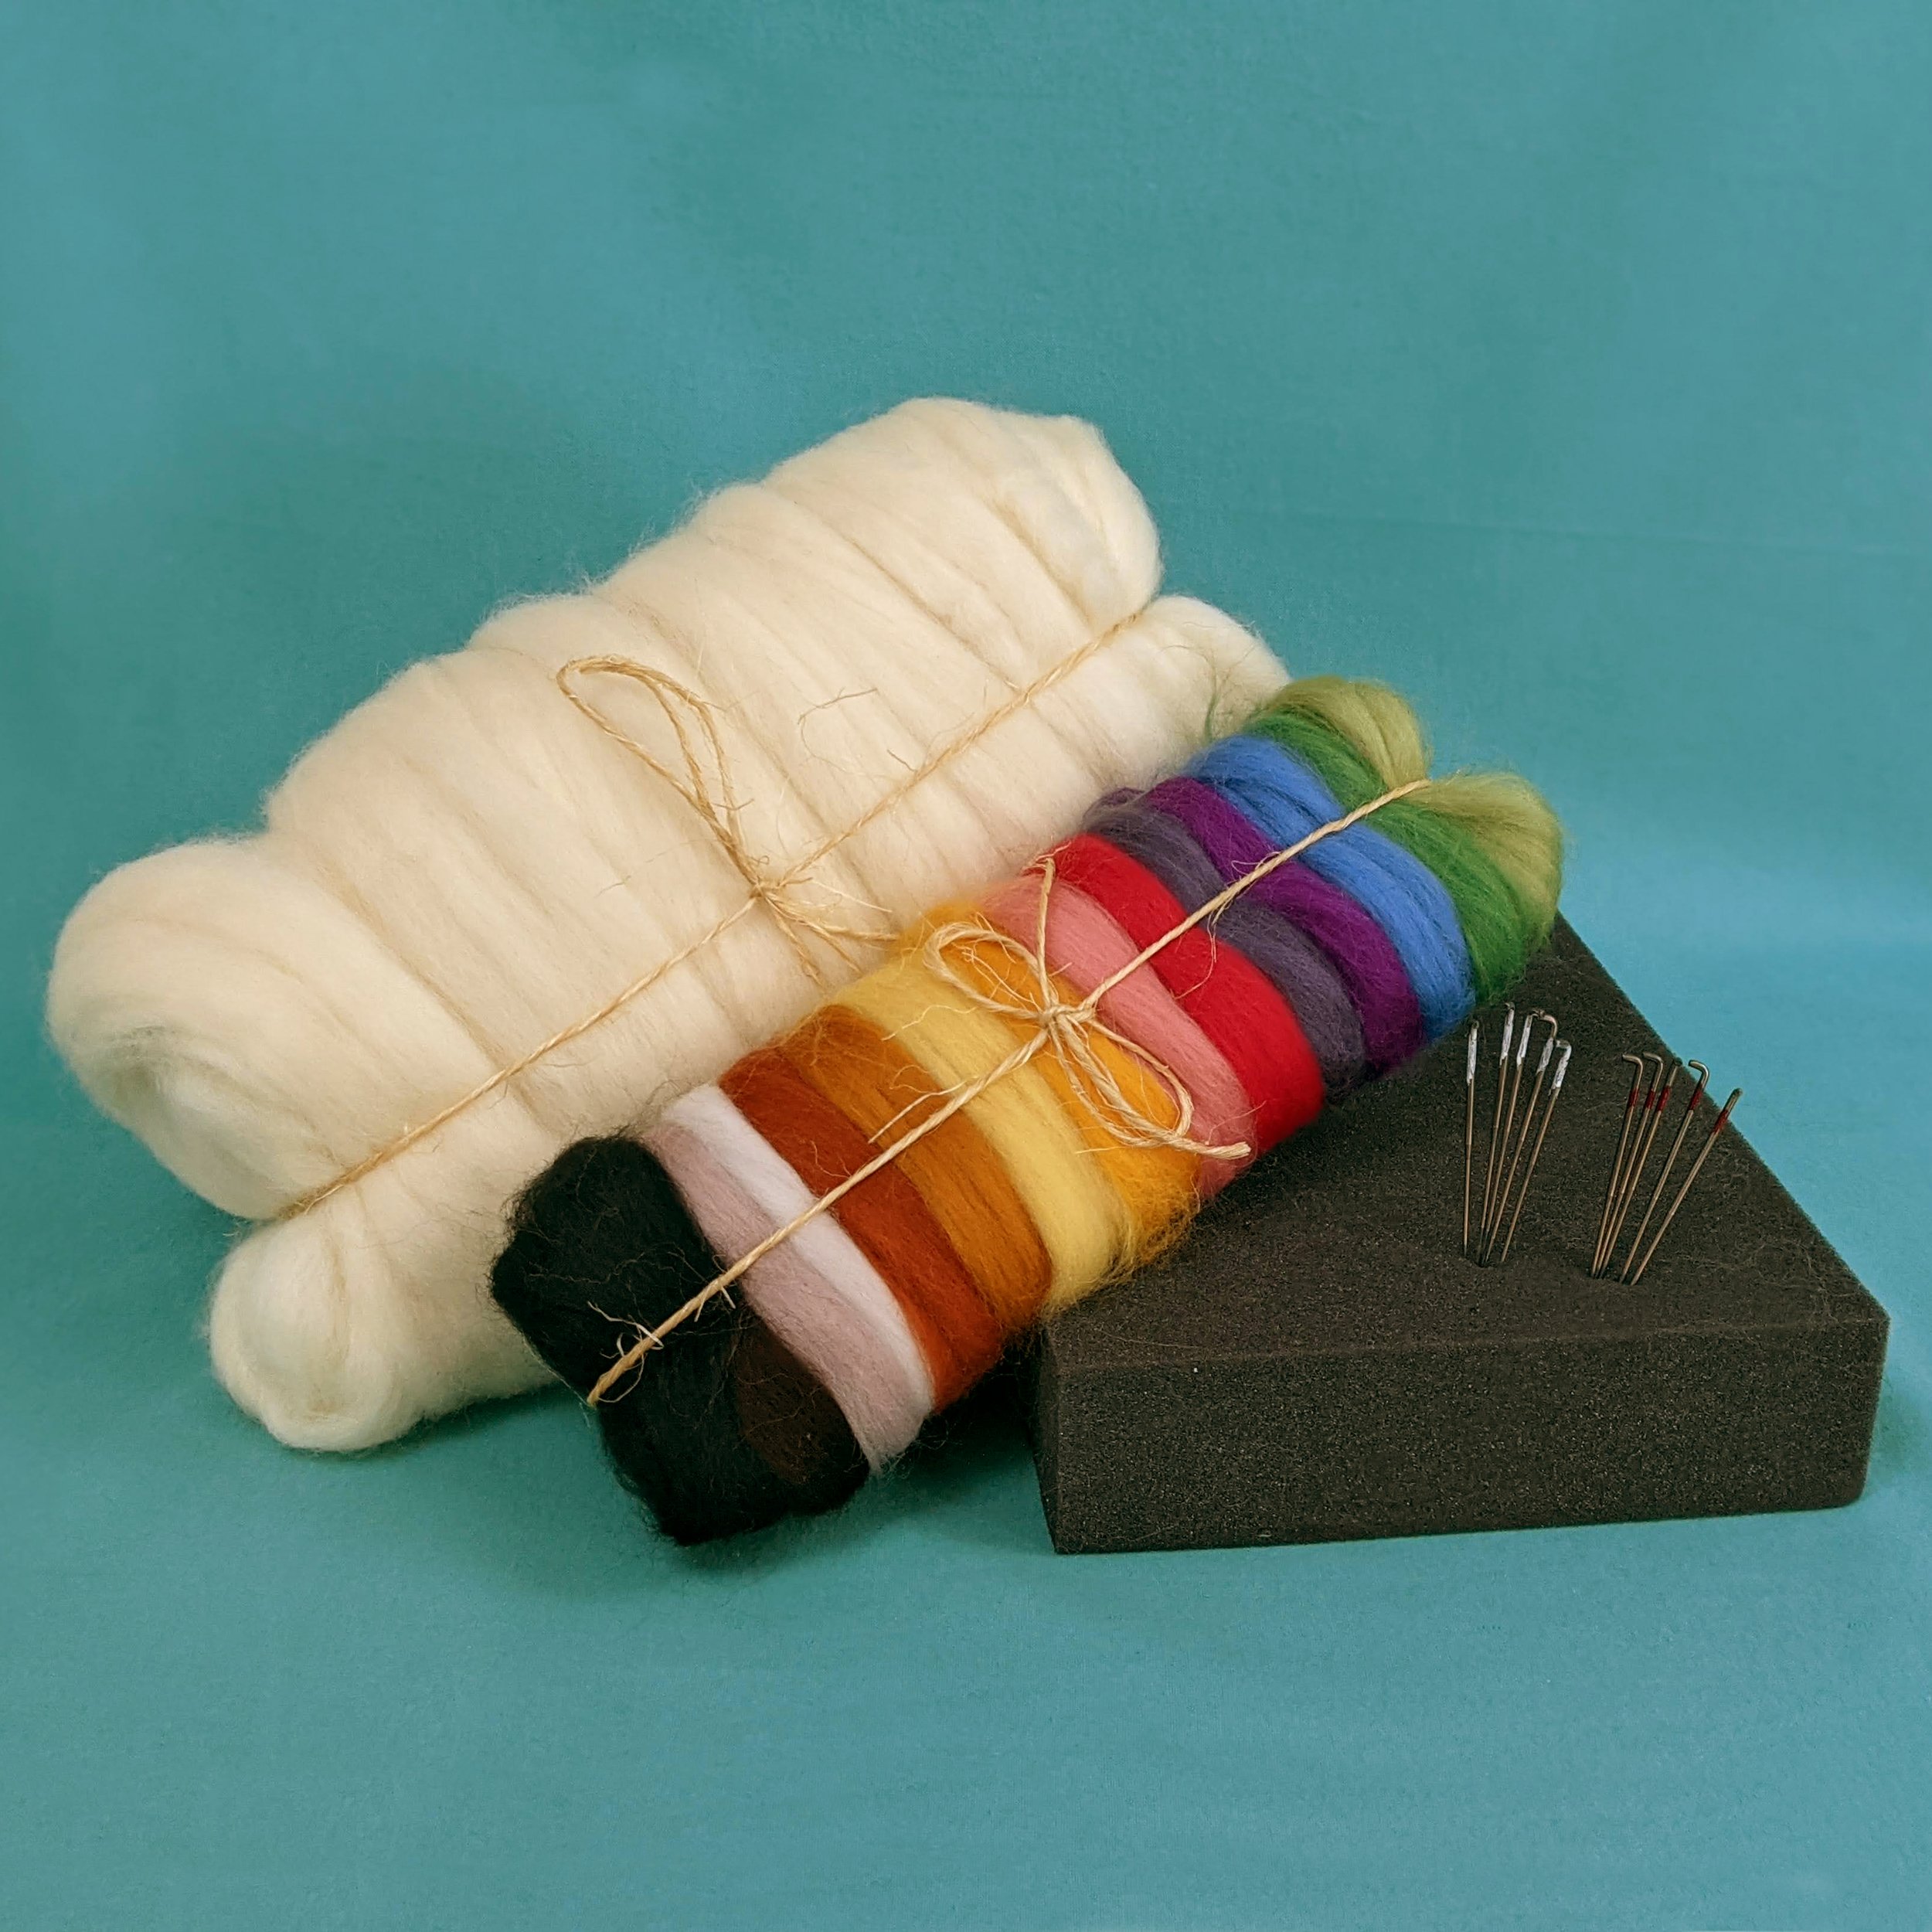
I’m a professional visual artist trying to get my work seen in the world, but I’m also a private person negotiating the amount of me that I share with that world. My life experiences and unique outlook clearly play into the sculpture I create; sometimes the line between inspiration and output is even clear and direct. I’m not consciously looking for material constantly, but by now I’m well accustomed to ‘paying attention to what I’m paying attention to’- a key feature of being an artist, I think. So I decided I’d share some photos from the summer vacation trip I just returned from with my family, with the idea that it will give a little insight into the things I notice, and why.

My family (myself and my husband Hayden and two sons, ages 15 and 12) embarked on a two-week vacation to visit family, see some sights, and give me the opportunity to see my work in a far-off museum and present a talk there in July. We did some sightseeing in Washington, D.C., spent a week at a gorgeous property on the eastern shore of Virginia with my extended family, toured around Boston, and then headed to Brattleboro, Vermont to see ‘Felt Experience’ at the Brattleboro Museum & Art Center, where I delivered a presentation about the creation of my touchable felt sculpture. Here are a few highlights and glimpses into my brain.

Museums in the Capitol

First: the spy pigeon. If you know me (or my work) at all, you know I’m intrigued by pigeons, particularly fancy ones. When we toured the International Spy Museum in D.C. this specimen caught my eye and my imagination. The taxidermied pigeon with bulky camera strapped to its chest felt so poignant— I imagined the hope and trials of the humans who developed the technology as well as the care and training of a multitude of precious and yet disposable birds. Did you know pigeons have earned more medals of honor than any other animal? The stuffed creature itself seemed rather ridiculous- but it was early in the museum, in the gadget section that seemed to take a page out of Hollywood. Only later did I reconsider the way I characterized the pigeons more or less as tools— after reading through the stories of everyday people as well as professional spies who gathered and transferred little scraps of information to put together a big picture that might save their loved ones in exchange for their individual human lives.

A taxidermy pigeon with a black camera strapped to its breast at the International Spy Museum.

Besides the spy museum we also spent time at several of the Smithsonians. I was impressed by the National Museum of American History’s display ‘Girlhood (It’s Complicated)’ — it’s about time the often-minimized but common experiences of half of the population gets straightforward treatment in a public museum. I even learned some new euphemisms for periods! But after that refreshing experience I ended up feeling beaten down and depressed by the contrast between current events increasingly limiting individual freedoms versus the glowing displays about great strides made by women and other non-dominant humans over the last 80 years. We Americans are a work in progress.

The Museum of Natural History was an overwhelming treat; one could spend weeks there, if one were not responsible for a 12-year-old whose cup of natural history was full after a scant 2 hours. Regardless, I saw some great specimens just made for replicating in other materials, like this starfish whose actual name I neglected to note:

Close-up view of a dried and wrinkled starfish from the collection at the National Museum of Natural History.

I pride myself on knowing a lot about animals, but I learned something new: that rabbits eat, poop a particular kind of poop, eat that poop to maximize the nutrients they get from it, and then poop it out a final time. Kind of like cows, but without the handy internal system of multiple stomachs. I didn’t take a photo, though. I also learned that my older son is now utterly fascinated with gems and minerals— he took perhaps 75 photos of gorgeous and colorful formations which he showed me while we waited in line to see Yayoi Kusama’s exhibition at the Hirshhorn Museum. Her immersive infinity rooms were almost too easy to love, and I nearly tried to resist the delight they delivered. Then I gave in. The all-encompassing use of mirrors and repeated objects is the kind of thing where it seems so obvious once it exists but, like so much of art, it takes someone to show you something before you can imagine it.

A woman and boy stand inside an infinity room with mirrored walls reflecting them, and a multitude of white and red polka-dotted fabric forms by artist Yayoi Kusama at the Hirshhorn Museum.
A panoramic image of a darkened room lined with reflective mirrors to form an infinity room, with black and multi-colored lit-up paper lanterns creating a rainbow of reflections at a Yayoi Kusama exhibit at the Hirshhorn Museum.

I’m not including photos of the major memorials along the National Mall; they were somewhat moving to see in person, but didn’t capture my imagination after such familiarity. Instead, a final stop museum-wise, and one of my all-time favorites: the Renwick Gallery, which features contemporary craft and decorative art. I took a ton of photos, but here are just a few standouts: first, Large Silver Globe by Rick Dillingham— hand built in clay, fired, purposefully broken, glazed, and reassembled. I love the perfect imperfection, and his quote: “no one is a master of ceramic arts, it’s just a matter of how much you can cooperate with the elements at the time.”

A wide, squat, white and silver ceramic vase crisscrossed with cracks, where each section is patterned differently. Titled Large Silver Globe,  by artist Rick Dillingham at the Renwick Gallery.

Next up, a wood piece by Connie Mississippi called ‘Midnight Mountain,’ which somehow included use of a lathe to shape laminated layers of dyed birchwood. The shapes achieved really resonated with me. Here’s an overall and a detail view (it’s about 20 inches across):

A purple flower-like sculpture carved out of layered wood, named Midnight Mountain by artist Connie Mississippi.
detail of A purple flower-like form carved out of layered wood, named Midnight Mountain by artist Connie Mississippi

And this neon piece blinking on and off and filling the room with its pink glow was quite moving as well; it’s by Alicia Eggert:

A neon sculpture consisting of pink illuminated words spelling out "This Moment Used to be the Future" by Alicia Eggert at the Renwick Gallery.
A neon sculpture consisting of pink illuminated words spelling out "This Present Moment Used to be the Unimaginable Future" by Alicia Eggert at the Renwick Gallery.

The ostensible purpose of our visit to D.C. was to expose our boys to the nation’s capitol- since we were going to be so close by anyway. That achievement was unlocked, although it will probably feel more pertinent to them personally as they study different topics at school and take in more of the world.

Family Reconnections/Looking at Things

Our main impetus for traveling to the East Coast was to have an extended visit with H’s extended family; his parents celebrated their 50th anniversary and wanted to get their kids and grandkids together in one place. It was truly a pleasure to interact in person rather than via a grid of faces on a screen interrupting each other. A lush and expansive property on the eastern shore of Virginia near Cape Charles was the site for a week of relaxation, exploration, board games, and reconnecting with cousins.

The Laughing King property in Cape Charles Virginia, A large house with screened in porch and separate tiny house surrounded by green lawn and trees, photographed at dusk.

The Laughing King consists of a huge main house with 5 bedrooms, a separate tiny house, and an airstream trailer right on the shore of the Chesapeake Bay. I can highly recommend it. My family is made up of introverts, extroverts, and everything in between- so staying at the same place allowed us to be together and separate when desired.

Three boys walking out on a dock leading out to an expanse of water, with sandy, grassy shore nearby and paddleboards laying on the beach at Cape Charles, Virginia.

I spent a lot of time looking at things while walking on exposed low-tide sandbars and wading through the shallow, warm bay: conch shells, horseshoe crabs, blue crabs, and even cow-nose rays that would slowly flap through the waters nearby, seemingly curious but shy. I find that looking at interesting things is even more satisfying when you can point them out to other people who are also curious. I sketched some of the more interesting skeletonized shells to take note of their swoops and structure for later. Drawing is always so much more informative for me than photos because I’m forced to look very carefully in order to understand, and the physical act of drawing seems to work information right into my bones.

We ended the week on a screened-in-porch as the warm air whipped around us, watching lighting white out the sky as thunder rumbled and branches flew down from a nearby tree. One bolt zigzagged all the way down to the water where it ended in an orange crackling burst and everyone shouted with mingled glee, awe, and some healthy respect for nature.

Boston

Our nuclear family proceeded to Boston for another chance to show the boys some interesting historical places. They were particularly taken by the blend of very old and fairly new architecture. We took a hop on/hop off bus tour to make the most of only one day in the city. My elder son who, let it be noted, likes shiny and sparkly things, took lots of photos of the various gold domes from different vantage points, so I took a series of photos of him taking those photos. I’ll spare you entire collection, as this sums it up:

A boy taking a photograph of the gold dome at the top of the Massachusetts State House in Boston.

My kids are at the age that their senses of humor are pretty sophisticated— there’s lots of banter and wordplay— and so we can all appreciate some ridiculously delightful (and helpful?) use of language. Here’s one that will continue to find its way into conversations for years to come, as seen on the exterior of the elevator in our hotel:

When I’m traveling I often find myself speculatively reframing my life against different backdrops: what would it be like, what would I be like, living in this city, or in this rural area, in this kind of weather, in this kind of energy and population? I remind myself that it’s an incredibly brief snapshot into that mysterious what if, and it never hurts when the atmosphere conspires with temperature, color, and lighting to make you rethink the dry, yellow heat of your home turf. I will say I was overwhelmed by the amount of green the filled my eyes on the east coast, and I wished I could carry that with me back to California. Below is the Longfellow Bridge at sunset.

Sunset photograph of the lit up Longfellow Bridge in Boston showing blue lights decorating the arches under the bridge.


Brattleboro Whirlwind

The final stop on our trip was Brattleboro, Vermont- home to the Brattleboro Museum & Art Center, where six of my InTouch Hanging Pods are in residence until October as part of the exhibition ‘Felt Experience.’ Once we knew we’d be traveling to the other side of the country for our family week in Virginia, I raised the question of including a museum visit as well, and thus the Boston stop was added in with a three-hour drive to Vermont for an overnight. Sweetening the deal was the fact that my sister who lives on the East Coast made the drive to join us, so I got to see her, her two young daughters, and my other niece who was visiting them as well. As brief as it was, it was truly a treat.

If you’ve seen me speak (or seen my recorded documentary about the making of InTouch) you’ll know that I’m pretty enthusiastic about what I do, and I enjoy sharing the stories of what goes into making new weird things with strangers helping you. So I was excited to do a presentation at the museum, and curious to have my family members in the audience for the first time. Although they know I wear a ‘professional hat,’ they don’t often see me perform it— and I was particularly gratified when my younger son expressed his legitimate admiration. It’s not something you get from your tween every day. I’m honored that people WANT to hear what I have to say, and so grateful to hear that they’ve been following my work for years and drove quite a distance to see me. It’s moving to find that the things I create can connect me with supportive strangers. It makes the world feel smaller and more friendly.

A room of people sitting in chairs looking at a screen in the front of the room with an image showing a boy and a man working on a white sculpture, while the speaker, artist Stephanie Metz, gestures towards the screen.

The museum itself is housed in what was formerly a train station, and its remarkable architecture works well for presenting artworks. I hoped that my touchable sculpture would be presented in other venues, but I hadn’t imagined such a perfect stage: the raised platform under a skylight used to be the ticketing area, and its window looks out onto New Hampshire across the Connecticut River.

Sculptor Stephanie Metz, a brunette woman in a dress, moves among human-sized cocoon-like hanging white felted wool sculptures.

BMAC does an excellent job at sharing and promoting its exhibitions, including complete installation shots and a virtual tour. And, fellow artists, it is a joy to work with the people there. At every step of the way they have been professional, helpful, prompt, and personable. I’ve been lucky to have had mostly highly positive interactions with exhibition venues over the years, but have recently been commiserating with a friend over her extremely poor treatment by an institution. So I’m taking this opportunity to truly appreciate and call out a great one that treats exhibiting artists well, produces strong exhibitions, and gets audiences in to see them!

‘Felt Experience’ highlights work in wool felt by five of us, and you can see images of the complete exhibition via the links above. But I want to share a few standout pieces. First is the underside of a sprawling organic form by Marjolein Dallinga. The form is huge and complex, then as you move ever closer you notice the tiny details of both her design and her craftsmanship. It may take someone who knows how to wet felt to fully appreciate her mastery, but I think even the uninitiated will be moved. And you should definitely watch her film of her work in natural surroundings and animated.

Next, an overall and then detail shot of Ruth Jeyaveeran’s work— to give you a proper sense of its presence. I’m realizing that the satisfying far away/close up nature of this work too is something that turns out to be a theme in this exhibition. Maybe it’s something about the nature of fiber and its textural qualities…

A large wall display of approximately 40 organically shaped felt sculptures reminiscent of horns, nautilus shells, and sea creatures attached to each other with string by artist Ruth Jeyaveeran.

Next up is one of Melissa Joseph’s painting-like pieces in which she lays out and then wet-felts images based on photographs. The movement, distortions, and blending of colors blurs the design, leaving a dreamlike impression not unlike childhood memories. Here’s a link to an interview she did with BMAC about her large-scale pieces based on views out an airplane window.

Finally, I’m delighted by Liam Lee’s needle-felted work, particularly (as a sculptor) his robust, curvy, organic, swelling chair pieces, intensely colored and extraordinarily crafted.

Two colorful felted wool chair-like sculptures by artist Liam Lee in front of his textile wall art in deep red, orange, and grey.

The Vermont stop was the final stage in my summer travel adventure; the next day we flew home with very few hiccups, reunited with our dog, and took a few days to get back into ‘normal’ life. Writing about and reviewing the trip in this medium highlights for me some of the best parts in terms of artmaking. I’m playing catch up with some of the administrative part of being away for two weeks, but part of my re-entry into regular life was to thoroughly clean my studio. After being in ‘observe and think’ mode for a while, I’m ready for ‘experiment and make’ time. Here’s a final photo to encapsulate the trip: a Hanging Pod hug.

A large white felted wool cocoon-like sculpture by Stephanie Metz is hugged by a small girl, but only her hands and feet show from behind the touchable sculpture.

Sculptural Needle Felting Kits: Materials, tools, and color to get you started

My online video-based masterclass is up and running, and getting good feedback from students. I refer to it as a ‘masterclass’ because it covers a LOT, including the materials and tools I prefer, and why. But it’s a remote learn-from-home class, so unlike my in-person workshops, I’m advising on tools and materials, not offering them. Until now.

In addition to making my recommendations and providing some sources, I’ve also taken some time to bulk order things and repackage them into manageable amounts for students. So you can order felting kits directly from my store that will get you started. Here’s what’s included:

  • 1 pound (16 oz) of natural white Corriedale wool. I use this for nearly everything. When people ask me ‘What core wool do you use?,’ this is it. It has a long natural length of the fiber (or ‘staple) and its’ a little wavy, and more coarse than the more familiar Merino wool, which makes it great for building up mass.

  • 1.5 oz of dyed Corriedale wool in 15 different colors. These small samples will be enough to add color over top of your creations, and if you need more you can get more through my source, GreatLakesFibers.

  • 5 medium (38 gauge) felting needles, which I use for nearly everything. I’ve marked their tops in red paint so you can tell them apart from the

  • 5 fine (40 gauge) felting needles, useful for tiny details, and marked on top with white paint.

  • and an 8 x 10 x 2 inch foam rubber work surface, which gives enough space (and two sides) to work on while protecting yourself and your table top.

A bundle of white wool, rainbow-colored wool, ten felting needles, and a dark grey foam rubber pad against a teal background

Contained in the kit: white roving, colorful roving, needles, and an foam pad.

The only thing missing as far as I’m concerned is a multi-needle tool— the handle that you can put felting needles into in order to use more than one— or just to make it easier on your hand. Pinching a single needle between your fingers and flexing your wrist to poke into wool a few thousand times is not great for your body. Using a needle holder— even just to hold one needle— changes the shape of your grip (the bigger the tool, the better for your grip) and tends to transfer some of the motion to your elbow and shoulder rather than just your wrist. You can watch a FREE section of my workshop all about tool use and choices on my YouTube Channel, here.

Happy Felting!

Assembling felting kits in my studio. Kits fit perfectly in US Post Office shipping boxes, a welcome bonus!

Why Do My Felting Needles Keep Breaking?

I’m back with another tool use tutorial. If you’ve been needle felting for any length of time you’ve likely broken a needle. Or two. Or a lot more. As strong as these steel tools are, they’re also surprisingly brittle at their tips. Whether that sharp little tip goes flying off into the carpet or embeds itself deep inside your project, a broken needle is frustrating. And there’s no repairing it, it’s a question of replacement. So how can you minimize the destruction of your tools and keep yourself and your surroundings safe from razor-sharp needle tips? First it’s worth taking a closer look at exactly why your felting needle is breaking in the first place.

Keep in mind that the felting needle was designed for a very specific function: to move precisely straight down with its tip sleeving into an awaiting hole several inches away, tangling any fibers in its path. That is to say, in an industrial setting the wool and other fibers fed into a felting machine are supported over a perforated base so the hundreds of felting needles mounted above can travel straight down through the fiber as the machine repeatedly lowers and raises them. Here’s a concept drawing of an industrial machine:

Illustration of an industrial felting machine with multiple needles arranged so their tips will sleeve into holes below.

I often describe the industrial felting machine as a mouth full of teeth chewing—except the glaring problem with that metaphor is that most of the time teeth are grinding and moving sideways—there’s a lot of motion in the jaw. Not true with a felting machine: felting needles are purpose-built to move ONLY up and down. They’re quite strong in that plane of motion—but any sideways pressure to the tip will snap it easily.

The short answer to why your felting needle keeps breaking is that you’re using it wrong. You are not using it like you’re a precise machine. You’re either applying sideways pressure to the tip, or you’re running it into something hard. 


So first of all, don’t beat yourself up about it. You’re NOT a machine! We’re adapting part of an industrial machine to hand use, and the element of chance that happens with hand work of any kind is going to always be a factor with this tool. 


But even given your basic humanity (yay- machine-made things can be so boring)- there are some ways to avoid breakage, and it mostly comes down to attention. Not to say that you’re inattentive when you’re needle felting—you have to be, to avoid stabbing yourself and to get the wool to move how you want it to.  But you have to train yourself to be aware in a few particular ways.


First of all, you need the needle to enter your mass of wool perpendicular to its surface (see the illustration below). That usually means manipulating and turning over the mass of felt you’re working on in concert with the motion and directionality of your tool-holding hand. This is increasingly important as your wool becomes increasingly densely felted as you proceed, because dense felt is firm enough to snap off a needle tip when the needle is plunged in or pulled out at an angle. I often see students trying to shape their felt by somehow turning a corner with the needle, which just plain doesn’t work. 


You need to develop muscle memory of doing it the right way—straight in and out, pushing in and pulling out far enough that the needle comes all the way out before you push it in again instead of dragging it sideways. This takes attention and practice, but you’ll eventually not need to think about it as much. 


Along the same vein, if you are using more than one needle in a multi-needle holder, you need to be sure that ALL of the needles are entering the fiber perpendicular to the surface you want to affect. Think about it: if your multi-needle holder allows you to position your needles ½ an inch apart, but you’re working on a sphere the size of a tennis ball, it’s possible that one of the two needles is not going in perpendicular. Here’s an illustration of what I mean and why that breaks your needle:

illustration of a felting needle holder with two needles being poked into a ball of wool felt; one needle enters straight in, but the other enters at an angle. Captions describe how the needles must enter the wool perpendicular to its surface.

So that means that you should be thoughtful about what I refer to as the ‘footprint’ of your multi-needle tool—the spacing of the needles where they come out of the tool. You need that footprint to work with the size of the object you’re working on. The smaller the sculpture, the smaller the overall footprint of needles:

Illustration of two felting needle tools; one with wide-set needles pokes into a broad sphere; the other with needles much closer together pokes into a small sphere.

Spread your needles out too far from each other when you’re working on something small, and the odds are that at least of your needles will not be going in straight, or will miss the piece entirely and hit something else. Like the tabletop.


Speaking of the tabletop, it’s probably made of a hard material. Breakage also occurs when the needle encounters something hard; with nowhere to go and continued momentum and force, the needle will bend and then snap. This hard, resisting object could be your tabletop, or a wire armature inside your sculpture. With armature wire it can be particularly difficult to avoid felting too close; the wire is, after all, inside the felt. Whether you’re entirely building up wool around said wire or cutting into a nearly finished limb to add in a wire and close the felt back up again, you’re going to probably hit that wire at some point. Again, attention is key- but so is some finesse. 

When you’re felting into something with a known hard element inside, use a single needle so you only have to keep track of one, and use a much lighter, looser grip on the needle holder, so when you DO inevitably get too close to the wire you’ll feel it and remove pressure without that fatal breakage. I do this a lot and, like all of this, it takes practice. I’ve definitely felt the needle flex but then withdrawn it before it breaks. It takes concentration to use delicacy.

Using attention, a single needle and a light touch will help you be aware of where the invisible wire is within your piece, and you can use that mental map to try to felt across or next to the wire from all sides, rather than straight into it. This will require turning over and manipulating your piece so you can work above and below and next to the wire, like this:

illustration of using a single felting needle to poke around the wire inside a bent felt tube, turning the whole thing over to attempt not to poke into the wire while keeping track of it.

I personally favor inserting armature wires AFTER much of the felting has been done; I use a sharp blade to cut a channel into the nearly-finished felt and then only need to patch and felt across that section. Wrapping fiber around wire from the start and then felting all around it just gives you more opportunities to hit the wire and break a needle. I go deeply into this with visuals in my video based master class Sculptural Needle Felting: The Comprehensive Guide (self-promotion alert! But hey, I am VERY proud of it and I’m getting great reviews from students).

My final bit of advice for avoiding breakage: manage your needles well when you’re not actively using them. Don’t let your needle holder go rolling across your desk and onto the floor- I know I’ve broken a few needles that way. Have a system in place to keep your needles and holders, even if that’s just a piece of foam to jam them into. 

Now go forth and be aware of your wickedly sharp but delicate tools. Needle felting is an excellent means to practice self-awareness and creativity at the same time.

If you have any other great advice for NOT breaking your needles, please comment!

Refilling the Well... the 2022 Yuma Symposium recap

I just returned from a speaking engagement at the Yuma Symposium in Arizona, where I presented a slide lecture and demo on my InTouch project. When I first submitted a proposal to speak at the event it was early 2020 and my show had opened 2 weeks earlier; ‘global pandemic’ was not something anyone was talking about yet. Despite the early closure of my exhibition and all the other immense changes we all went through between now and then, I’m pleased to say my presentation remains upbeat. Looking back at all that went into creating multiple, huge, touchable sculptures - with the hands-on help of community members— and looking ahead at the possibilities opening up as a result, I can’t help but focus on all the good stuff. And if it wasn’t already obvious, I like writing (and talking) about the things that excite me.

And that’s doubly true when I also get to be reinvigorated by other artists and all that they get excited about. The Yuma Symposium does that for me. In case somehow you haven’t heard of it, the Yuma Symposium is a three-day gathering by and for artists featuring demonstrations, lectures and slide presentations given by both internationally recognized and emerging artists who “have demonstrated unusual talent.” The founders and a good portion of the attendees have been at this for 43 years; instructors bring their students, some of whom go on to be teachers and/or practicing artists who come back to present on THEIR work. It’s a zany, welcoming, incredibly creative rotating cast of kindred spirits. I’ve gone six times now, and presented twice (with twelve years in between, particularly easy for me to track since my youngest son was just 5 months old when I dragged my whole family along so I could present; now he’s 12!)

In any case, it’s not something I can manage to get to every year, but every time I do it leaves me feeling full of new ideas, admiration for other artists, and eager to get back to the studio and play. It’s torturous that some of the talks are scheduled at the same time as another, so you have to choose between them. I was VERY happy with the ones I got to see, which is not to say that the ones I missed would not also have had the same effect. But here are the other speakers, with a little info on the presentations I attended:

From left to right: Motoko Furuhashi, Tybre Newcomer, Linda Ethier, Linda Christensen, me, Michael Nashef, Roz Ritter, Miguel Gómez-Ibáñez, and Claire Warden.

First up: Motoko Furuhashi, who blew me away with her clever and elegant approach to interacting with the environment around her, from ‘patching’ cracked asphalt with beautiful interventions, to ‘collecting date’ on a space by laying down packing tape along a route to pick up the detritus of life there, and then incorporating it into jewelry. You should take some time and explore the projects on her website, http://motokofuruhashi.com/

Next I saw a talk and demo by Tybre Newcomer, who is ostensibly a ceramic sculptor but is in fact one of those artists who has all sorts of highly developed skills in all sorts of media, and he’s clearly a gifted instructor (he teaches at Spokane Falls Community College). While his talk was partly about building his forms, it was also very much about taking good (better) care of one’s body as a sculptor— the tools and approaches that make a lot of sense— especially after a youth spent assuming his body could take whatever he threw at it. I think a lot of us in his audience found that message to be resonant. Things I learned: a hydraulic cart is a sound investment, and it’s worth looking at the long-ingrained processes particular to your medium to reassess if there are smarter ways to work. Plus it’s fun to watch clay be extruded- pressed into a long, thick, even ‘snake’ for coiling into the walls of his tall sculptures. See his work at https://tybrenewcomer.com/home.html

Michael Nashef is a sculptor, jeweler and designer whose enthusiasm and curiosity are clearly driving forces in his life and in his making. He came up through very traditional jewelry avenues before finding his voice, and his work is evidence of his rigorous engagement with materials and processes, combining hands-on ways to incorporate concrete into delicate, elegant jewelry (yes, jewelry) and 3D printing technology to physically and conceptually support his forms. And I was delighted to find that he’s the inventor of these fantastic saw blade and drill bit organizers I had seen for sale at Penland School of Crafts. See his work here: https://www.nashefdesigns.com/

Roz Ritter is a fiber artist with whom I’ve exhibited in the past; she ‘draws’ with textile, telling stories through the stitched line. Her work is delicate and strong at the same time- her concepts resonate and their execution is elegant. I found her work about aging (embroidering the lines on an oversized image of her own face) particularly moving— as an 80-year-old artist who only came to this over the past 40 or so years, she’s an inspiration. See her work here: http://www.rozritter.com/

The final speaker I saw was furniture maker Miguel Gómez-Ibáñez, who started out as an architect and, in his 40’s, discovered the joys of making things with his hands. I have to say I love the themes that kept coming up about figuring oneself out in one’s fourth decade— it feels so true. Anyway, Miguel’s talk highlighted North Bennet Street School in Boston, where he was introduced to woodworking and a true, supportive community of makers where generations are taught, among other things, the crafts of bookbinding, piano technology, violin making and repair, preservation carpentry, and more. If any of that sounds intriguing to you, check it out. Miguel’s incredible studio furniture can be seen here: https://www.craftinamerica.org/artist/miguel-gomez-ibanez

Sadly, I was yet again unable to be in two places as once, so I was not in the audience for the remaining three presenters. I heard excellent review of their talks, and here is some more information about each:

Linda Ethier is a glass artist whose work I saw in person at the accompanying exhibition. It was breathtaking: delicate arrangements of leaves, bird bones, and eggs- rendered in translucent glass. See more of her work here: http://www.lindaethier.com/index.html

Photographer Claire A. Warden presented her Mimeses body of work which I was also delighted to see in person. The large-scale (24 x 20ish?) photos were somehow created using, among other things, objects, saliva and photo paper. I really wish I had been at her talk to learn more about it. https://www.claireawarden.com/

And last but not least, painter Linda Christensen presented her loose and colorful figure-laced scenes, talking about the role of emotion and paying attention - being a keen observer - of everyday life. See her work at https://www.lindachristensen.net/

My message to you? Make the time to seek out the other passionate people in life who love what they do and make. It’s contagious. In a good way.

Needle Felting: The ONE Thing Nobody Teaches about needle placement

I know, a headline like that sounds like clickbait. But I’ll tell you what it is straight up that no one seems to teach when it comes to needle felting: that the placement and quantity of felting needles in your multi-needle holder makes a HUGE difference to your needle felting.

You may not have come across this yet if you primarily use a single needle. Once you do move into multi-needle tools, you’ll find that many needles too close together don’t penetrate the wool to actually felt. Instead, it’s best to let them act like single needles by spacing them out enough for what you’re working on. There’s more to it than that, and I’ll go into it in depth (and with illustrations) below to explain what I mean. 

four plastic and wooden multi needle handles showing different quantities and spacing of felting needles


First, I’m sharing this because lately I’ve been paying a lot of attention to the information floating around the internet regarding needle felting. With my masterclass video workshop now live, I’m researching all the places to market it to reach my core audience. My students generally range from total beginners to advanced needle felters, but what they have in common is a mix of hope and frustration: seeing the potential of the art form but not knowing how to get the results they want.

If you’re reading this I’m going to assume you understand the basics of how needle felting works. (If not, read this previous blog post on felting needles). Needle felting has its own logic and ‘rules’ of how it works, and it helps to have some guidance to get a handle (pun not intended) on how to effectively and efficiently make what you want. If you’re self taught and paying attention you’ll get there, but it’s nice not to reinvent the wheel.

So as I was looking around online as if I were someone interested in a workshop, I observed that there are a lot of sources to answer the simple straightforward questions, like:

  • Why are my felting needles breaking? You’re applying sideways pressure somehow, make sure to go straight in and out, and don’t try to ‘turn corners’ with the needle. Read more on this topic in this post.

  • Which wool do I use? Coarse wool is easier to build up into 3D forms; I prefer Corriedale or Romney as ‘core’ wool to make shapes out of-- save the fine Merino for surface finishes.

  • How do I make my needle felting smooth? The more dense and firm your object, the easier it is to get a smooth, even finish-- add loose, fluffy wool going every which way as a finish layer, and (sorry to say) do a LOT of shallow poking all over to tack it in.

Those are important issues, especially for beginning needle felters. But there’s a larger question that seems to float around, hard to pin down and thus harder to answer. What it comes down to is:

Why is my needle felting not working like I want? 

This could mean very different things to you depending on where you are in your needle felting journey. If you’re a total beginner, when you pick up a kit or watch a tutorial online and then try it out, there is often a disconnect between how it is ‘supposed’ to work-- how it is described or appears to work-- and the reality of actually poking wool into the shape you desire.

Part of the problem is a lack of understanding how long it might realistically take to make fluffy wool pack together enough to take on a cohesive shape. (It takes longer than you’d think to get a piece started, that’s the real leap of faith portion… but if you stick with it long enough it will magically achieve workable mass and get a lot easier)

Part of it is not knowing how firm and structural a thing ‘should’ be, since density is not easily communicated with words or video. (There is no ‘right’ answer here, but more dense is often easier to work with. If you squeeze your felt between your fingers and it squishes down by half, it’s probably too squishy. Add more wool or keep poking in towards its center, or do both). 

Part of it is that people start by making teeny tiny things small enough to fit in the palm of their hand, which is challenging because there’s just so little wool to move around and shape, and at that scale every little poke can make big changes (or disfigure what you’ve already done). When you’re starting out, aim to make something at least as big as your closed fist. Or bigger!

Once you’ve started to find your way around needle felting (and haven’t been scared off by the time commitment and the occasional vicious self-poking of your fingers) that larger question of ‘things not working like you want’ really starts to come into play. Over my ten years of teaching needle felting I’ve noticed that there’s often a point at which students want to move from using a single needle to using multiples. Sometimes this happens quite early on, sometimes it takes a long while. 

There’s the idea that using a multi-needle tool will speed up the process, which makes a lot of sense since it seems like 5 times as many needles should multiply your poking labor and minimize the time required. But that’s often where a big knowledge gap comes into play-- one that no one seems to talk about and one that causes a lot of frustration. 

So I’ll say it again: the placement and quantity of felting needles in your multi-needle holder makes a HUGE difference to your needle felting. How many needles you use at once and how close together or far apart they are will absolutely impact the way the multi-holder tool works for you.

Several different styles of multi-needle holder handles poked needle-end into a block of foam

In my studio I keep no less than eight multi-needle tools at the ready- that’s my setup, pictured above, with all of them poked into a foam block and ready to use. You could certainly have just one, but even though it’s easy to open up these needle holders and take out or put in more needles, that takes time, and I like to move smoothly between different tools as I need them. Clearly some of them appear to be the same tool-- I have multiple copies of the knobby wooden holder, some of the pink pen-like tool, a plastic one-- but the different configurations of felting needles in them cause them to effectively behave like different tools, useful in different situations. More on that below (and these are the tools I swear by).

Multiple needle holders are great because they can hold lots of needles, and again, you’d think more needles equals faster felting. That’s true- but really only when you’re working on something flat and thin, so all the needles can enter the wool perpendicular to its surface, and the mass of fiber isn’t so thick that it offers much resistance. That’s what these things were designed for, after all— making flat sheets of industrial felt in a big machine, with hundreds of needles near to each other. But I NEVER find myself using ALL of the holes available in my big knobby felting tools because I generally don’t work flat, I work with three-dimensional forms.

If you HAVE tried multiple needles used together in one tool, you’ve probably noticed that if often just doesn’t seem to work very well. Despite all your hopes, you still keep reaching for a single needle for detailed surface work and deep-poking shaping work. For efficiency you dream of using more than one needle at a time… but in reality too many needles too close together can work against you. That’s the resistance you’re feeling when you start using multiple needles and suddenly they don’t seem to be doing anything. Here’s what’s happening:

A lot of needles really close together actually act kind of like a unit-- like a bed of nails, they distribute the pokiness, and none of them poke in very far, they just work together to push the whole mass. When they’re close together, multiple needles are also more likely to be pushing at different parts of the same fiber, which moves all of them instead of making them rub against their neighbors to tangle together and actually felt.


That can be good when you’re working more at the surface, applying color or smoothing things out. But when you’re trying to initially tame loose wool into a cohesive mass it’s more useful to poke deeply into the wool.

When felting needles are spaced farther apart they are able to actually act on the area underneath and surrounding the needle, penetrating the mass of wool, tangling fibers with each other, and really getting some felting done. Here’s where we get to the visuals.

I’ve decided to coin a term for the effective space around each needle tip: introducing “The Circle Of Tangling.” When the Circle of Tangling of any one needle overlaps with another, they don’t penetrate like a single needle anymore, which means they don’t poke in very far. And the Circle of Tangling differs for coarse, medium, and fine needles.  

Here’s a visual breakdown: 

illlustration showing the circle of tangling area affected around different gauges of felting needles

The smaller or finer the needle (with the confusingly higher number gauge size), the closer together you can place the needles and still have them penetrate the wool. 

The bigger or coarser the needle (with the confusingly lower number gauge size), the farther apart they should be if you want them to really poke in.  Another visual:

illustration showing felting needle size vs quantity spacing for effective wool penetration

For a fine, 40 gauge needle the Circle is about ⅛ of an inch or 3mm wide. 

For a medium, 38 gauge needle that Circle expands to about ¼ of an inch, or 6mm wide.

For a coarse 36 gauge needle that Circle grows to about ½ inch or 12 mm wide. 


That means you want your needles to be no closer than a ‘Circle of Tangling’ width away from each other. Here are more pictures, for those of us who are visual creatures:

illustration of spacing between felting needles so circles of tangling do not overlap for most effective use
illustration showing ideal spacing for felting needles of different gauges in multi needle tool handles

Given that reality, it’s pretty handy that most of the readymade multi needle holders out there are already designed with that approximate spacing:

Two different multi-needle holders showing how spaced apart the needles can be

Two different designs of multi-needle holders show that ideal spacing is already designed in; on the small Clover Pen-Style pink tool, designed primarily for fine, detailed work, you can see that the needles are spaced about 1/8” apart. On the larger Colonial Felting Tool 2 you can see that you could choose to use holes about 1/4” apart or far more than that. Don’t think you have to use all the holes all the time.

Here’s the thing: if you use more than one needle but you position them far enough apart that their ‘circles of tangling’ don’t overlap, you can get the effectiveness of a single needle multiplied by the efficiency of more than one needle being used at a time. Read that over again, because I think it’s the most important part of this whole long-winded post.

What does that mean? How does is actually apply to you? Well, take a look at three of my tools:

Knob-like wooden multi needle holders showing needles in different arrangements

See all those unused holes? Those are not wasted space. That space gives me a lot of value. It gives me a lot of options for where to put my needles, which makes them effectively become different tools. I keep one holder with two needles about 1/2” apart, one with two 1/4” apart, and one with a single needle. All of these are holding 38-gauge needles, and when I grab any of these three tools and poke them into the same ball of felt they’ll penetrate into it differently. They’ll give a different feeling of resistance, and poke in deeper or shallower.

When I’m just starting in on a piece— let’s say I’m making a ball the size of my fist as a base shape— I’ll use the one on the left with the most spaced-out needles. They can easily poke all the way deeply into the wool I’m trying to tangle into a cohesive blob. At that stage I’m usually adding more wool, turning over the mass, and poking in from all sides. If I added even one more spaced out needle it would still work pretty well, but that’s one more needle to keep track of and not stab myself with, and at that point those needles may be too spread out for the overall size of the thing I’m shaping; one of them might miss entirely or glance off the side, possibly snapping off. And if I tried to use, oh, you know, TWELVE needles, they would barely penetrate at all and would just flatten the whole thing down.

When I’m a little farther in the process I’ll switch to the single needle to start honing the shape (yes, you read that right, a single needle), pushing down any high points and evening things out. When I’m ready to work more at the surface I grab the holder with the two needles 1/4” apart; it’s a good tool for shallower poking as I start to tack on and build up surface details. But then I often grab the single needle tool again(!) on and off throughout the process.

I switch between the different holders with their different configurations of needles quite often as I work on a piece— in response to the feeling of resistance I’m getting, or to poke more deeply or more shallowly. It becomes instinctive, but first you have to make yourself try it and pay attention to what you’re feeling and how things are working (or not working).


It’s surprising to note how differently the tools work and how much you do actually rely on feel as you’re felting. Even with the pen-shaped tool intended for tiny work, it’s remarkable what a difference you feel when using one, two, or three needles in it at a time. I also keep several of those at the ready— see below how I’ve marked dots on their ends with a pen so I can see at a glance how many needles they’re holding? When it comes to detail work I often find that two needles in the pen tool are ideal, because three resist too much and just don’t poke in far enough- by maybe 1/16 of an inch, but hey, that matters if you’re working at a scale small enough to be using this tool.

Speaking of scale, did you see how far apart the needles on those wooden knobby tools are? Can you infer that I’m not working on thumb-sized sculptures when the needles are that spread out? Again I’ll advise working LARGER, especially if you’re starting out, and especially if you want to use more than one needle at a time. You need SPACE. Forget the teeny tiny precious thing. Try something as big as your closed fist, if not bigger. It’s more forgiving and easier, trust me. 

But the bad news is, even with this revelation on spacing out needles to use multiples, you still can’t throw a lot of needles at the problem and felt a lot faster unless you’re working on something bigger, say, head-sized (is it weird to relate everything to body parts?). You will find, I think, that you are working more effectively and efficiently when you’re using a few needles WELL.


As for me, I’m often working with just one or two needles. The effectiveness of the single needle is worth the additional poking, to my mind. Then again, I tend to make pretty firm sculptures (with minimal use of armatures) so it matters to me to have even the core of a piece be pretty structural and dense. I prefer to needle felt pretty deeply.

In conclusion, after 20 years of doing this (and 10 years of teaching it) I see that a lot of frustration in needle felting happens when there's a mismatch between the size, distance, and quantity of needles being used and the goal of the needle felter. So now you know:

If your multiple needles don’t seem to be poking in, try using fewer or moving them further apart. You don’t need to use all the holes in your multi-needle tool.

And when all else fails in a given situation, try using a single needle.

Really understanding how the needles work and trying different gauges and orientations of needles so you know how it feels to use them will really help you be effective AND efficient in your needle felting. You’ve read all the way through this lengthy post, so even if you take nothing else away from it, DO try using one, two, and three needles in different spacing arrangements on the same piece of felt and pay attention to how it feels. I swear it will help you be a better felter.

Want to go over all this and a lot more in video format? My sculptural needle felting masterclass is now available.

Want some guidance on my favorite tools? Check out this page to learn more and get your hands on tools of your own.


I’d love to hear your feedback- leave any questions or comments below.

Felting Needles: What Are They and How Do They Work? Explanations with photos and illustrations.

Needle felting as an art form and creative pastime is getting more and more attention lately, and yet I meet plenty of people who have no idea what it is or how (and why) it works to stab at wool until it takes different shapes. At my Open Studio events I find myself giving ongoing demonstrations to ever-changing wide-eyed audiences… who then look around my studio with renewed awe when they realize how my sculpture has come to be.

Artist demonstrating needle felting to visitors

Demonstrating needle felting to Open Studios visitors. Usually not something I do on my lap for safety reasons since stabbing sharp tools downwards is a key activity.

So if you’re new to needle felting or simply curious, I’m going to give a brief overview of the tool that makes this whole thing possible- with illustrations. 

Felting needles are different from sewing needles or pins: instead of being smooth to pierce through fabric, they have notches cut along their shafts. Those rough notches snag, catch and push fibers they’re poked into, causing them to tangle with their neighbors enough to mat into a mass that has density and form: the nonwoven textile we know as ‘felt.’ 

Closeup view of notches cut in sides of sharp steel felting needle

The tip of a felting needle showing the nearly-invisible notches cut along the shaft.

Wool fibers tangle so well because they are covered in overlapping ‘scales,’ which you can see with the help of a microscope (or a shampoo commercial, or in my illustration below). 

Illustration of overlapping scales on microscopic view of wool fibers

Wool fibers can be smooth (smaller scales) or coarse (larger scales) which affects how easily they mat together as well as how they feel against the skin. That’s a topic we can go into another day. Suffice to say that the notches on felting needles make those scaly fibers grab each other, almost like hook-and-loop fasteners (aka Velcro).  

Two steel felting needles of different lengths

Felting needles were designed for factory machines; they are made of steel, three or four inches long, with a bent over hook at the top for fitting into said machine and a gradually thinner shaft leading down to a VERY sharp tip. The notches are cut only in the bottom inch or so.

View of an industrial felting machine, aka a needlepunch machine: hundreds of felting needles aligned with holes below move up and down, ‘chewing’ and matting the wool fed into the machine. Photo taken at a restored wool mill called Casari Ranch in Valley Ford, California.

In a factory a big machine full of hundreds of these needles works almost like a mouth ‘chewing’ on wool: each needle lines up with a hole below, so as loose, clean wool is fed into the machine the needles move together like jaws up and down to tangle the fibers into a flat sheet of felt. When you look at a piece of industrial felt you’ll see the many hole marks from the needles. The density and thickness of the batch of felt is determined by how much wool is inserted and how long and how much the needles poke into it.

Industrial needlepunch machines have been in use since the mid 1800s, and they’re very good at making flat, even sheets of felt. But what about working in three dimensions? What about using felting needles by hand? Well, that history starts with a couple creative people looking at a tool with fresh eyes. Eleanor and David Stanwood are credited with first taking felting needles in hand to work ‘in the round’ in the 1980s-- here’s an article that details the beginnings. David reached out to me by email a few years ago when I revealed that I got my start from a book by Ayala Talpai;   it turns out he’s the one who handed Ayala her first felting needle when she visited the couple on Martha’s Vinyard! It’s still a fairly small world, especially when it comes to needle felting..

So to use a felting needle by hand, you need to poke in the direction that you want to shape and compress, almost like squishing clay into shape. You could make a sphere by poking inwards towards the center of the mass of wool from every direction, turning it around evenly as you go. You could make a cylinder shape by rolling the mass of wool like a log as you poke in towards the center. You can make increasingly complex shapes by making simple ones and then joining them together with more wool bridging across. If a piece isn’t dense or firm enough for your purposes you can add more wool and force it into the same amount of space, or else keep poking to compress your form into a smaller and smaller size.

wool human-like shapes showing progression from rough to detailed forms

Samples showing progression from roughly humanoid shapes to increasingly detailed and realistic felt sculptures. Note that component parts have been made separately and then joined together after initial shaping.

It’s both incredibly simple in concept and brain-achingly weird at first. Needle felting has things in common with building forms in clay or riveting metal pieces together- except it’s also totally different to have the actual, physical mass of your material change depending on how much you stab at it.

To get started you can literally just start poking at some wool with a felting needle. But of course then you’ll find that there are different kinds of felting needles out there. What’s the difference between felting needles?  Well, basically they differ in size and shape when you look at them in cross-section.

Illustration of 3 different felting needle tips showing cross section: triangle, star, and spiral.

Above is a drawing showing the most common shapes of felting needles: the triangle needle has three edges that can have notches cut, while the star-shaped needle has four edges, and the spiral needle is like a triangle tip that has been twisted. Arguments can be made that the star- and spiral- shape needles do the job quicker because they have more surfaces that notches can be cut into, and more notches equals faster felting. There are people who swear by each type; I advise trying them all and seeing what feels best for you in different situations.

The size of the needle is referred to as its gauge, and the higher the number, the smaller the gauge and the diameter of the needle. 36-gauge needles are ‘coarse,’  38-gauge is all-purpose, 40-gauge is fine, and 42-gauge is the finest. You would choose a higher gauge needle for details or tiny work, or when working with very fine fiber, and a lower gauge for ‘roughing out’ a form, or when using a coarse fiber. 

Stephanie Metz poking at a human-sized wool sculpture using a wooden tool that holds multiple felting needles

Every single needle in those multi-needle holders I use is a 38-gauge triangle needle. For the size I tend to work in, that’s all I need.

I myself am not at all a felting needle connoisseur when it comes to the needle choice. I’ll admit I use a 38-gauge triangle needle for almost everything; the exception is when I’m working on something very small, and then I use a 40-gauge ‘fine’ needle. I very often use a single needle in my work (more on why in a moment) but even then I put it in a knob-shaped multi-needle holder; I only use one of the holes. That’s because pinching a single needle in your fingers is REALLY rough on your hand and arm, over and above the repetitive arm and wrist motion needle felting requires.

An important aside: I cringe when I see so many videos and photos online of very sophisticated and skilled needle felters working with a single needle pinched between their fingers. Don’t do it! Find a handle tool you like that fits and fills more of your hand and make it easier on your body. Safety is Sexy! Protect your body so you can do this as long as you want, without hurting yourself. 

Don’t just pinch a single felting needle— it’s really hard on your hand, wrist, and arm. Use a handle— there are a wide variety of multi needle tools available (or you can make one yourself).

So there you have it: a quick introduction to felting needles. In my next post I’ll go into great depth about the ONE thing nobody seems to talk about when it comes to needle felting… I know, you can’t wait!

5 different multi-needle holders featuring wooden and plastic handles of different sizes and shapes.

The variety of multi-needle holder tools I use all the time— even with a solo needle, I still want that bigger grip for the handle.

In the meantime, you can find my recommendations and links for multi-needle holders and other felting tools here.

This is just the tip of the iceberg. If you’re ready for the iceberg, you can sign up for my in-depth sculptural needle felting video-based class here

Please comment or ask any questions below; what else do you want to know about my technique and process?